...
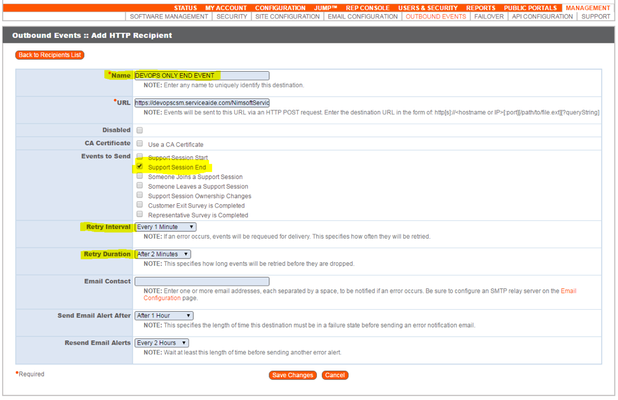
Add a new recipient, with the following details
- Name: <name of event> Enter any name for the event, you could use CSM_Session_Response as an example.
- URL: https:// <csm url>/NimsoftServiceDesk/servicedesk/odata/integrationListener?slice=<slice>&$format=JSON
Need to provide the values of token <csmurl> and <slice> in above url. - Check on event Support Session End
- Provide Retry intervals as shown below
- Retry Interval: Every 1 Minute
- Retry Duration: After 2 Minutes
- Save Changes
Step 9
Next you need to create a user account for every Cloud Service Management user that will also be using Bomgar. For example if you have 10 analysts that will be taking chat requests, you need to create all 10 of them in Bomgar.
Click on USERS & SECURITY and then Create New User
...
- Username: <user name>
- Private display Name: <This must be match the user name Username of the Cloud Service Management Analyst, otherwise there will be an error in BOMGAR session sharing scenarios>
- Public display name: <public display name in Bomgar>
...
- domainURL: This will be the URL of the bomgar portal e.g. https://<DEMOORG>.bomgar.com
OAuthToken: The value of this field will can be obtained from Step 4 of Bomgar Portal Integration.
The OAuthToken value is combination of OAuth Client ID and OAuth Client Secret to be provided together separated by a colon(:) for example:Code Block title Example OAuth Client ID:OAuth Client Secret b8696ab9d2asfdasfasfdasdfasdfasf:asdfqrasdfqasdfSDEDSfsd2134SDSsds
Step 4
Once you have the domainURL and OAuthToken populated you can test the integration.
If the Cloud Service Management properly authenticates to Bomgar, you will receive a message "Authentication Successful".
If the authentication attempt fails you will receive a message of "Failed to Authenticate". If this happens validate your DomainURL and the format of your OAuthToken. Refer back to Step 4 of the Bomgar Portal Integration Setup.
Once done you can make this integration active by clicking on the Active slider on the top and test the integration with “Test Integration” Button.
...