| Table of Contents |
|---|
...
If you are looking to embed Luma in a web page other than SharePoint please review Configure Web Widget.
Prerequisites
Before adding the chat application to SharePoint, ensure that the following prerequisites are met:
- Navigate to the Sharepoint path where you want to configure the web widget.
- To add the web widget, you must be the Administrator of the Sharepoint.
Enable Web Widget Channel in Skills Builder
...
- On the Bots dashboard, from more options
 , click Bot Configuration as shown below.
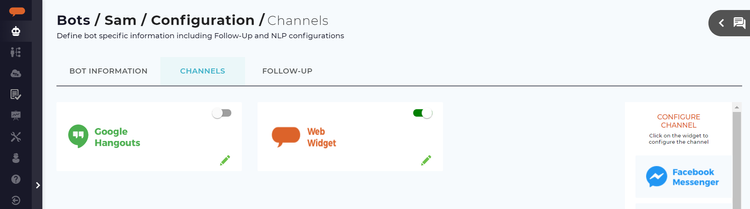
 - On the Bot Configuration page, click the Channels tab.
The Channels page appears as shown below.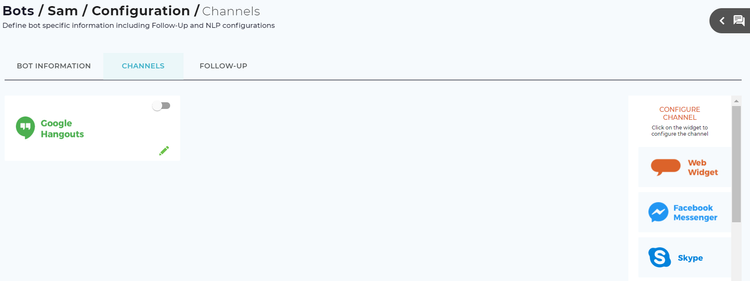
- Select Web Widget from the Configure Channel list.
The Configure Web Widget dialog box appears as shown below.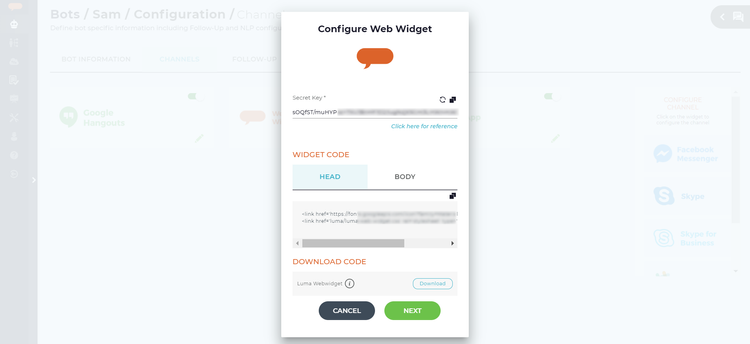
Copy the Secret Key, the Head code and finally the Body code and retain them in an easily accessible location such as notepad or a text editor tool. These details will be used later when adjusting the web widget code on your website. You can use the copy icon to the right of each section to simplify the operation.
Info title Note The secret key is a long series of characters. In this screenshot, we made it xyz as to not expose the secret key externally.
- Click Download to download the luma-web-widget.zip folder, which includes the index.html file, luma-web-widget.js file, and the web-widget.css file with images.
- Click Next to open Customize your Welcome Screen.
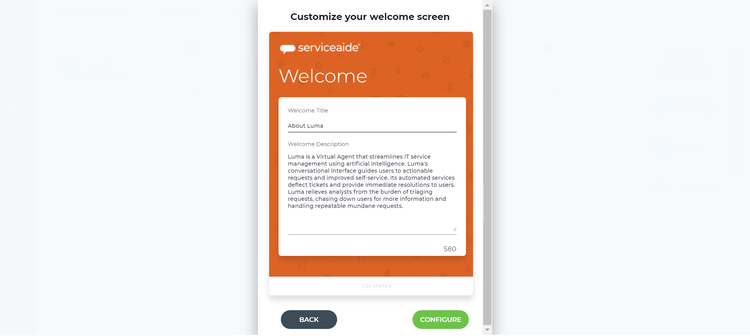
Customize your Welcome Screen consists of:- Welcome Title: A greeting message to the users when they open the bot chat window. Specify a welcome title. The maximum allowed number of characters is 45.
Welcome Description: The Welcome Description provides a brief overview, purpose and capabilities of the bot. Specify a custom message to welcome the user when when they open the web widget for the first time. The maximum allowed characters in this field is up to 580.
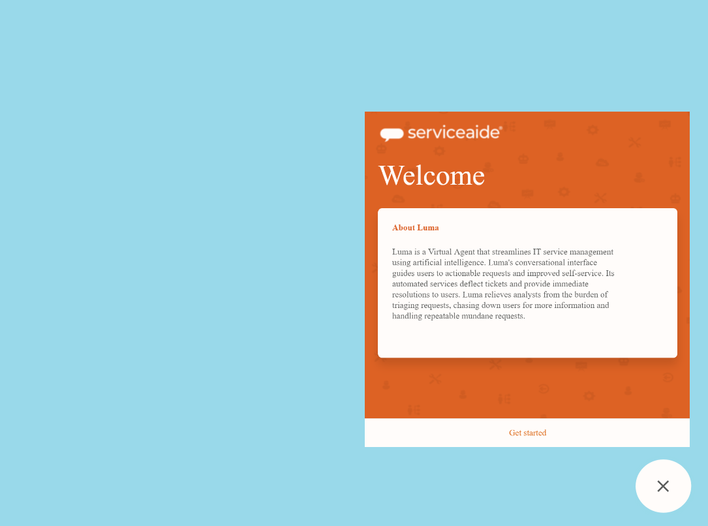
Welcome Title and Description are part of the welcome screen. The Welcome message appears for a registered user only during their first interaction with Luma. However, for a guest user, the welcome message appears each time they come and launch the web widget.
- Click Configure to enable the Web Widget channel. You can inactivate the web widget if you do not want this channel available to users.
- The configured web widget is shown on the Channels page.
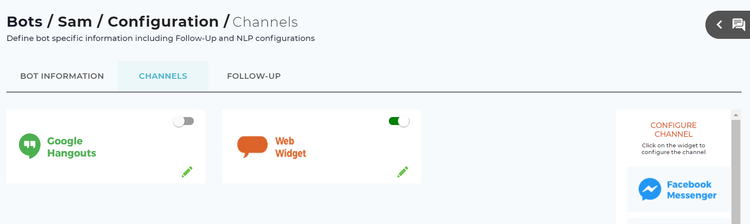
- If required, use the toggle button (
 ) to make the channel inactive.
 - If required, use the edit button (
 ) to edit the web widget details.
- If required, use the toggle button (
...
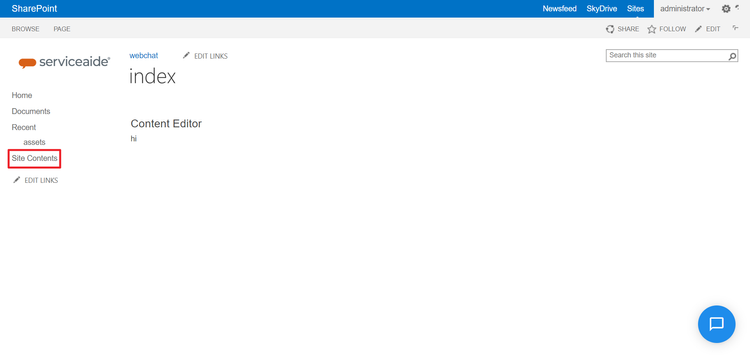
- After logging into the SharePoint, on the left panel, click Site Contents.
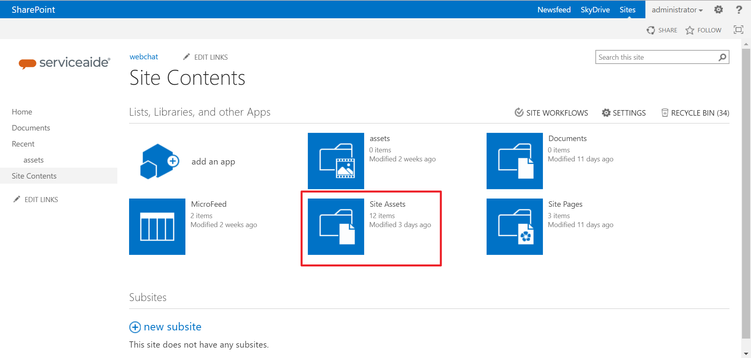
- On the Site Contents page, click Site Assets icon to open the SitePages.
- Navigate to the luma-web-widget folder (downloaded in step 5 in Enable Web Widget Channel in Skills Builder section above). Add the Index.html file using drag and drop method into the new document section in the SharePoint.
On the SitePages, navigate to the index file and click the more options
 icon to open the index.html dialog box.
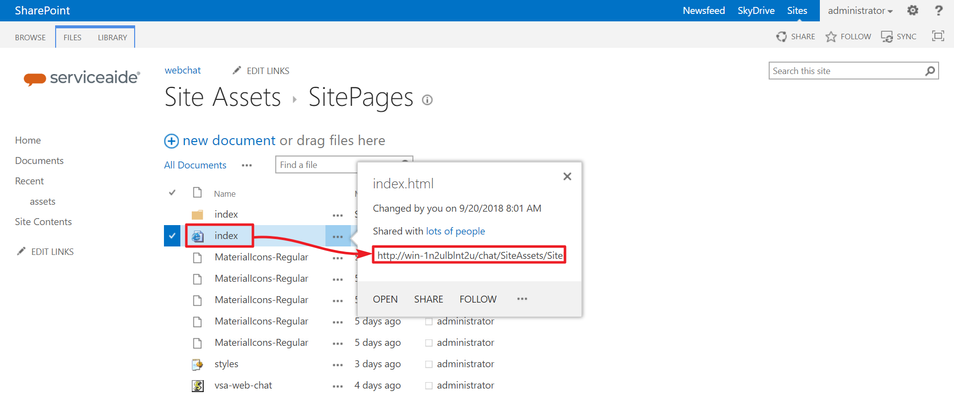
Copy the index.html URL.
Info title Note Save this URL for future reference since it will be used in the Content Editor referenced in Step 15.
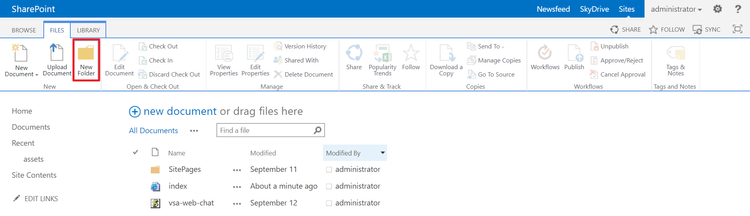
- Click the Files menu and add a New Folder on the Site Assets page.
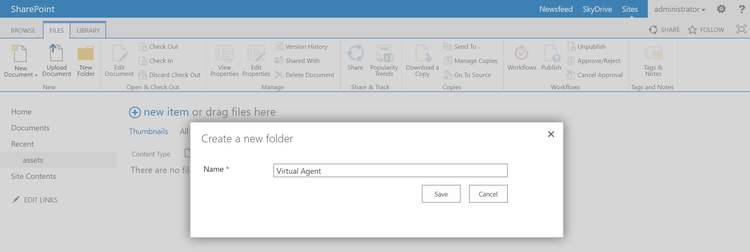
- Provide an easily identifiable name (in this example, let us use the folder name as Virtual Agent) to the folder and click Save.
In the Virtual Agent folder, copy the luma-web-chat files to the newly added folder in the Site Assets page.
- Navigate to the luma-web-chat folder and right-click on the index.html file and edit it with the required HTML editor.
Change the .css and .js paths as per the folder path that you have created.
Info title Note To know the path of the .css and .js files, click the more options
icon of each file and then copy and paste it in the respective folder path.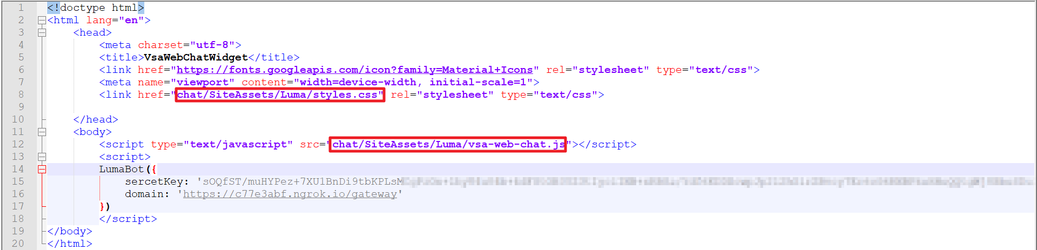
Open the index.html page of your web portal in a text editor. Paste the Head code from the Configure Web Widget dialog box (copied in step 4 in Enable Web Widget Channel in Skills Builder section above) into your index.html. The Head code includes the CSS stylesheet associated with the web widget. To learn how to customize the stylesheet to change the appearance of the web widget, see the Customize Web Widget Styles article. See the example below of a sample index.html page.
Code Block language xml title Head Code Sample linenumbers true <!doctype html> <head> <link href="https://fonts.googleapis.com/icon?family=Material+Icons" rel="stylesheet" type="text/css"> <link href="luma/Luma-web-widget.css" rel="stylesheet" type="text/css"> </head> </html>
Copy the Body code (which includes the secret key) from the Configure Web Widget dialog box and then paste it in the index.html as shown in the following sample page. The Body contains a javascript, which loads the Luma application into the web widget.
Code Block language xml title Body Code Sample linenumbers true <!doctype html> <head> <link href="https://fonts.googleapis.com/icon?family=Material+Icons" rel="stylesheet" type="text/css"> <link href="luma/Luma-web-widget.css" rel="stylesheet" type="text/css"> </head> <body> <div id='botHere'> <script type="text/javascript" src="luma/Luma-web-widget.js"></script> <script> LumaBot({ botName: 'xxxxx', user: { clientUserId: 'xxxxx-xxxxx-xxxxx-xxxxxxxx', userDisplayName: 'YOUR_USER_NAME' }, secretkey: '*****', domain: 'https://www.yourdomain.com' }, document.getElementById("botHere")); </script> </body> </html>The Body code consists of the following:
- Div container: The "div" element is passed as a parameter to the Luma Bot which uses it to start the Bot.
Script: This consists of the following parameters:
Bot Name: The name of the Bot you are chatting with. You can edit the botname as required on your index.html page. This bot name appears on the web widget chat window as shown below. It does not need to match with the bot name inside the Skills Builder interface.
Info title Note In the sample index.html page, the bot name is 'Chat with Luma Agent'.

- User Object: It consists of two parameters - Client User ID and User Display Name.
Client User ID: Is an ID assigned to each unique user of your website. If the user logs into the web portal using their credentials, then those credentials (email ID or username) are passed to the web widget to auto-authenticate the users. If the client user ID is not passed to the web widget, then the user continues as a guest, and is prompted for registration.
User Display Name: Is the display name of the user which is shown during a chat conversation.
- Authenticated User: This field allows passing a username or email address in the web page to allow the user to automatically be authenticated to Luma. This greatly improves the user experience as Luma recognizes the user, shows chat history and allows triggering user specific skills. If you want the users to be authenticated, then you need to pass the clientUserId which can be a username or an email address. You can also provide the 'userDisplayName', which shows the username while chatting with the Bot.
Non-authenticated User: For non-authenticated users, since the client ID or user display name are not provided, the username is not displayed during the chat. If the user object is deleted, the user can chat with Luma as a guest user. To learn more details of who is a guest user and how to execute the skills as a guest user, refer to Anonymous/Guest User Skill Execution.
- Secret Key: The unique code generated in Skills Builder which is used to authenticate the API calls made to Luma.
Domain: The domain URL is the URL used to communicate with the Luma platform. This URL is pre-populated in the Body code. Ensure that the correct domain URL is provided in the body, failing which it will not connect to the Luma instance.
If the user object is deleted, the user can chat with Luma as a guest user. Provide the client User ID or username in a user object to allow an authenticated user to chat with Luma.
Info title Note Client ID is assigned to each unique user of your website.
- Replace the existing index.html with the edited index.html file by using drag and drop.
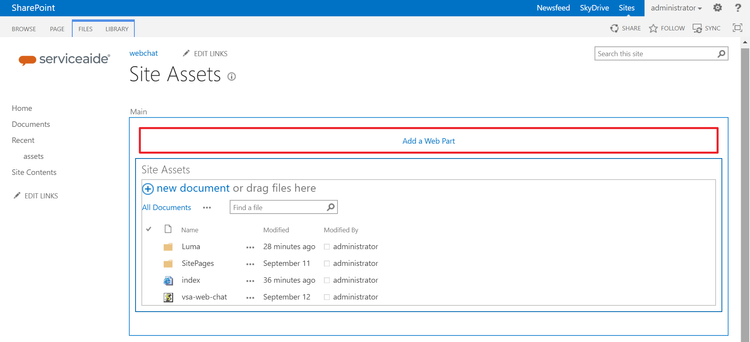
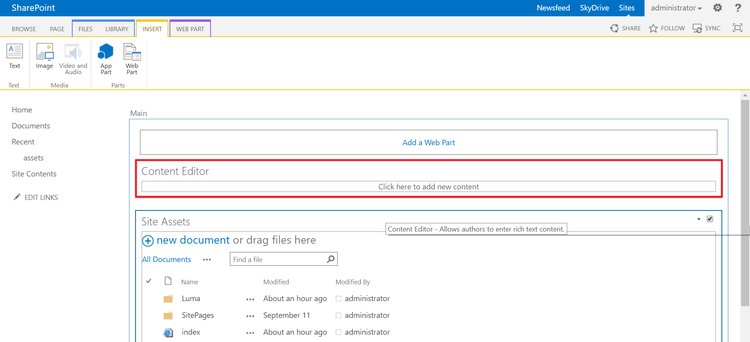
- Go to the Settings icon and click the Edit Page option.

- Click Add a Web Part button to open it in the same page.
The following window appears, where you can add a web part.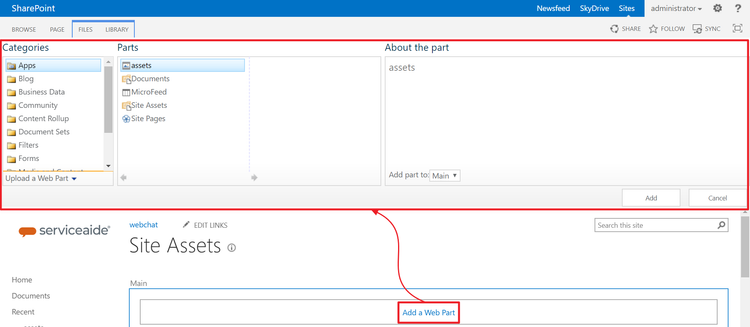
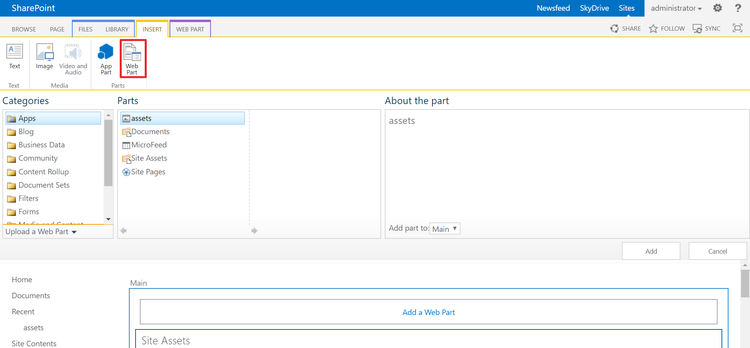
- Go to Files > Insert and then click Web Part.
- From the categories, select Media and Content > Content Editor and click Add.
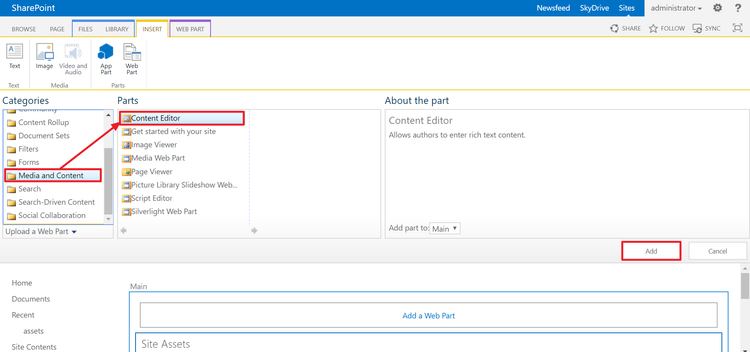
- Content Editor is added to the Add a Web Part.
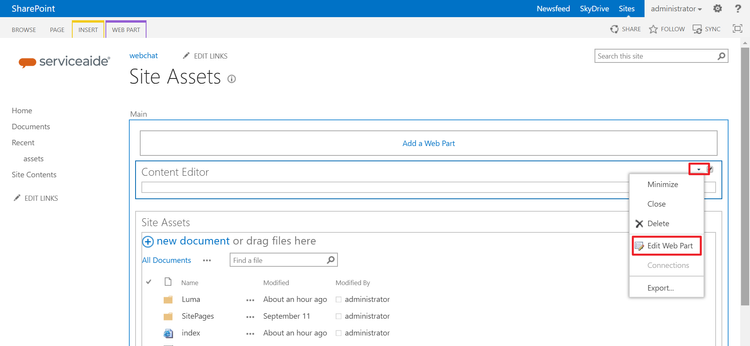
- From the Content Editor drop-down list, click Edit Web Part.
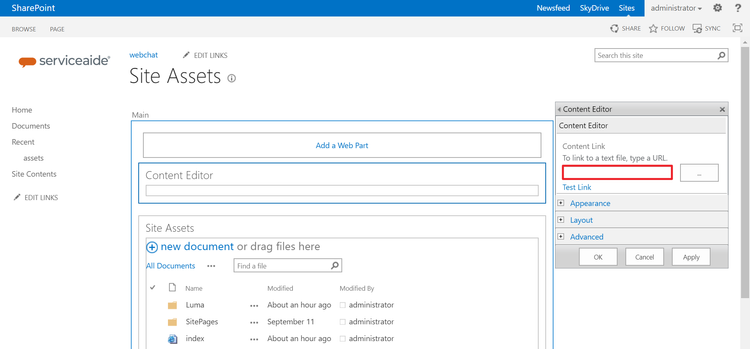
- Paste the relative URL (that you copied in Step 4) "/Chat/SiteAssets/SitePages/styles.css" in the Content Editor > Content Link and click OK.
- To test the Sharepoint Web Widget, Save the index.html page with the changes and refresh the page to load the web widget as shown below.
.png?version=1&modificationDate=1539320505870&cacheVersion=1&api=v2&width=750)
- Click the chat icon to open the web widget, which shows the welcome message and the common skills.
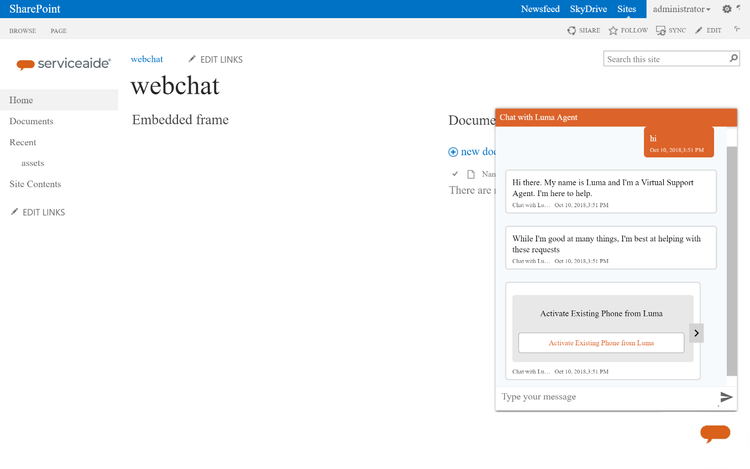
On a subsequent chat instance, web widget shows the previous conversation history.
...
During the chat conversation with the bot, you may encounter some known issues. To learn more about them and how to resolve them, refer Troubleshooting the Web Widget.