This article contains the following topics:

As an administrator, you can create and schedule service feedback surveys for the end-users. |
You can also analyze the feedback results. You can achieve the following results with service feedback:
- Create feedback forms for surveys.
- Define the schedule for starting feedback surveys and the recurrence pattern.
- View the status of all the feedback surveys that are scheduled in the application. The following diagram describes the creation, scheduling, and review of service feedback surveys:

Considerations
- You can either schedule a feedback survey for once or you can select a recurrence pattern.
- The recurrence pattern can be based on the number of tickets from a user or on the number of days.
- If one of the following points is excluded from the survey, a contact is excluded from participating in the survey:
- The primary organization of the contact
- The primary groups of the contact
- The contact
- Apply additional filter criteria on the Assigned Group and/or Ticket Reason Code. You may include or exclude tickets assigned to a specific Support group or tickets with a specific Reason Code.
- You can abort a feedback survey schedule at any time. The application does not send any survey notifications against the aborted schedules.
- If the administrator aborted the survey, the respondents cannot submit the responses to any outstanding survey notifications or to a schedule selected from the Feedback listing.
- An anonymous schedule cannot have a recurrence pattern.
- You cannot change the message to be displayed after a schedule is initiated.
- You can use the same feedback survey form for multiple schedules.
- Respondents can submit their feedback without logging in to the application. The feedback schedule notification contains a direct URL that takes the respondents directly to the survey form.
Note: The direct URL works when the SSO is configured. If the SSO is not configured, a dialog displays to enter credentials.
Prerequisites
Verify the following prerequisites:
- The organization, site, location hierarchy is configured so that you can associate a feedback survey with an organization.
- To associate a feedback survey to a support group or contacts, configure the contacts and the support groups.
- The Disable Service Feedback is not selected for the contacts, support groups, and organizations that are required to participate in the feedback surveys.
- The communication templates are configured to send an automatic email notification by the survey scheduler. Only one communication template can be attached to a feedback survey form.
Create Feedback Survey Form
Creating feedback surveys form is the first step to implement the service desk feedback function.
Follow these steps:
- Create Feedback Form: Navigate to MANAGE> ADMINISTRATION> Tools> Feedback Forms, and click Create New.
- Fill in the information and click Apply Changes.
A feedback form is created in the Draft status. - Add the Questions: Add the questions by selecting the sequence, question type, and option values.
You can add single choice questions and multiple-choice questions each with up to five responses. You can also add single/multiple line free-text responses. - Click Apply Changes.
Note: You can only delete or modify the feedback forms that are in the Draft status. You can use the Service Feedback Report Key to create a report for service feedback. You cannot use the same to configure a unique report key specific to your needs. The Board of the feedback form displays information and status of the feedback schedules the form is associated with.
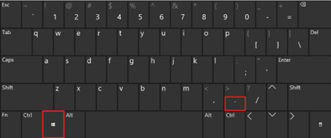
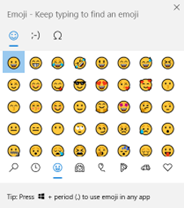
Note: If you want to use smileys or emoticons or something that will make the survey more appealing and improve the grading experience for the user, in the answer values you can use system emoticons with Windows key + . dot key.


Manage Feedback Schedules
A feedback schedule is required to start a feedback survey that is automatically based on schedule, using a feedback form.
Follow these steps:
- Create Feedback Schedule: Navigate to MANAGE> ADMINISTRATION> Tools> Feedback Schedules, and click Create New.
- Fill in the details and click Apply Changes.
Note: You can schedule the feedback survey for an organization, support group, or individual contacts. You can allow duplicate responses only for anonymous feedback. - Specify the Recurrence Pattern: Specify the Start On, End On, and the Repeat fields. Also specify the days for which the survey remains active.
If the end date is not specified for the schedule, the system prompts you to specify either an end date, Active for days, or some other recurrence pattern. You can schedule the feedback survey either after a set number of days or tickets from a user. For example, enter 4 in the Every__number of tickets and select Service Request. The feedback survey starts after four service requests from a participant. Select No Repeat if a single execution of the feedback survey is required. - Specify the contact to receive feedback: Select a user for Notify to Contact on Feedback Responses. The application automatically notifies the user whenever a feedback response is received.
- Specify the Messages: Click the Messaging tab and specify the messages. The messages are displayed when the notification schedule is aborted, inactive, or the feedback resubmission is attempted.
- Click Apply Changes.
Note: You can only delete or modify schedules that are in the Draft status. You can abort a feedback schedule by changing its status from Initiated to Not Initiated. The Notify to Contact on Feedback Responses field lets you select the contact to whom all responses from that Schedule gets redirected to.
Review Feedback Results
You can review the feedback results for all the scheduled service feedback. Navigate to MANAGE> ADMINISTRATION> Tools> Feedback Results. The application displays complete details of all the service feedback that are scheduled through various schedules. Use the export buttons at the bottom of the screen and export the results to a CSV or PDF file.


