Conditional Group Attributes
This article explains how to create Conditional Group Attributes and contains the following topics.:
Overview
Conditional Group Attribute emphasizes a user-driven experience for creating tickets using the catalog or an analyst filling information in a ticket for an end user. As an Administrator, you can configure custom attributes to appear in the Additional Information section of a ticket based on the user's input. While creating a rule, along with the list type attributes you can also add text type attributes.You must create the Custom Attributes/fields and link them to a Custom Ticket Attribute Template before you build the conditional attribute group. Custom Ticket Attribute Templates allows to group the custom attributes with a section header to easily identify them and populate the data. Conditional Group Attributes help associate multiple conditional questions for a specific Section Header in Additional Information in a ticket.
To learn about Custom Attributes and Custom Ticket Attribute Templates, see the following topics:
How it Works
You can configure Conditional Group Attributes to define rules and conditions for the visibility of custom attributes in the Ticket Details workspace. You must create the Custom Attributes/fields and link them to a Custom Ticket Attribute Template before you build the conditional attribute group.
To define Conditional Group Attributes:
- First, you must define a Group Name, link a Section Header and a Custom Ticket Attribute Template.
- After saving the template, create questions, then define rules for the questions. These rules make the fields conditional. If you select an option in A, options in B will appear subsequently.
Note
You must relate a custom field template to a Category-Class-Type-Item (CCTI) categorization. Based on the related CCTI, the section headers in the Additional Information section are displayed.
Define Conditional Group Attributes
Before creating Conditional Group Attributes, you must create the required Custom Attributes and Custom Ticket Attribute Templates. See Create and Manage Attributes and Create and Manage Custom Field Templates
The following example explains how to define conditional group attributes.:
Example:
We have created a Group with a specific Custom attribute template (Personal Information) and a specific Section header (Employee Provisioning Data).
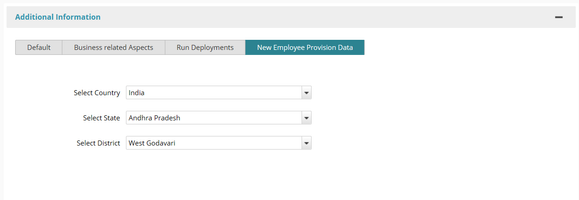
In our example, we have defined two countries, India and USA.
The service desk admin wants to build a form for employees to fill out data related to new hires. The questions on the form must be driven based on the employees location in India or the USA.
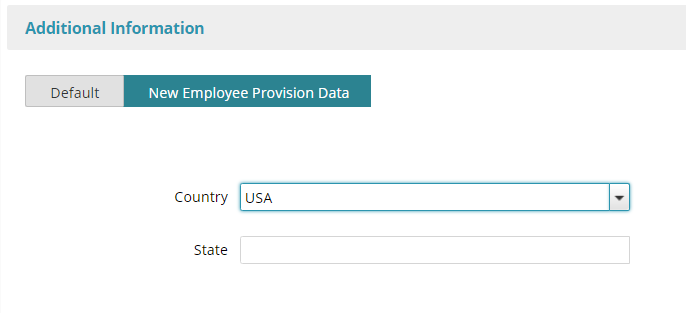
If the user selects the India, the States list will be displayed and will show a list of states in India in alphabetical order. If the user selects the Country as USA, the list of USA States will be displayed in alphabetical order.After creating conditional questions, you need to add rules such as 'if Country is equal to India, following are the list of States' or 'if Country is equal to USA, following are the list of States'.
To define conditional custom attributes, follow these steps.:
To navigate to the Conditional Custom Attributes page, click Manage, Tools and then Conditional Group Attributes. The following page appears.:
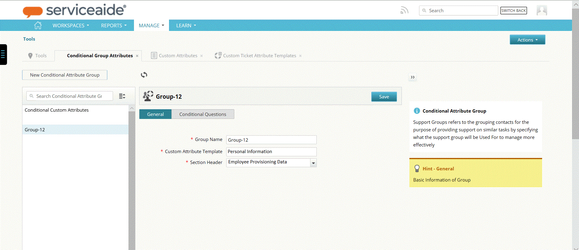
- Click New Conditional Attribute Group.
- On the General tab, specify the following details.:
Group Name: Specify a name for the group.
Custom Attribute Template: Select the custom attribute template from the available templates list. Based on the selected template, the custom attributes are retrieved and allows you to create questions to be prompted for the requester.
Note: The Custom Attribute Template allows you to group together multiple Custom Attributes. To learn more about the Custom Attribute Template, see Create and Manage Custom Field Templates
Section Header: Select the section header from the list. The section header is used for grouping custom fields on tickets into sections. On the Conditional Questions tab, you create questions for which you define rules or conditions later. Specify the following details.:
a. Click New Question. The questions should be in sequence since the rule is created based on your first question followed by the subsequent questions.
b. Type the questions which you want to show as prompts for the user in the Additional Information section, for the selected section Header. You can add multiple questions.
c. Select the mapped custom attribute. Mapped custom attributes are displayed based on the selected Custom attribute template on the General tab.
d. Click Save.
The following window displays questions and rules that are already defined.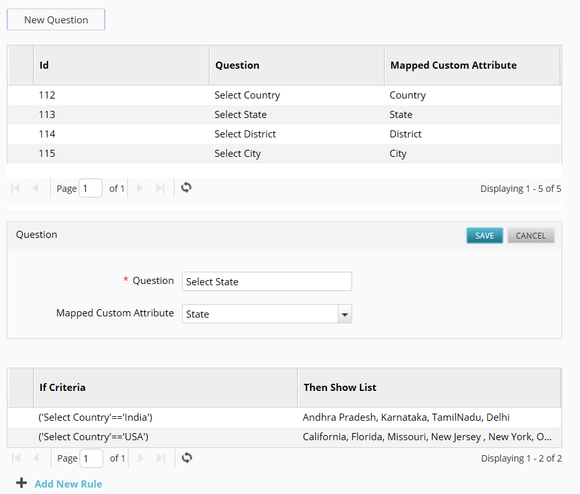
Note:
You can add up to maximum of 10 Questions in Group
Define Rules to Display Questions
You can define rules for the questions to display the possible options to the user upon selection. You can add both list type and text type attributes.
- List Type Attributes: The field appears as a list box based on the user's input. For example, If you have selected the State, you can create a rule as "if Country = India", the possible values for the states can be Andhra Pradesh, Karnataka, and Tamilnadu. These values are displayed as options for the specific attribute. Likewise, you can create rules for cities and districts as well.
- Text Type Attributes: The field appears as a text box. The user can type the value as required.
To create a rule, follow these steps.:
- On the Conditional Questions tab, click Edit Question from the context menu by selecting the required question from the list.
- Click Add New Rule. The following window is displayed.
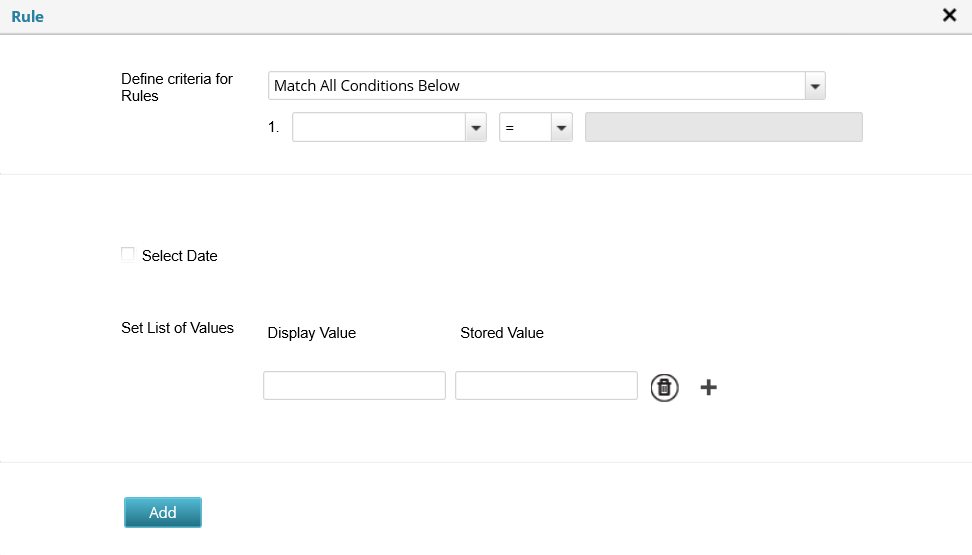
- Specify the following details for a list type attribute:
Define Criteria for Rules: Select the criteria whether to match all the conditions or match any condition.
a. Select the required value from the list. The list displays all the standard attributes available in the ticket.
b. Select the operator such as =, !=, and Like.
c. Type the Value to match with the condition. You can add and delete multiple conditions using the and
and  options respectively.
Set List of Values: Specify the following. You can add and delete multiple values using theand options respectively.
Display Value: Type the display value. This value is displayed to the user as an option to select. For example, Andhra Pradesh.
Stored Value: Type the stored value. This value is stored in the database. For example, AP.
Select Date: Do not check 'Select Date' option
Specify the following for a text type attribute:
Define Criteria for Rules: Select the criteria whether to match all the conditions or match any condition.
a. Select the required value from the list. The list displays all the questions which you have defined earlier using the Conditional Questions tab.
b. Select the operator such as =, !=, and Like.
c. Type the Value to match with the condition.
Set List of Values: Do not specify any data in the Display Value and Stored Value field in this section.
Select Date: Do not check 'Select Date' option
Specify the following for a Date type attribute:
Define Criteria for Rules: Select the criteria whether to match all the conditions or match any condition.
a. Select the required value from the list. The list displays all the questions which you have defined earlier using the Conditional Questions tab.
b. Select the operator such as =, !=, and Like.
c. Type the Value to match with the condition.
Select Date: Select the option to accept a date value.
Set List of Values: Do not specify any data in the Display Value and Stored Value field in this section. - Click Add to add the condition. The following window displays a rule.
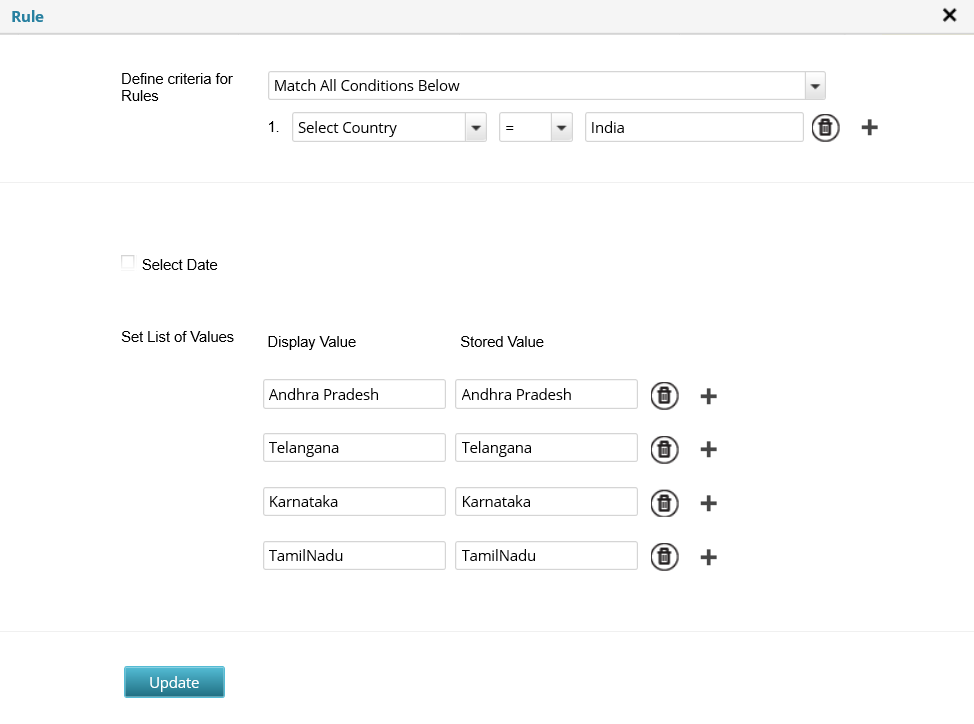
Similarly, you can create conditional questions for the USA by following the above steps. You can create a rule as, "if Country = USA", the possible values for the states will be as follows.: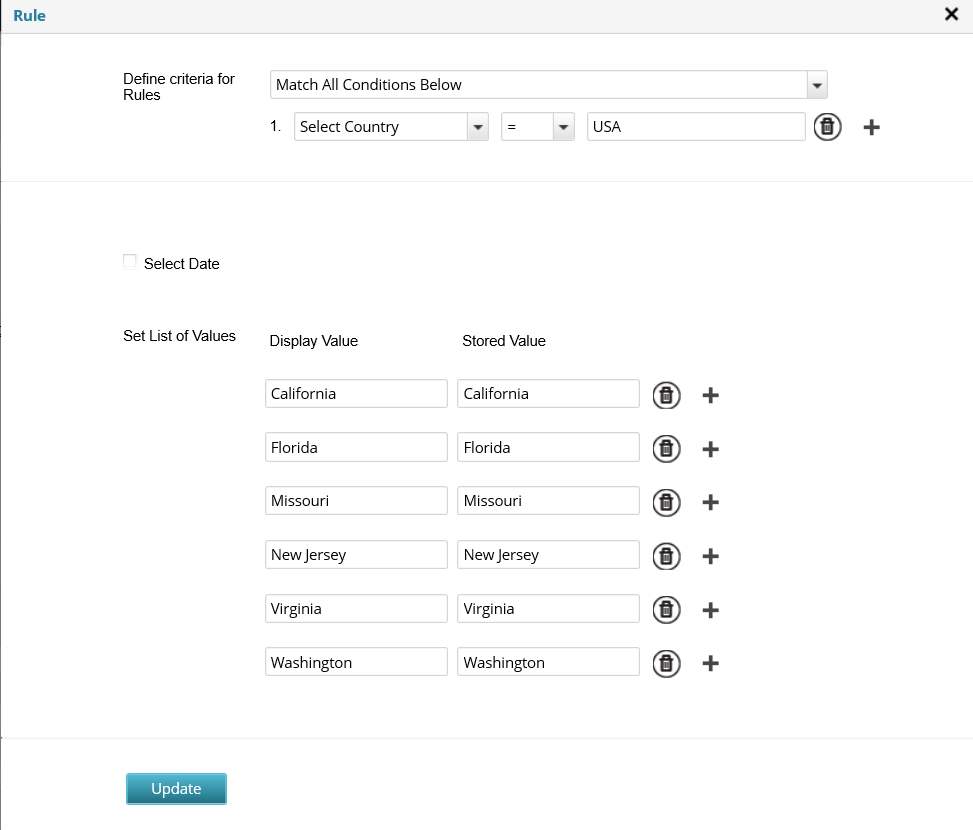
Note
- You can add multiple questions in a Conditional Group Attribute. However, the maximum number of rules which can be displayed for a conditional question is 25.
- To learn about the maximum length of the attribute value, see Create and Manage Attributes.
- When defining the criteria for displaying questions, you may also add filters based on the CCTI categorization or individual items (Category, Class, Type or Item).
Visibility for the User in Ticket Details
The following window displays how the conditional questions appear in the Ticket Details page for the end user.
List Type Attribute:

Text Type Attribute:
© 2019 Serviceaide 1-650-206-8988 http://www.serviceaide.com info@serviceaide.com