This page details the steps to create a new Automation workflow.
| Table of Contents | ||||||
|---|---|---|---|---|---|---|
|
...
| title | Note |
|---|
...
This page details the steps to create a new Automation workflow.
| Table of Contents | ||||||
|---|---|---|---|---|---|---|
|
| Info | ||
|---|---|---|
| ||
If you are just updating an out-of-the-box workflow, then go to Step 2 directly. |
Step 1: Create a new Automation Workflow
- As an Administrator, navigate to Manage >> Tools >> Automation.Go to click the
 Automation icon.
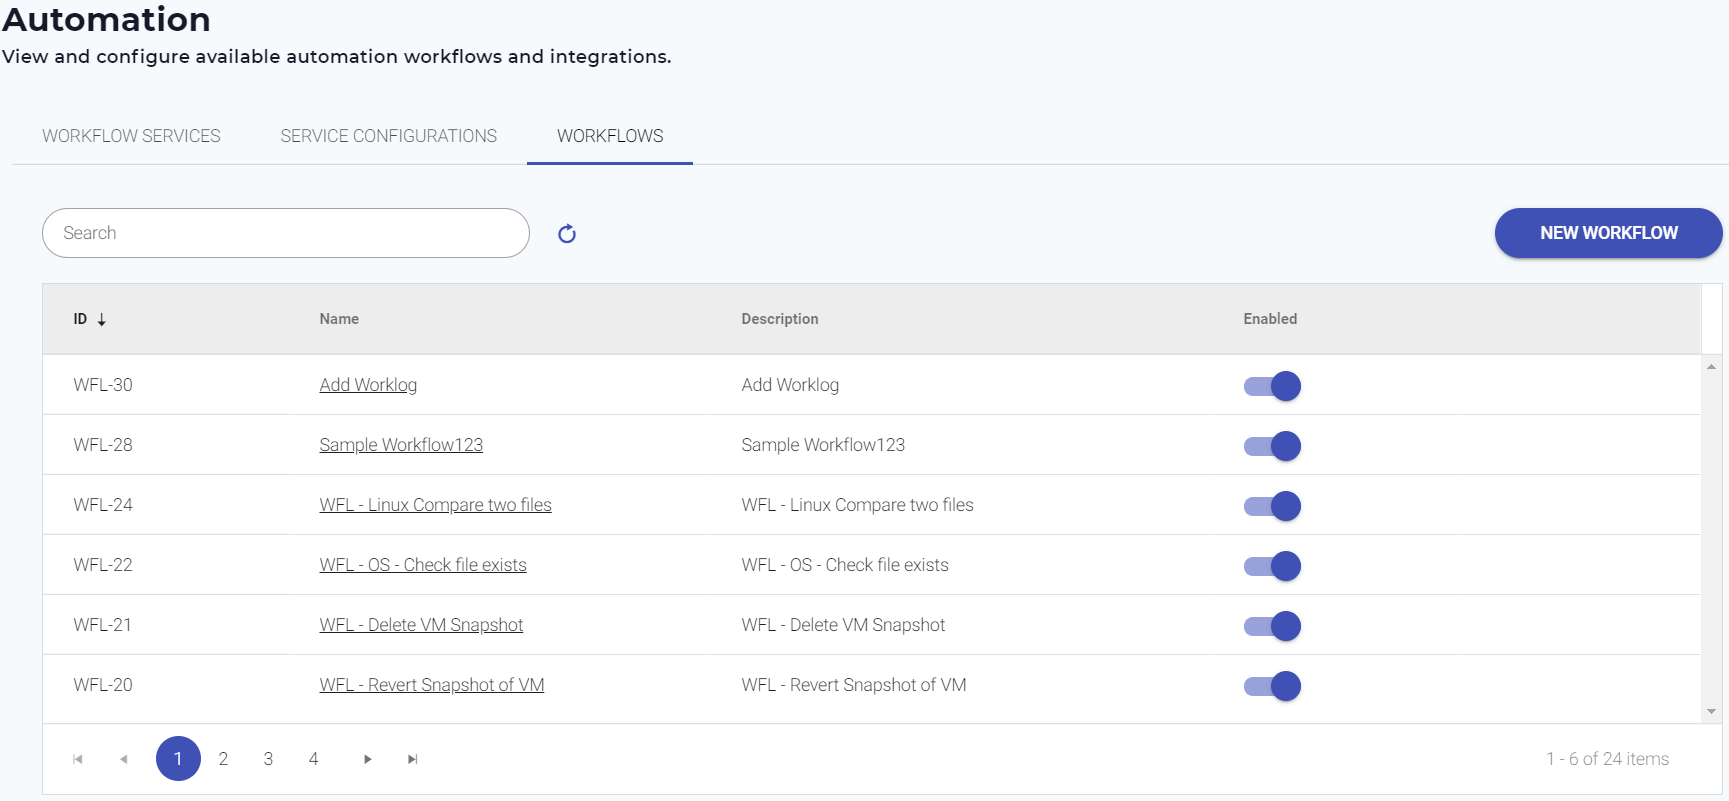
The Automation page appears. - Click the Workflows tab.
- Click NEW WORKFLOWNew Workflow.
- Give Provide a Name and Description to your workflow and click Save. You should see the message 'Workflow is created'.Once you do this your
The new Automation workflow will show appears in the Workflows list. - Click on the link under the workflow Name to start designing the workflow.

| Info | ||
|---|---|---|
| ||
When you click on any workflow, the Automation Workflow Designer should open opens in a new tab. If that does not happen, please open a Support Ticket or send an email to support@serviceaide.com. |
...
| Warning | ||
|---|---|---|
| ||
Please ensure Ensure that the Workflow Name is unique, the system does not allow creating a duplicate Workflow Name. If a Workflow is deleted, even then a new Workflow with the same name cannot be created. The name is cached and hence a duplicate is not allowed. |
Step 2 : Design the Workflow by adding Operations
- Under On the Workflows tab, click the Name link to open your workflow in the Automation Workflow Designer.
A A basic workflow with a Start and Stop point appears on the canvas. - Click Call Service + on the left pane to add an Operation to the canvas.
- Double-click the Call Service entity just added, to open the Call Service Activity Configuration window and configure it.

- Configure the Activity Details:
- Specify the name of the Operation under Activity Name field.
- The Activity Id will is set automatically.
- Add a description under Activity Purpose field.
- Select an OOTB Operation from the list under field 'Select a Service' list. A complete list of OOTB Operations is available at Out-of-the-box Automation Operations and Workflows.
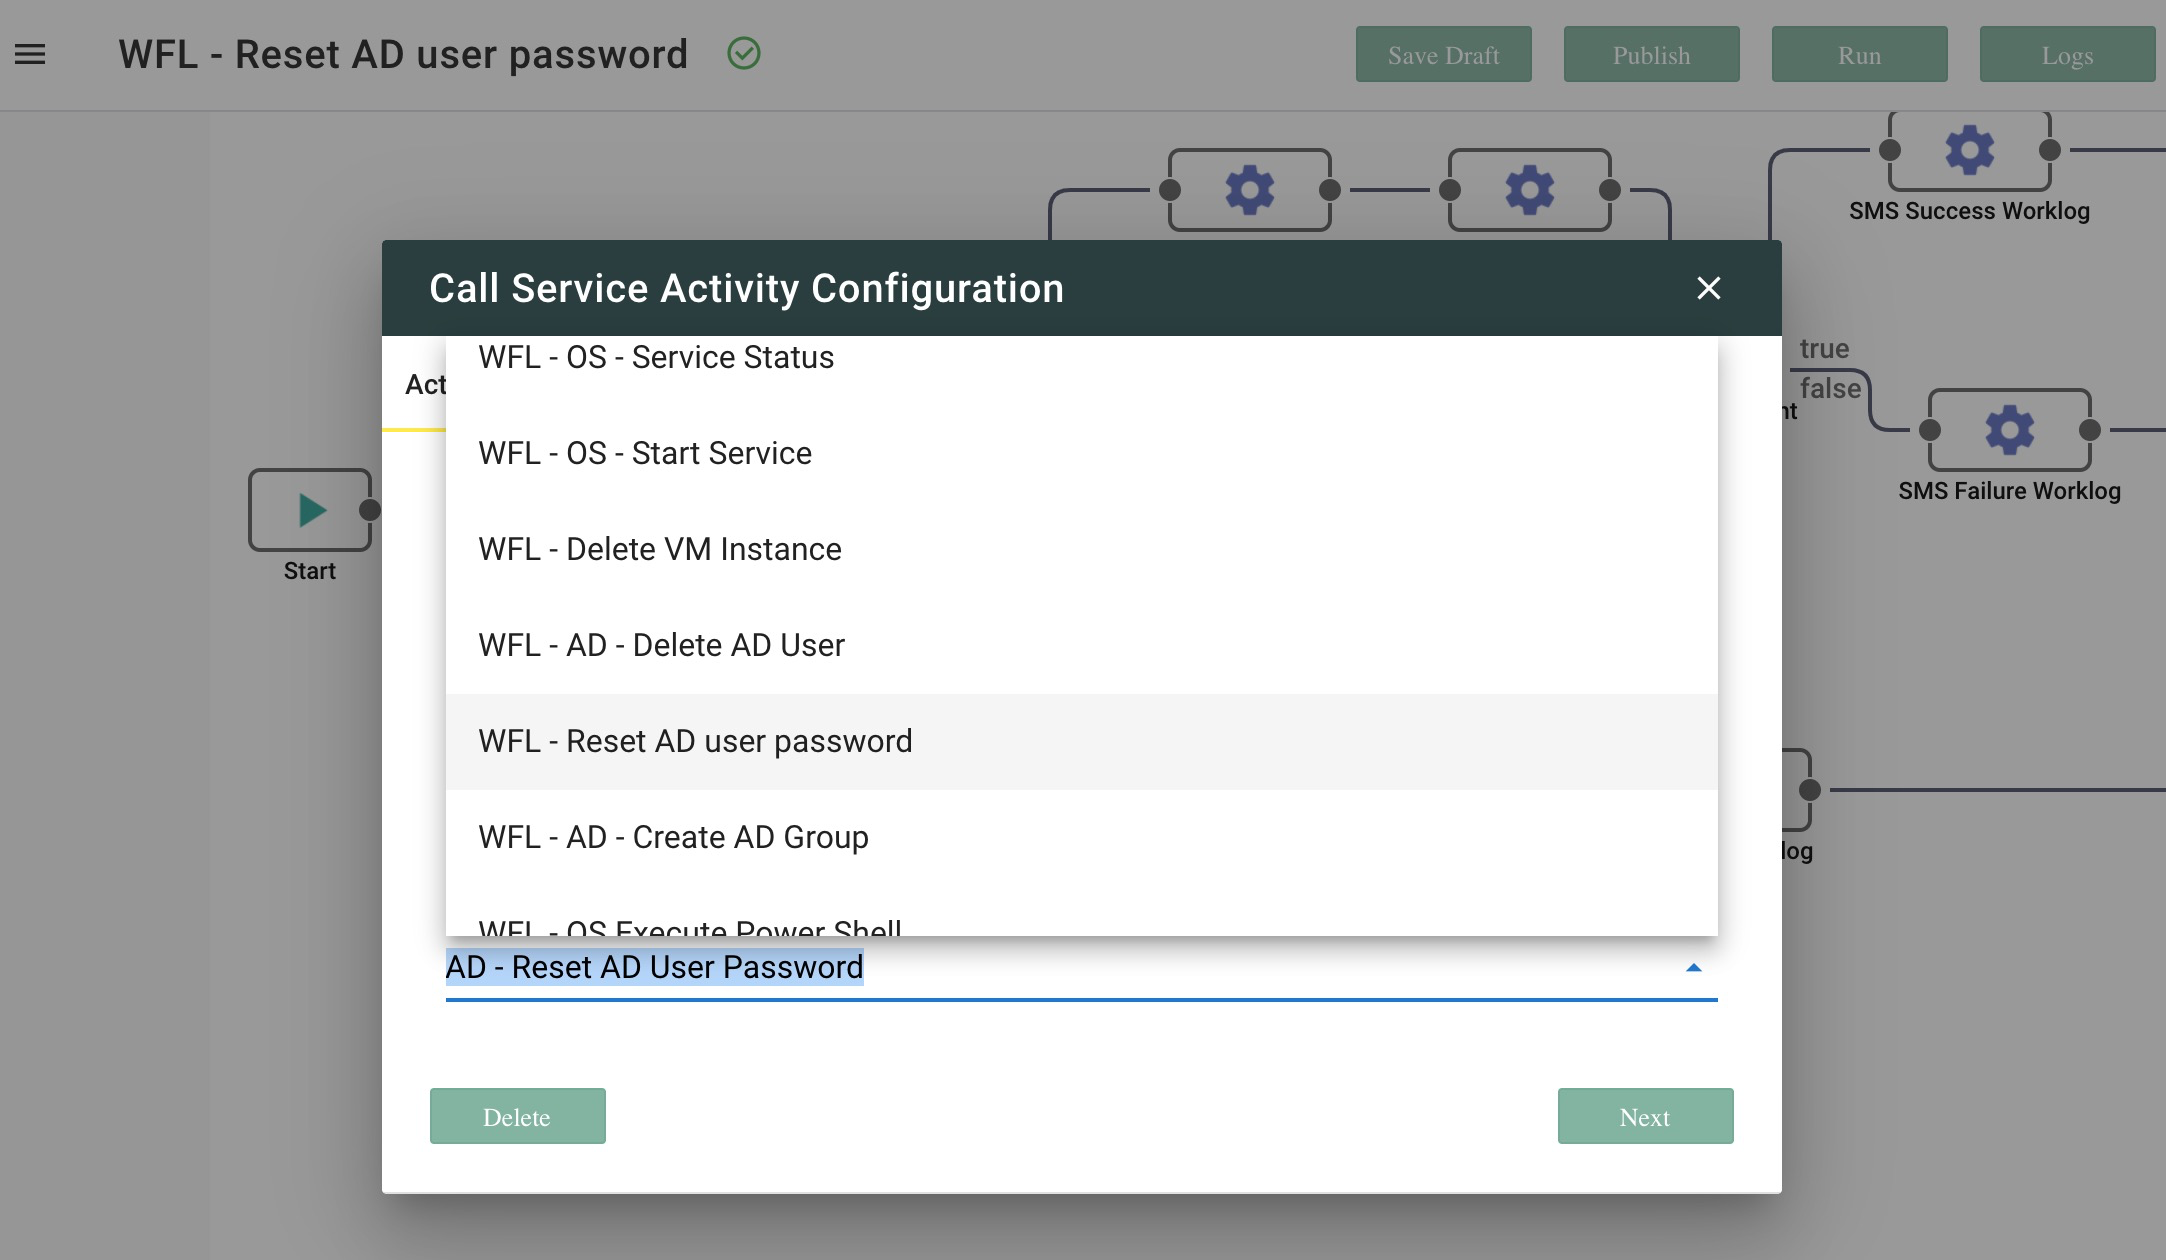
- Click Next to go to the next tab.
- Configure the Service Input for the Operation in the Workflow.
- Define the Service Inputs that the Operation will receive from an external system, which it will then use to execute the task. For example, while Deleting an to Reset AD User password, the inputs the Operation will need is sAMAccountName of AD User, which it will get be passed from the Service Request Ticketskill attribute to the workflow. Input is an object that consists of all input fields and you can utilize use it by typing
input.field_name.
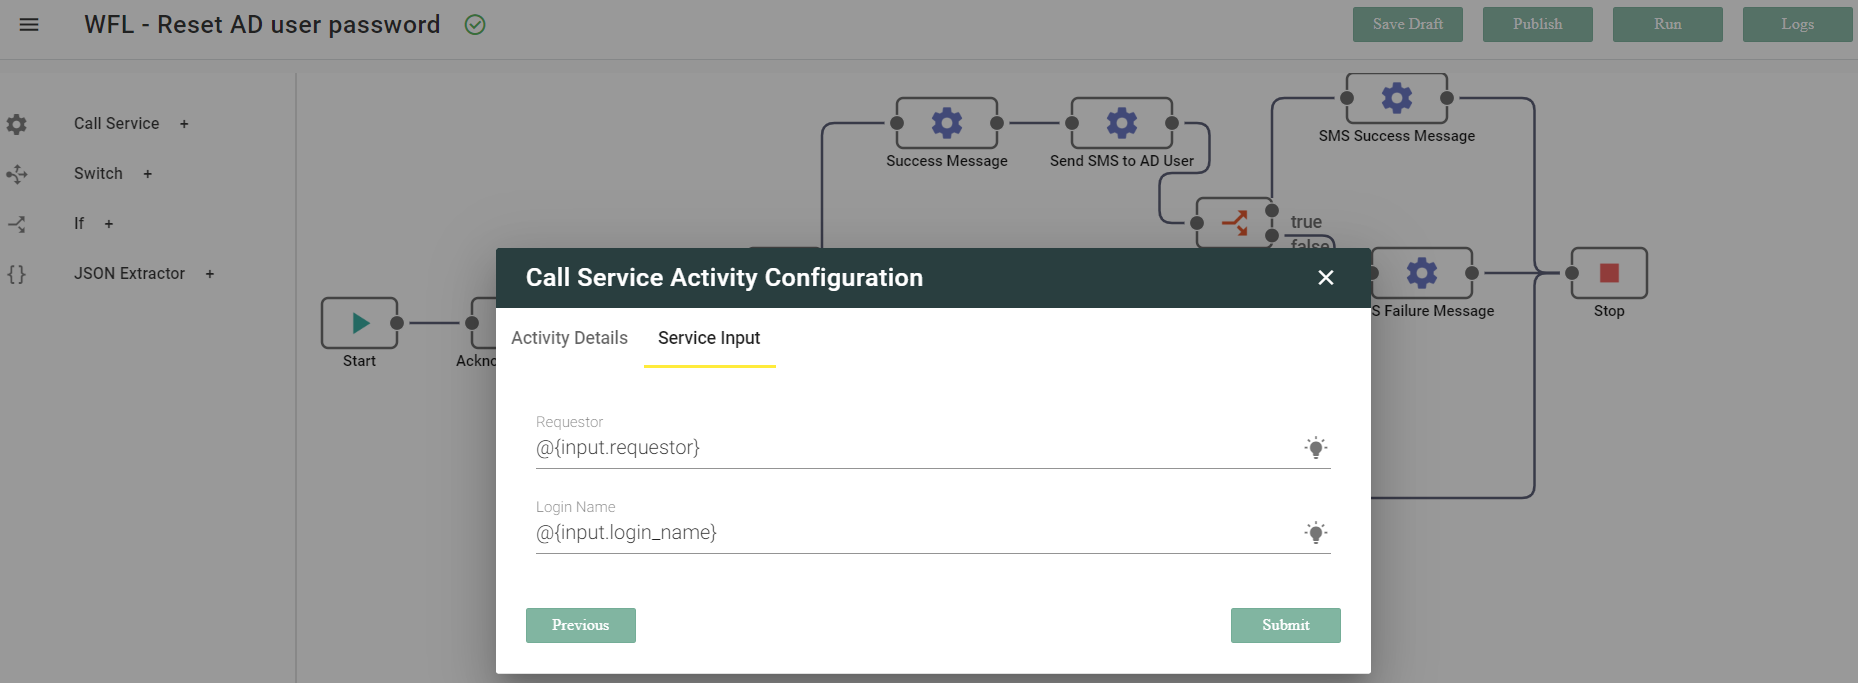
- Click Save Draft on the Workflow Designer to save the changes.
- Define the Service Inputs that the Operation will receive from an external system, which it will then use to execute the task. For example, while Deleting an to Reset AD User password, the inputs the Operation will need is sAMAccountName of AD User, which it will get be passed from the Service Request Ticketskill attribute to the workflow. Input is an object that consists of all input fields and you can utilize use it by typing
- In the above step you configured one operation. Similarly, you can create multiple operations within the same workflow.
- Define the sequence of your automation workflow by connecting the Start, Stop points and the Operations.


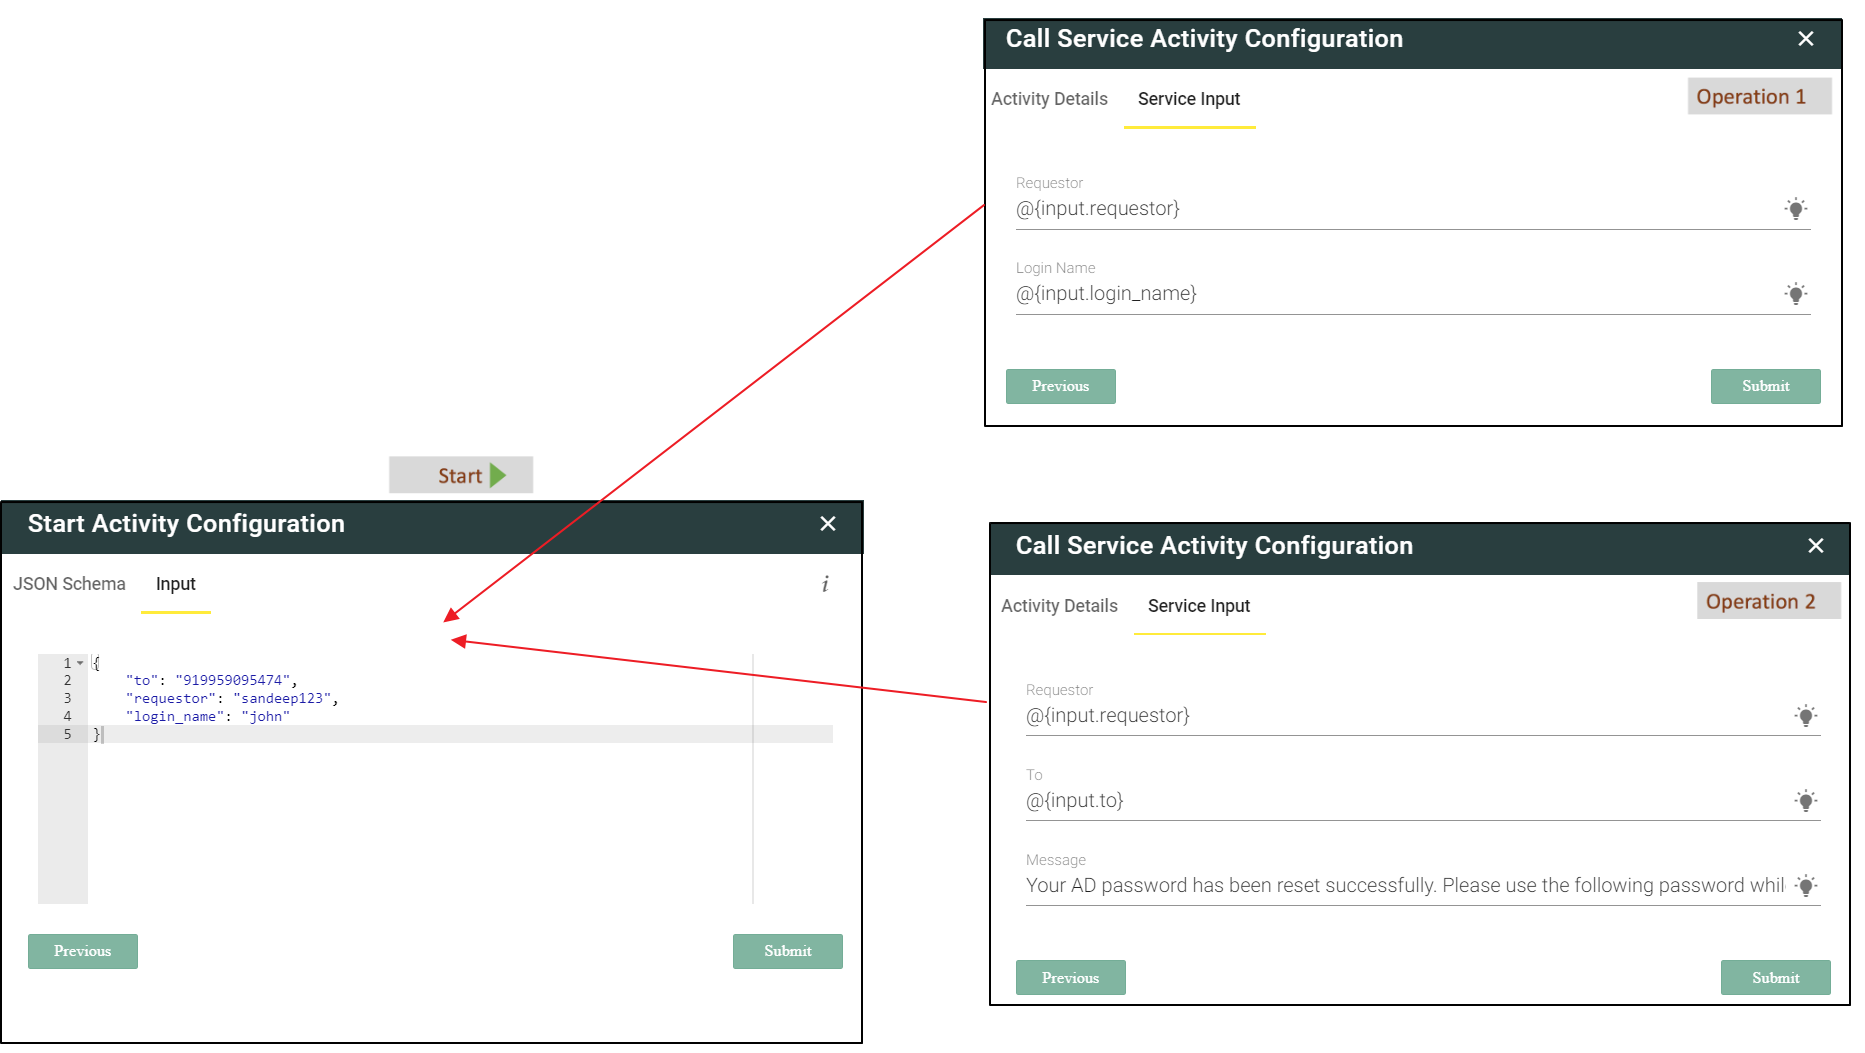
Defining the Start Activity Data
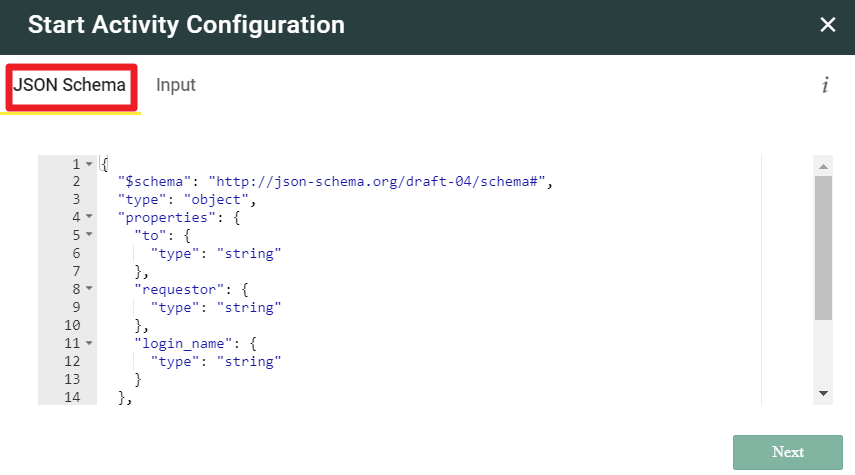
This is a requirement only when you are creating a new Automation Workflow. (For OOTB workflows this is already completed.)- Go to the Start step and double-click to open Start. Here you will see It consists of the JSON Schema and Input Tab tabs. The JSON Schema Tab tab contains the details of all the inputs that the workflow will need. It defines which input parameters are required (mandatory), which parameters are optional and what are the data-types (string, number etc) of each input parameter. The Input Tab tab should contain a super set list of all the input parameters that the workflow will need.
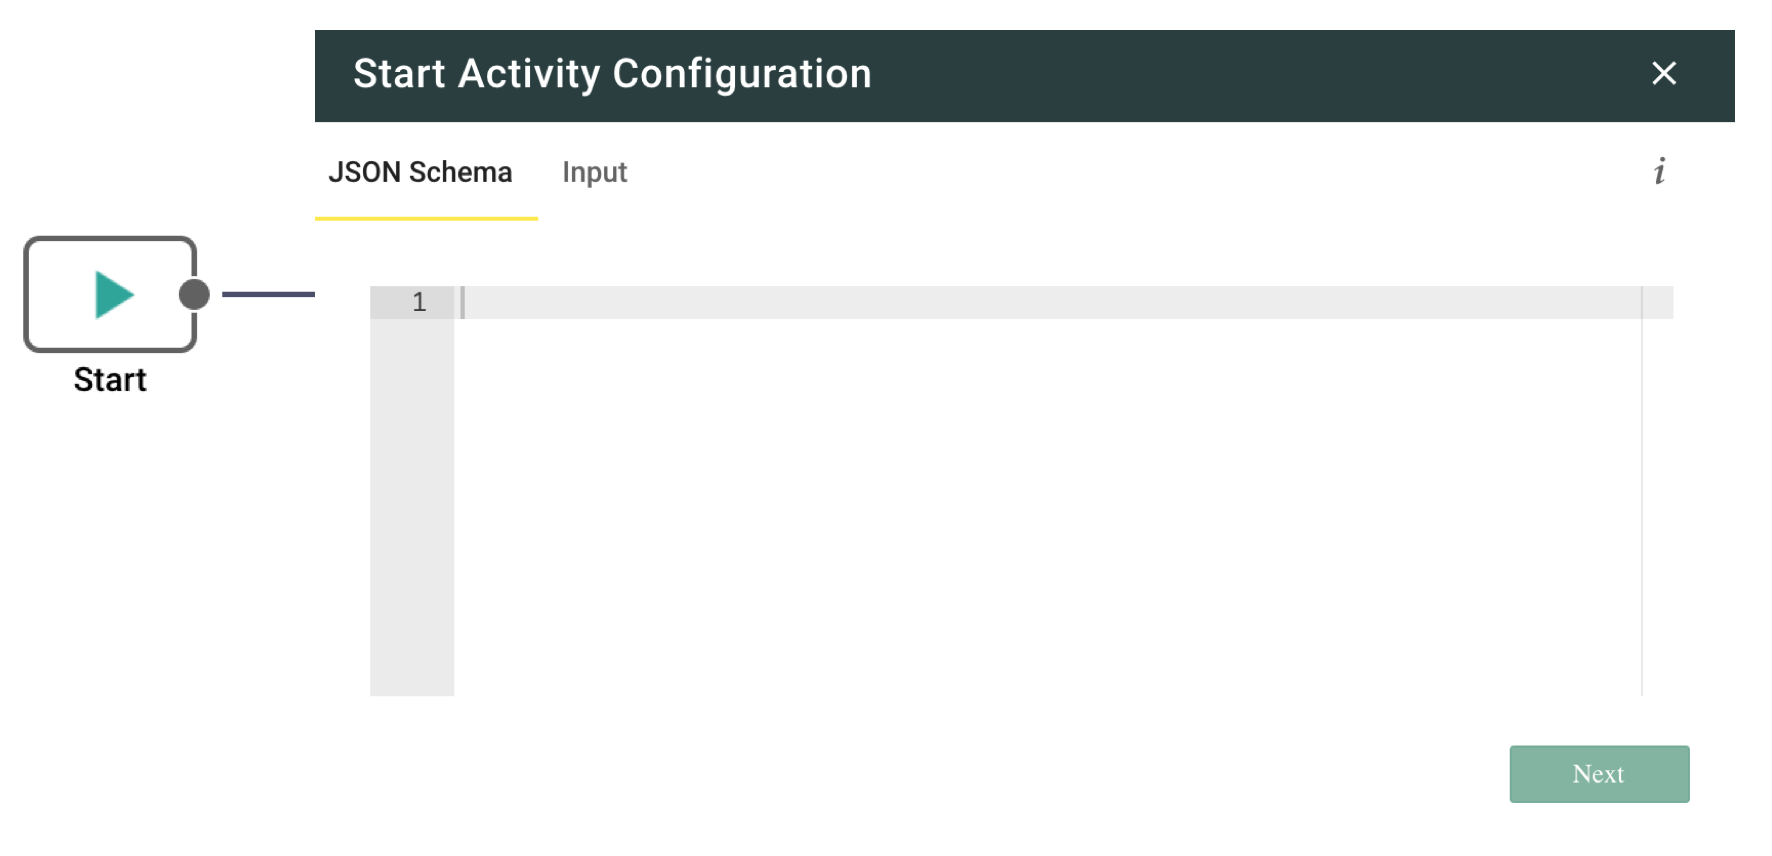
- First go to the Input tab and add all Input Parameters that are required for the various operations in your workflow.
- For example in the sample workflow below there are two operations. Operation 1 has input parameters last_name, ticket_id, first_name, requestor and login_name, employee_id and ticket_type. Operation 2 has input parameters ticket_id, group_name, login_name and ticket_typerequestor, and to. In that case a super set of all the input parameters must be defined under the Input tab of Start step as shown in the following screenshot below. Manually enter the input parameters under the Service Input Tab tab. Remember to write the parameters inside curly brackets {}. Multiple parameters are separated by a comma.

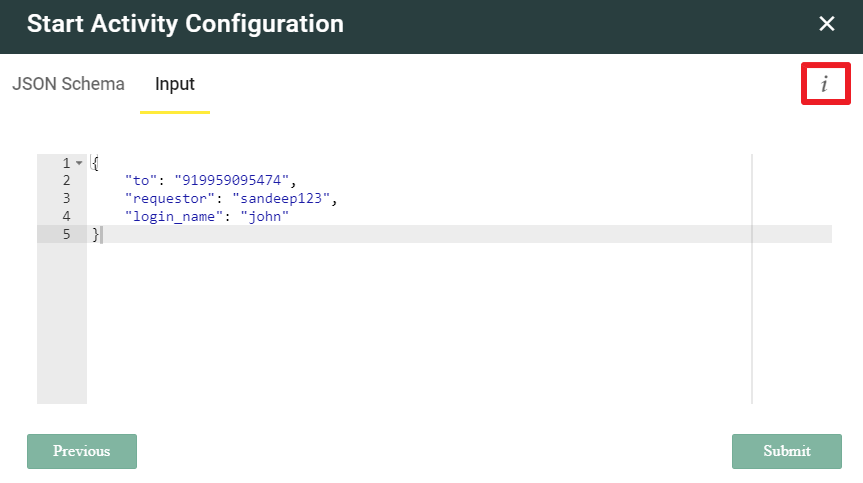
- After this click on in the i button on the top right corner.

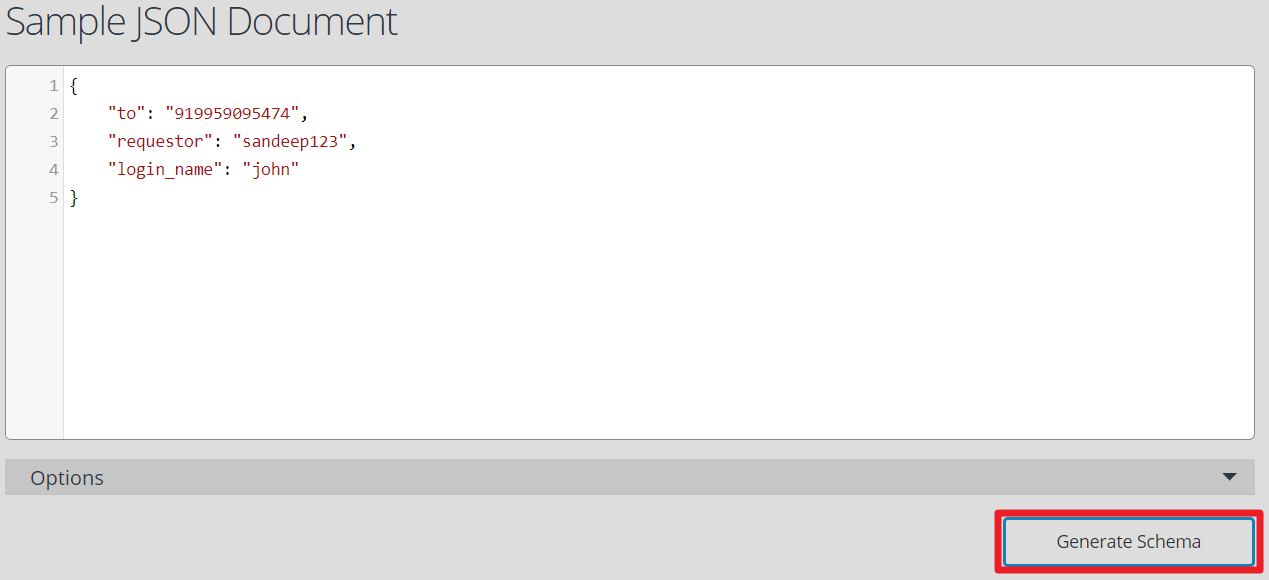
- This will open a website in a new browser tab, to generate the JSON Schema. Under the Sample JSON Document area, copy and paste all your input parameters and click on the Generate Schema Button
 The JSON Data will be generated in the section below, as seen in the screenshot.
Copy this Infered JSON Schema and paste it into the Workflow Designer - Start step >> JSON Schema Tab
- Click on the Next button, then click on the Submit button. This will save the Start Activity Data. For a custom or newly created workflow, if this step is not completed then the input parameters defined in Automation Workflow will not be mapped with parameters of Ticket Process workflow.
- Go to the Start step and double-click to open Start. Here you will see It consists of the JSON Schema and Input Tab tabs. The JSON Schema Tab tab contains the details of all the inputs that the workflow will need. It defines which input parameters are required (mandatory), which parameters are optional and what are the data-types (string, number etc) of each input parameter. The Input Tab tab should contain a super set list of all the input parameters that the workflow will need.
- Click Publish to publish your Automation workflow.
Define the Inputs or Outputs for an Operation
- Pass inputs to the operation from the user or an earlier branch:
@{input.field_name} : defines that input object holds user input fields
Example: @{input.login_name} indicates login_name is a user input
2. Print the output from an operation:
Three outputs from an operation can be used as inputs.
Fields that can be used as output are:
- exit-code
- user_message
- error (in case of failure of operation)
The syntax to use is:
...
- generate the JSON Schema. Under the Sample JSON Document area, copy and paste all your input parameters and click Generate Schema.
- The JSON data is generated in the section below, as seen below.
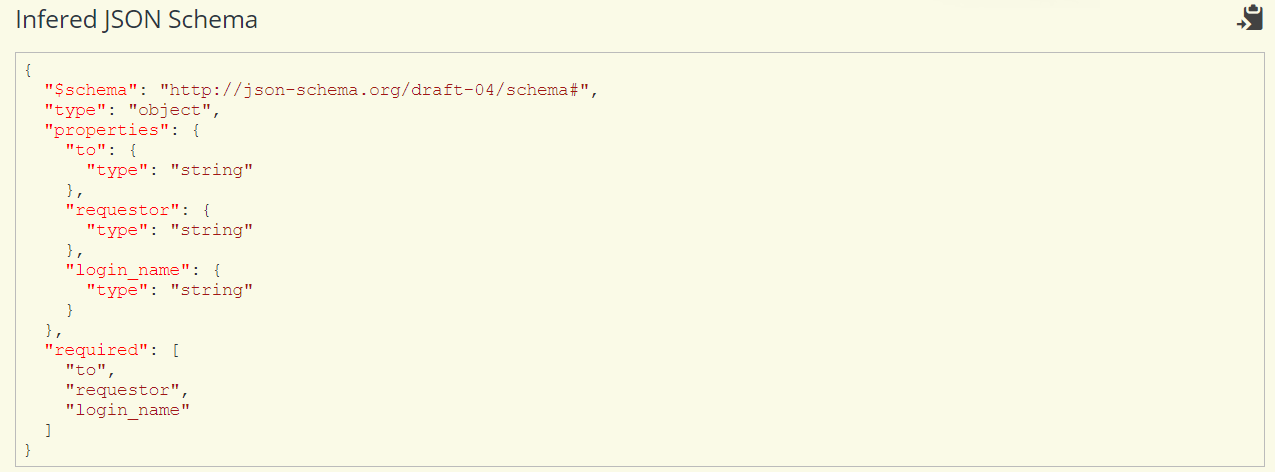
- Copy this Infered JSON Schema and paste it into the Workflow Designer - Start step >> JSON Schema tab.
- Click Next, then click Submit. This saves the Start Activity data. For a custom or newly created workflow, if this step is not completed, then the input parameters defined in Automation Workflow will not be mapped with parameters of the automation workflow.
- generate the JSON Schema. Under the Sample JSON Document area, copy and paste all your input parameters and click Generate Schema.
- Click Publish to publish your Automation workflow.
Define the Inputs or Outputs for an Operation
- Pass inputs to the operation from the user or an earlier branch:
@{input.field_name}: defines that input object holds the user input fields
Example: @{input.login_name} indicates login_name is a user input
2. Use the output from an operation as input for another operation:
You can use the output from an operation as inputs for another operation.
Some of the output fields that can be used in the next activity are:
- exit-code
- user_message
- error (in case of failure of operation)
The syntax to use is:
@{activity_id.output['exit-code']}: will print the exit code from the operation.
@{activity_id.output['user_message']}: will print the user message from the operation.
@{activity_id.output['error']}: will print the error from the operation where activity_id is the ID of the step whose output will be used.
Example:

Hence the syntax used for output will be:
@{disable_ad_user.output['exit-code']}
...
@{
...
disable_ad_
...
user.output['user_message']}
...
@{
...
disable_ad_
...
user.output['error']}
...
Example:
Hence the syntax used for output will be:
@{disable_ad_user.output['exit-code']}
@{disable_ad_user.output['user_message']}
@{disable_ad_user.output['error']}
Step 3: Update the Service Configurations
In order to execute a workflow, the system will need some configurations such as how to connect to the system where the automated task will be executed. You can store these configurations under the Service Configurations.
...
Step 4 : Publish Automation workflow as a Service
In order to consume the Workflow, you need to publish the workflow as a Service. Following are the steps to do that:
...
Step 3: Update the Service Configurations
In order to execute a workflow, the system will need some configurations such as how to connect to the system where the automated task will be executed. You can store these configurations under the Service Configurations.
- Click the Automation icon.
The Automation page appears. - Click the Service Configurations tab.
- Identify the appropriate Service Configuration you need to update. Refer to the table listed in Annexure I to understand which Service Configuration is related to which Operation.
- Click the Edit
 icon to edit the records.
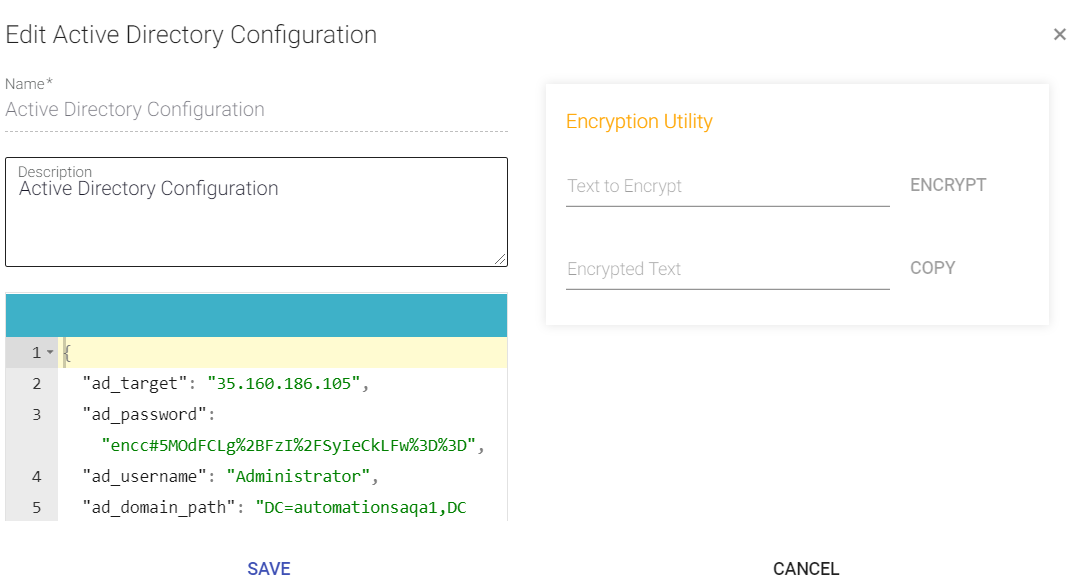
- If you want to input an encrypted value in the configurations, use the Encryption Utility provided. Add the data in Text to Encrypt field and click Encrypt.
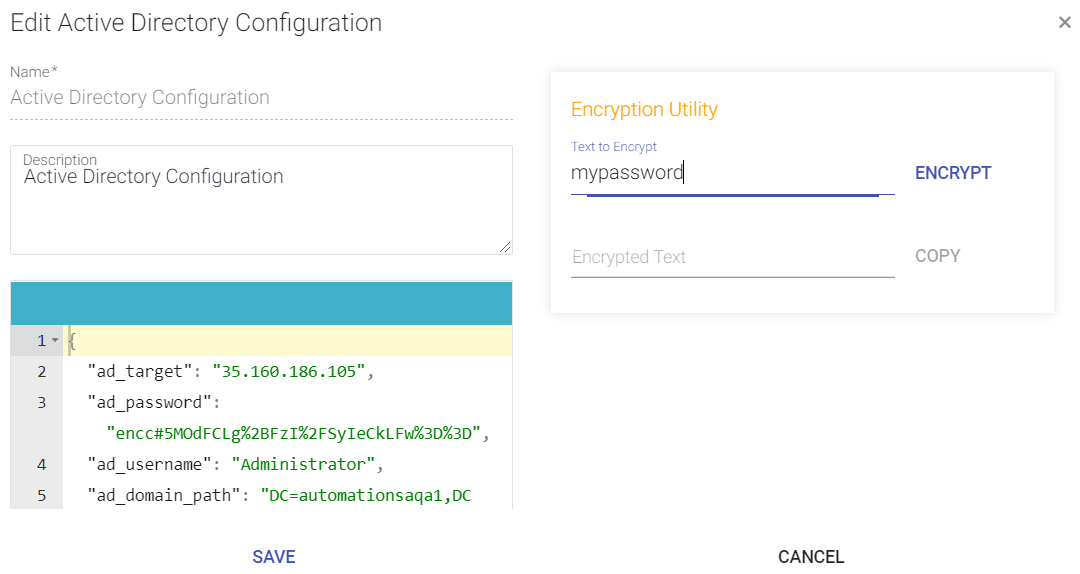
The Encrypted text appears in the field below. - Click Copy to copy the encrypted text to the clipboard.
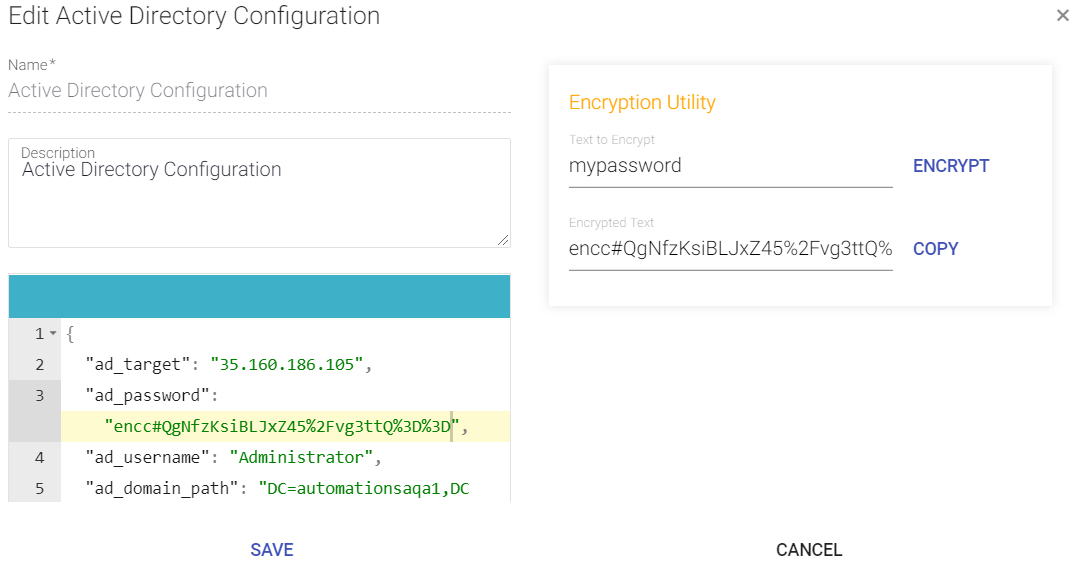
- Paste it under appropriate tag on the left pane.
Click Save to save your Service Configuration.
Info title Note Note that the Service Configuration is internally linked to the appropriate Operation. Administrator does not need to relate or link them.
Step 4 : Publish Automation workflow as a Service
In order to consume the Workflow, you need to publish the workflow as a Service. Following are the steps to do that:
- On the Automation page, click the Workflow Services tab.
- Click New Workflow Service as shown below.
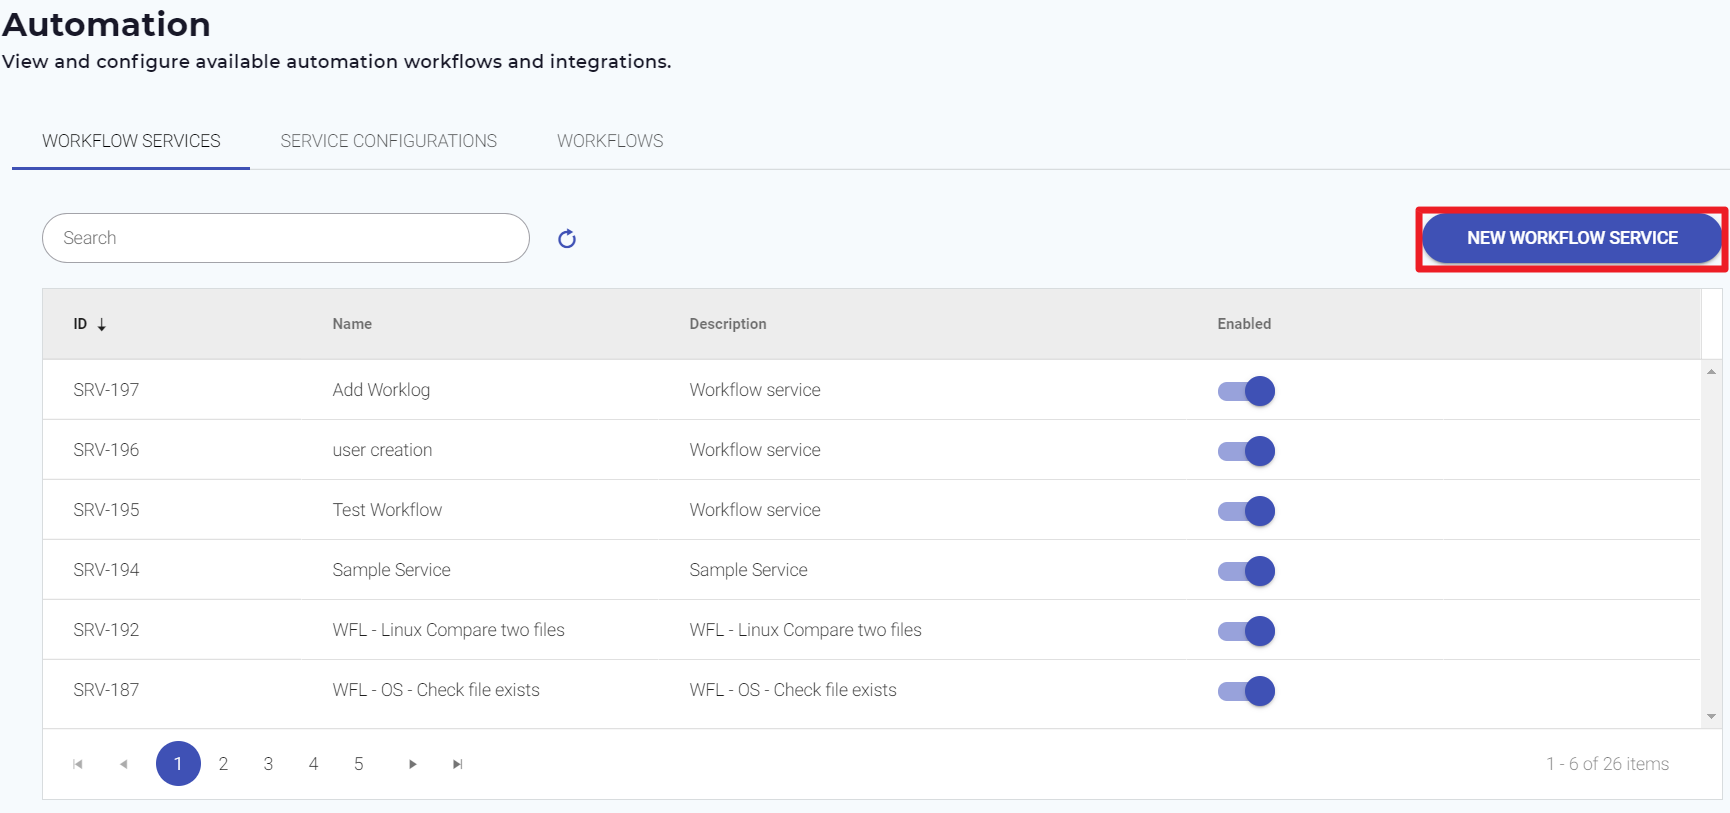
The Workflow Services page appears as shown below.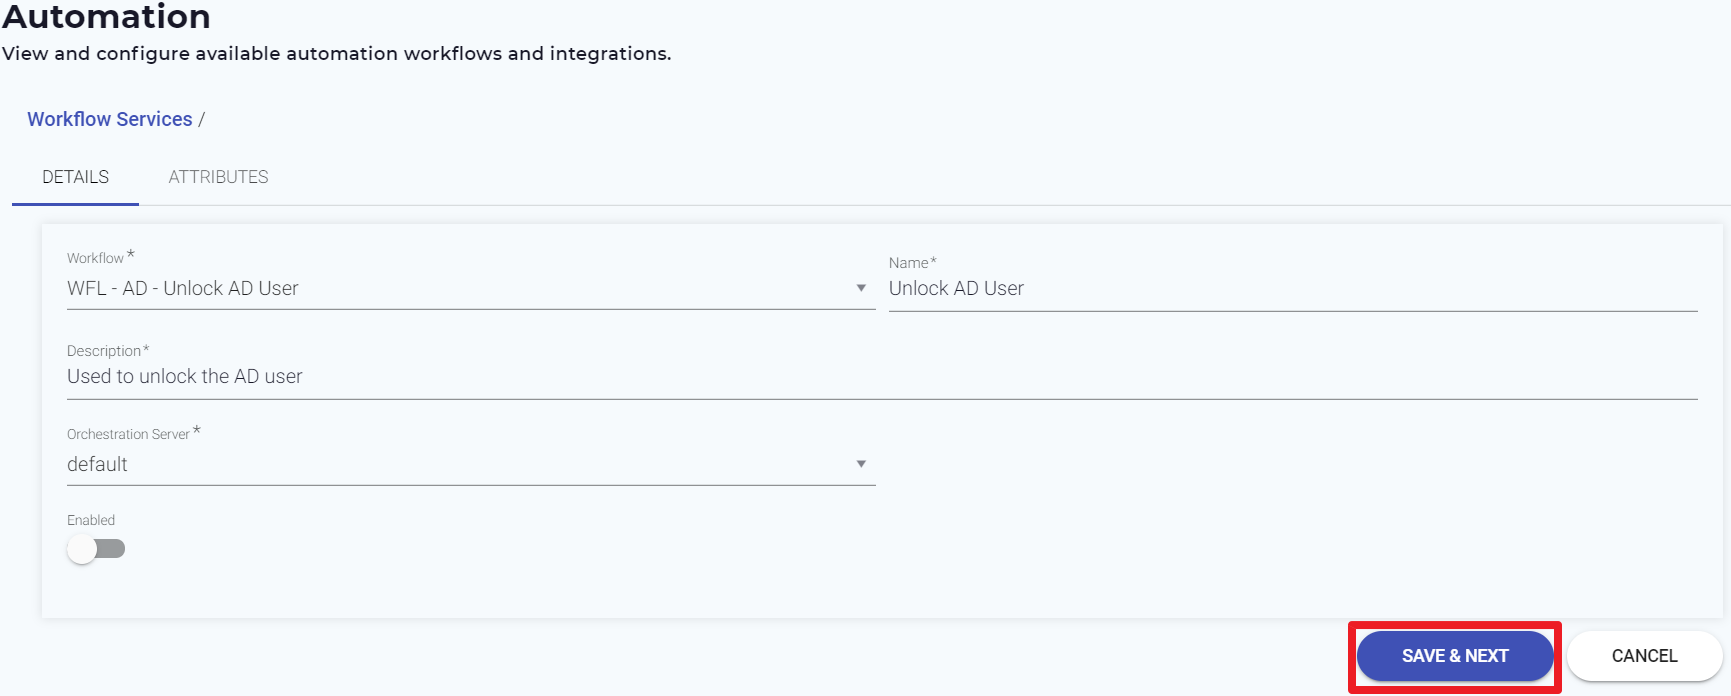
- Select your Workflow from the list.
- Provide the Name to your workflow service.
- Provide the workflow Description.
- Select the Orchestration Server as default. The Orchestration server should be set to 'default' if you are using the SaaS version of Automation. If you have deployed the Automation server on-premise, then the details have to be specified here.
- Click Save & Next.
The Attributes tab appears. - Click Add Text Attribute to add the attribute information.
The Add Text Attribute pop-up window appears as shown below.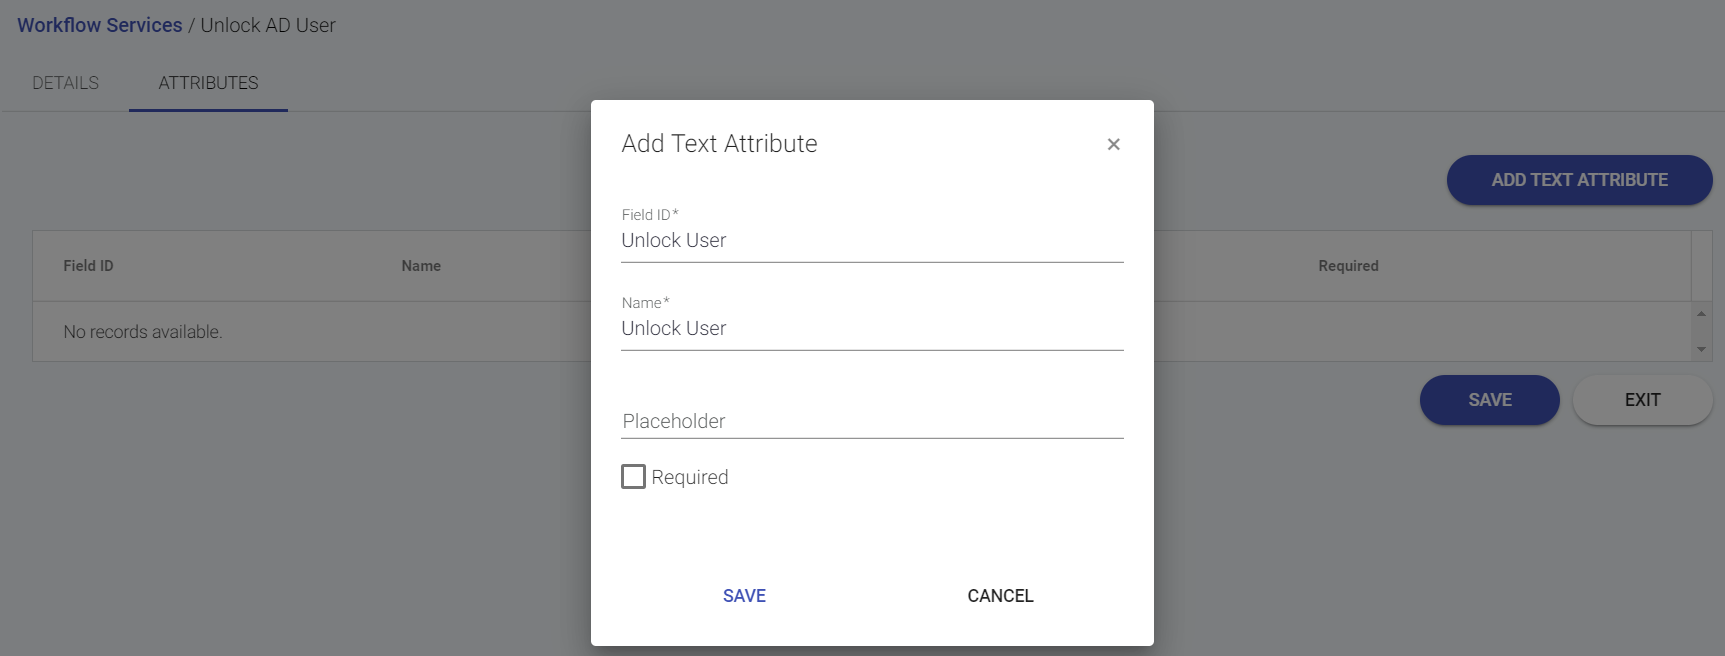
- Specify the attribute Field ID.
- System automatically populates the Field ID as the attribute Name.
- You can choose whether a Placeholder is required for the attribute.
- Click Save to save the changes.
Step 5 : Add the Automation Service into Ticket Workflow
You can link your Automation Workflow Service Workflow to a Ticket Process Workflow skill so that the automation task gets executed through a ticket request.
Refer to the steps listed at Execute an Automation Service from a Ticket Workflow.
Annexure I: OOTB Operations and their corresponding Service Configurations
...