Overview
At times, there would be scenarios where the end-users need assistance from a support team where the bot is unable to resolve certain requests. Agent Chat Console interface allows Support Agents from various Support Groups to manage and respond to multiple inbound requests from users who want to chat with a Support Agent during a conversation with the bot.
...
To launch the Agent Chat Console, perform the following steps:
Log in to the Luma application.
Click on Agent Chat Console on the left navigation to launch Agent Chat Console.
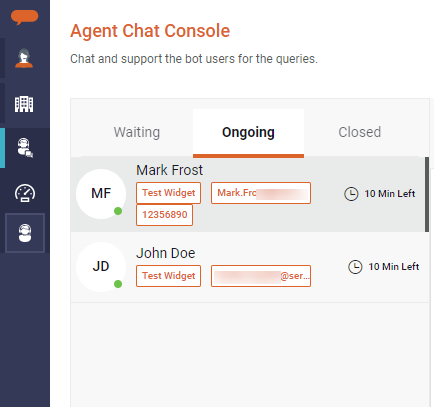
The Agent Chat Console mainly consists of the below sections:
Waiting: This is the Support Group’s queue.All active user requests assigned to the logged-in agent’s support group(s) and awaiting assistance are queued here. This queue is common for all logged-in agents that belong to the same support group. The queue holds requests on the 'First come first' basis. Every chat request with the queue holds the following information.
User information like name, username, chat channel, group as configured in Tenant settings by the Administrator/Developer. Refer to Manage Agent Chat Console Settings for more information.
Timeout, i.e., time remaining before the user requests timeouts. This indicates how much time the user requests could stay in the waiting queue. As a Tenant Administrator, you can configure Waiting queue Warning and Critical timeouts. Refer to Manage Agent Chat Console Settings for more information.

Ongoing: This is an agent-specific queue and holds all ongoing conversations accepted by the Support Agent. Once a Support agent Accepts a conversation from the Waiting Queue, the conversation is moved to the Ongoing queue. For every conversation in the list, the below information is available:
User information like name, username, chat channel, group as configured in Tenant settings by the Administrator/Developer. Refer to Manage Agent Chat Console Settings for more information.
Timeout, i.e., time remaining before the conversation timeouts. This indicates how much time the user requests could stay idle in the Ongoing queue. As a tenant administrator, you can configure User and Agent timeouts. Refer to Manage Agent Chat Console Settings for more information.
New message indicator: An amber dot appears next to the conversations which have unread messages. It alerts the Support Agent about any new messages received from the End-users that may need to be addressed.
| Info |
|---|
|
...
The Support Agent can sort and filter through the conversations on Chat End Date, Users, Support Group, and Chat Status. To filter the conversation list,
Click on the filter button.
Select the one the required filter:
Chat End Date represents the date of the user conversation. You may select the predefined ranges like Last 24 Hour, Today So Far, Yesterday, Last 7 Days, Last 30 Days, etc., or select Custom to view conversations between specific dates. The date range is set to Last 7 days, by default.
Users represent the list of the end-users with whom the Support Agent has interacted to date.
Support Groups list all the support groups the Support Agent is associated with.
Chat Status represents the status or reason due to which the conversation was ended, such as Support Agent Ended Chat, End-User Aborted Chat, Support Agent, or End User Idle Timeout.
Click Apply.
...
4. Conversation Section: This section displays the details of the user’s current and previous conversations with Luma. The Support Agent can select a user request and review the ongoing request and the chat history before accepting the request.
...
The following information is available in the section:
Conversation History: Once a conversation in Waiting Queue is selected by a Support Agent, the user’s conversation with the virtual agent or bot is populated.
Messages in GRAY on the left represent End-user messages with the Virtual Agent or the Support Agent.
Messages in ORANGE on the right represent messages from the Virtual Agent to the end-user
Messages in BLUE on the right represent messages from the Support Agent. These messages could be from the current logged in agent or a previous agent chat conversation as well.
Additional User information like name, username, chat channel, and group up to 6 fields can be displayed to identify the user better. These can be configured in the Agent chat Console settings screen by the Tenant Administrator. Refer to Manage Agent Chat Console Settings for more information.
Managing End-User Requests
...
A Support agent can follow the below steps to Accept the user request in the Waiting queue and start conversing with the user:
On the Waiting Queue, select a user request to initiate the conversation or view the user's chat history. You may use the search field to search for a user request by information like username, group, channel, etc.
The user’s chat history will be populated
...
in the Conversation details section.
Click on the Accept button to start conversing with the
...
end user.
| Info |
|---|
|
...
Execute Support Agent Actions
...
To execute the action, follow the below steps:
Select the required conversation in the queue.
Click on the Support Agent Action button.
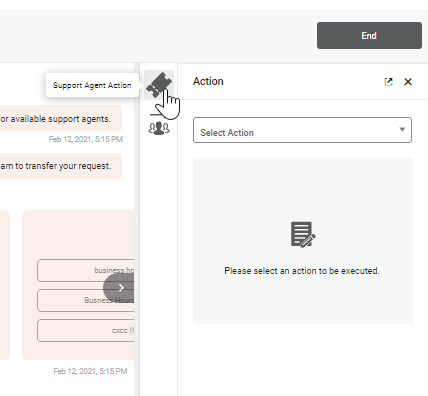
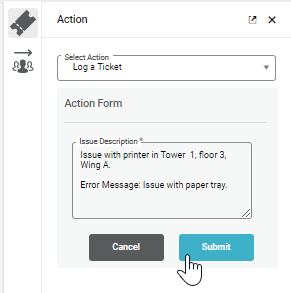
On the Action menu, select the Support Agent Action to execute. All Actions associated with the Agent’s Support Group are listed in the selection list.
Obtain the information from the end-user and add it to the form fields.
Click Submit to execute the action.
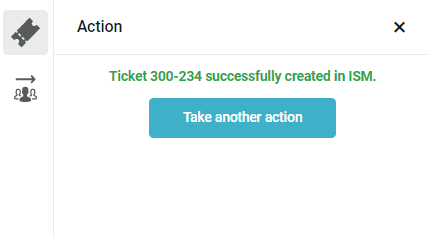
On successful execution, the response from the action appears as a message. You can share the required information with the end-user.
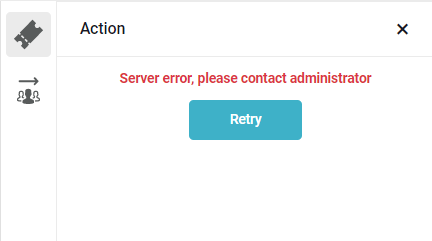
In case of an error, the following message appears. The Support Agent can retry executing the action.
In case the conversation times out or the end-user aborts the conversation, the Support Agent Action is not executed and the user conversation is closed.
| Info |
|---|
|
...
To transfer a conversation, follow the below steps:
Select the required conversation in the queue.
Click on the Transfer to Another Group button.
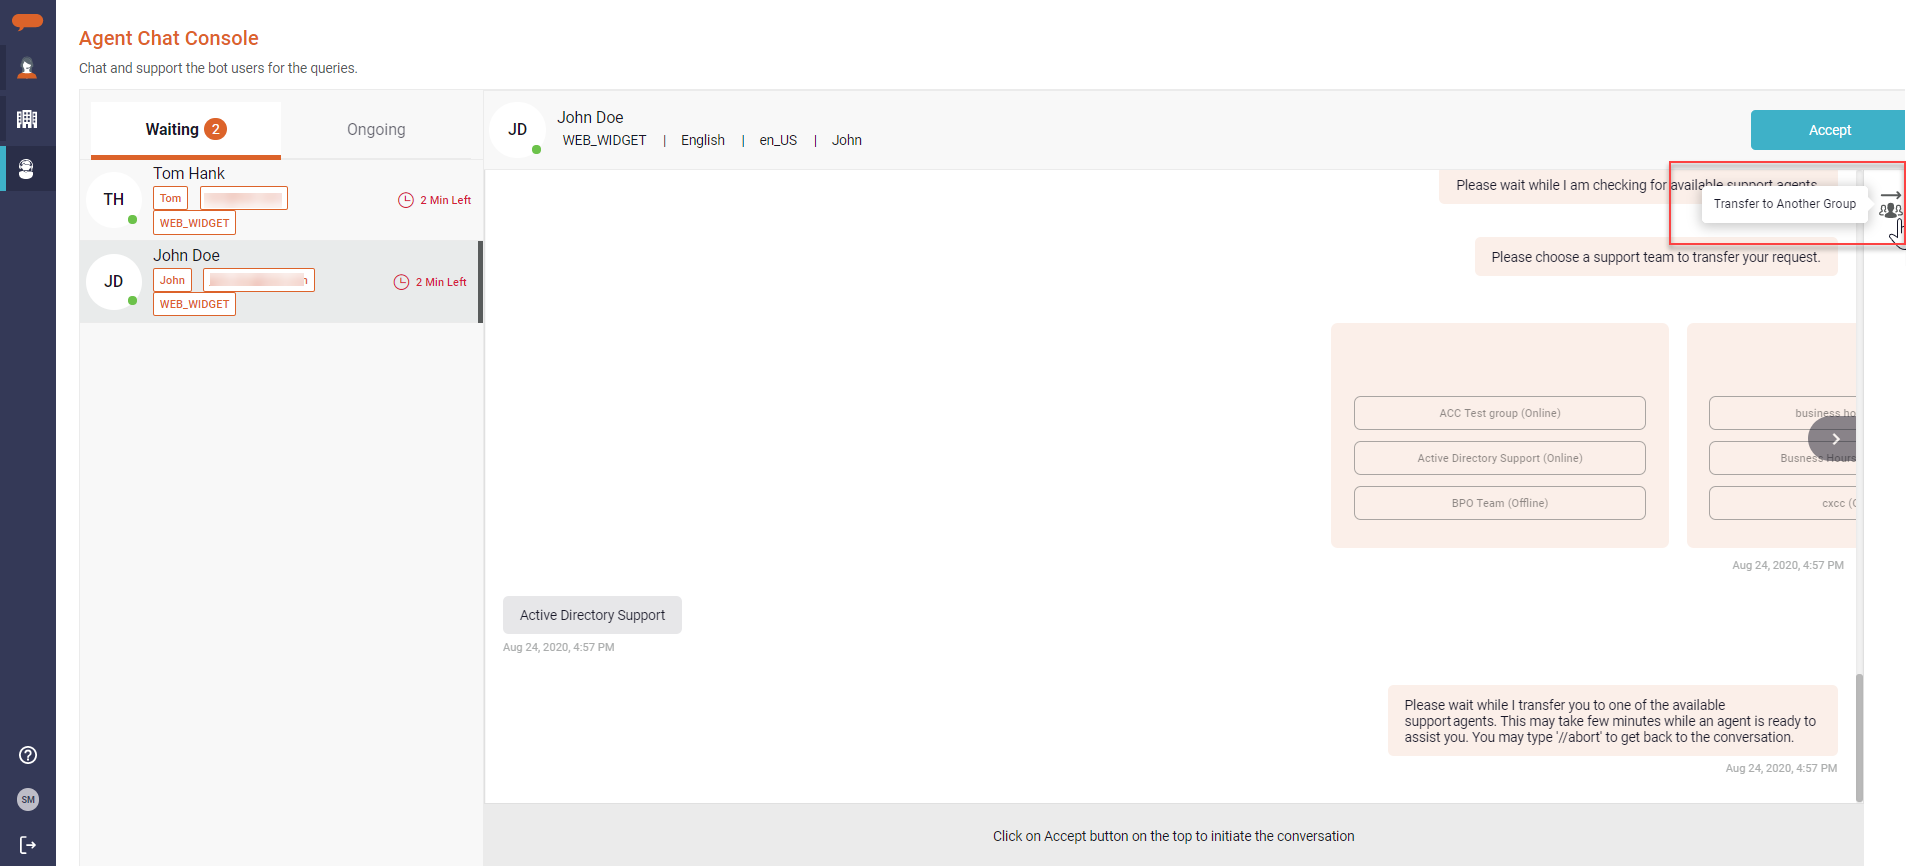
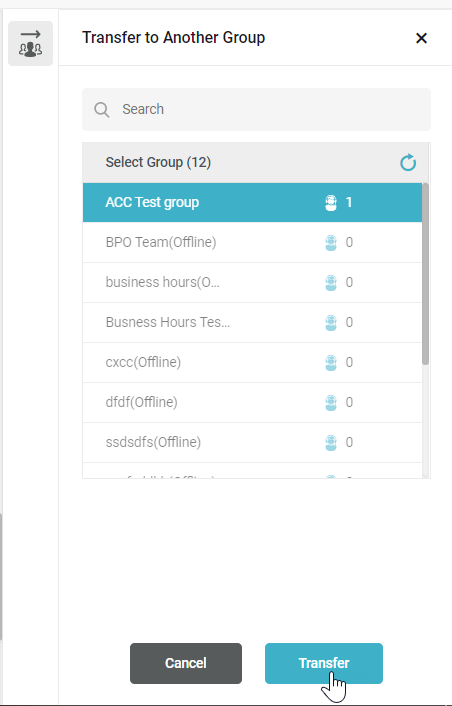
On the Transfer to Another Group menu, select the required group from the list of Available Support Groups, i.e., groups that are working at the moment within the Business Hours.
If at least one Agent associated with the group is logged in to the Console, the group appears Online and is available for request transfer.
If no Agents are available for the group, the Agent count is displayed as zero, and the group appears Offline. Requests cannot be transferred to such groups.
Refer to /wiki/spaces/DOC/pages/1628406221for more details on configuring Business Hours for a Support group.You may also search for a Support group by typing in the name in the Search box.

Click on Transfer.
On the confirmation alert box, click OK to confirm the conversation transfer to the selected group. You may click on Cancel to abort the transfer.
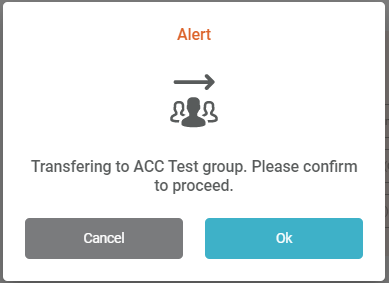
The conversation will now be removed from the current queue and start appearing in the Waiting queue of the selected Support group.
| Info |
|---|
|
...
A user conversation in Agent Chat Console can end in the following scenarios:
User Request is Complete. Once the End-User’s problem is resolved, the Support Agent can use the Remove button to end the chat. On the End button click, a pop-up is presented to the Agent to confirm. On clicking Yes, the Agent ends the current conversation.
User Exits Conversation: When an End-User exits an Ongoing conversation with Support Agent using the Abort/Exit command, the conversation becomes inactive. The inactive conversation can now be removed from the queue using the Remove button to end the chat.
Conversation Timeout: When a conversation between the user and the Support Agent times out due to Agent Idle time out or User Idle time out, the conversation becomes inactive. The inactive conversation can now be removed from the queue using the Remove button to end the chat.
When the conversation ends due to any of the above reasons, the conversation is moved back to the Virtual Agent context from the Support Agent context. The Virtual Agent fulfills all further requests from the user.
...
Luma sends the following alert notifications to the logged-in Support agents, who are not active on Agent Chat Console when a new request appears in the Waiting queue or a new message is received for a conversation in their Ongoing queue:
The browser tab blinks with a Red status indicator with the text: "Notification Alert."
Alert sound to the Agent. Audio Autoplay should be enabled on your browser to receive the sound alerts.

A Red status indicator appears on the Agent Chat Console menu in the left-hand navigation.
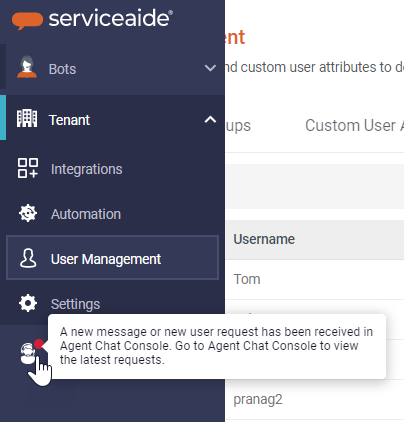
The alerts stop once the support agent accesses the Agent Chat Console page. The new request in the Waiting queue is highlighted to draw Agent’s attention to the new conversation added to the queue.
Useful Links: