...
On the Infobip homepage, scroll down to the ‘Get numbers’ options. You can also find the option under Application,
Click on ‘Request Number’.
Add the required information such as Number Type, Channel, etc. in the request form and ‘Submit Request’.
Note: Based on the details in the request form, Infobip provides ETA i.e. the estimated time needed to acquire the number and the price you should pay once the number is acquired and assigned to your account. For more information, refer to Buy Numbers.Once the number is assigned to your account, it starts appearing at Applications → Numbers.
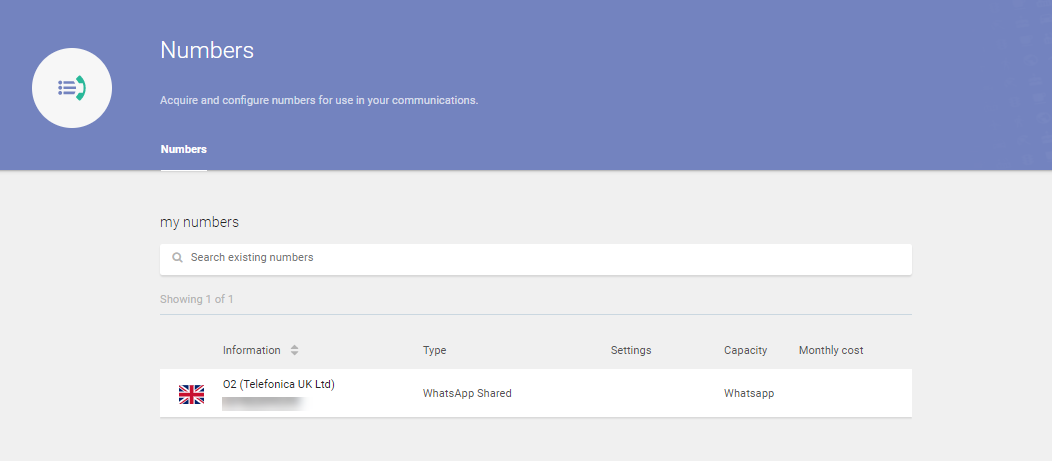
Copy the Sender number and retain it in an easily accessible location such as notepad or any text editor tool.
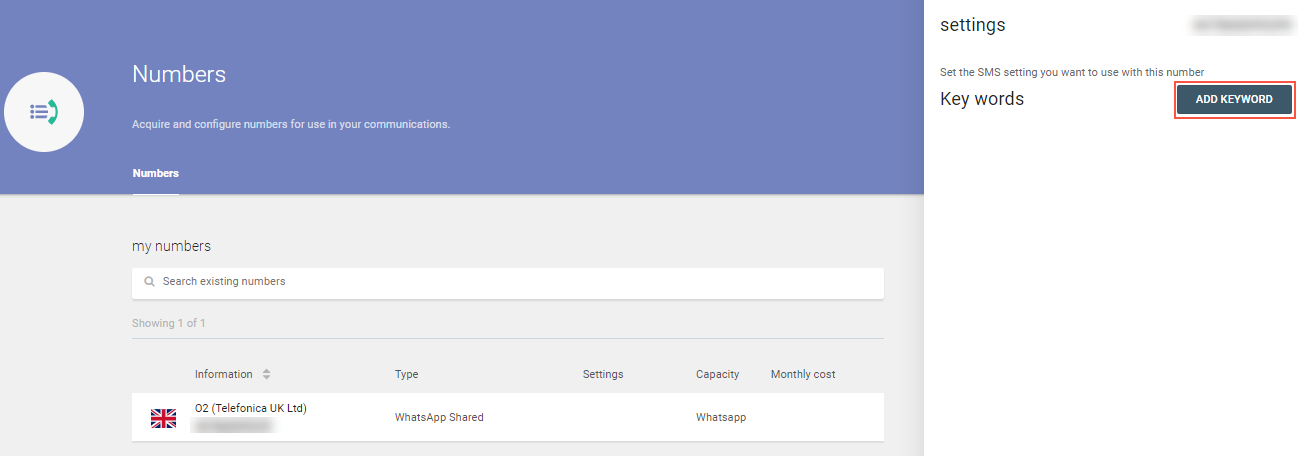
The next step is to add a Keyword for the number.
Keywords are the text in the inbound messages that are used to filter out specific messages received on a number. Each keyword can filter messages and perform a predefined action such as forwarding the message to another system, forward to Email, save the message to log, etc.Select the number in the grid and click Add a Keyword in the side panel.
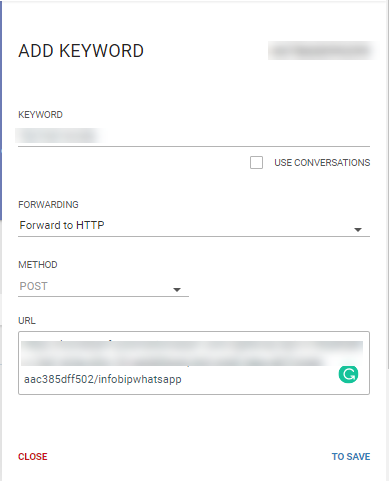
On the ADD KEYWORD screen, add the following configuration to enable the number to forward the messages to your Bot.
Add a new Keyword.
Set Forwarding field to ‘Forward to HTTP’.
The Method should be set to POST.
Next login to Bot builder to copy the Message URL for your Bot, from the Infobip WhatsApp configuration page.
To get the message URL,Login to Bot builder and navigate to Configurations → Channels under the Bot menu.
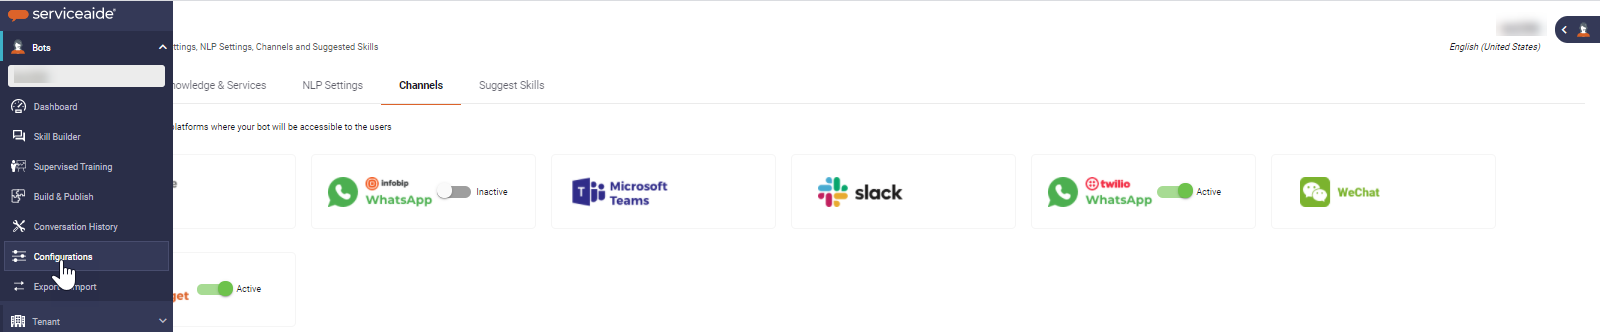
Select the Infobip Whatsapp channelto view the configuration details.

Copy the Message URL.


Add the Message URL copied in the above step (step d) to the URL field.
Click on To Save to complete Keyword creation.
Your Infobip account is now configured and ready.
...
Navigate to Infobip Homepage.
Click on Manage API Keys.


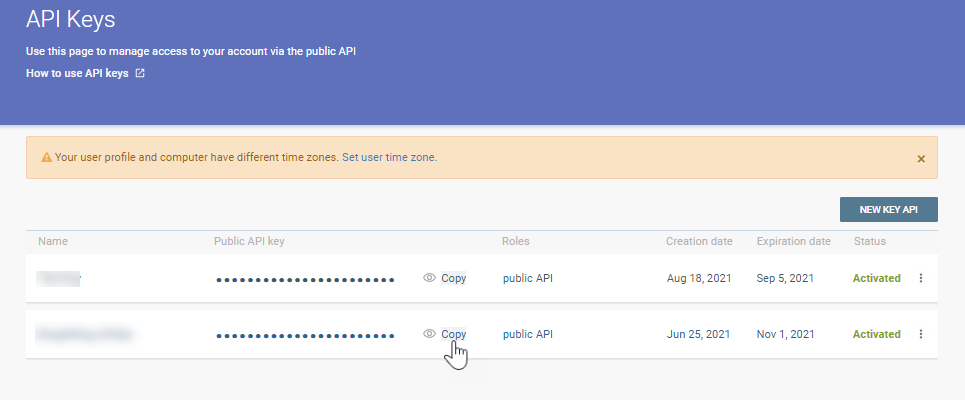
On the API Keys page, click on NEW KEY API.
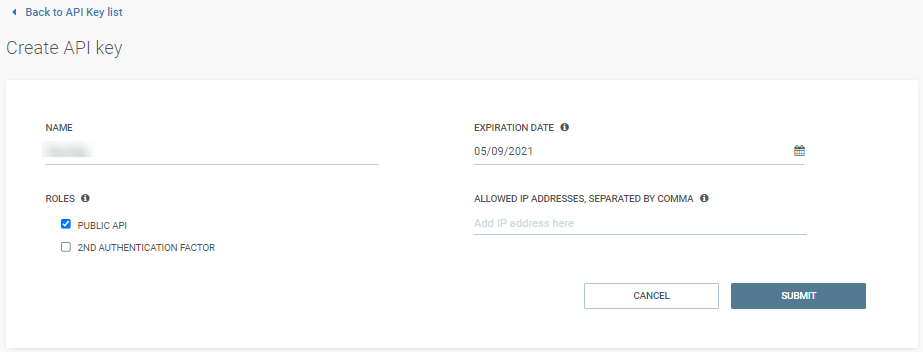
Create API Key is now open. Add the following details:
Add the Key NAME.
Add EXPIRATION DATE for the key. Upon reaching the expiration date, the key is automatically deactivated. You can either update the expiration date or regenerate a new key.
Select the ROLES to Public API. This provides your bot access to all API calls.
In case, you want to restrict access to the API, add the IP addresses in ALLOWED IP ADDRESSES, SEPARATED BY COMMA field.
Once done, click on SUBMIT to generate the Key.
The new Key is listed on the API Key page. Copy the API Key and retain the information on the notepad or the text editor tool along with the number (as in Step 2 → 5)
In addition to the API Key, you need the Base URL to complete the configuration.
Navigate to the Infobip Homepage and copy the Base URL. Retain the information in the notepad or the text editor tool along with the API Key and number (as in the earlier step).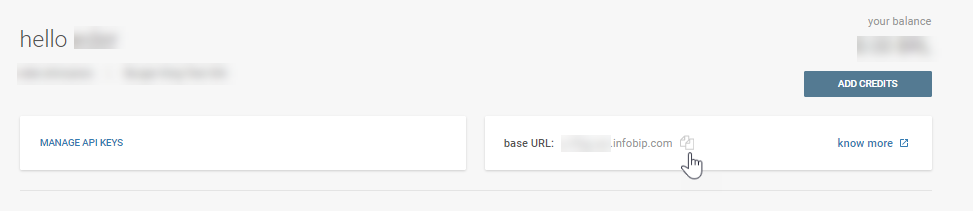
...
| Info |
|---|
Points to Remember:
|
...
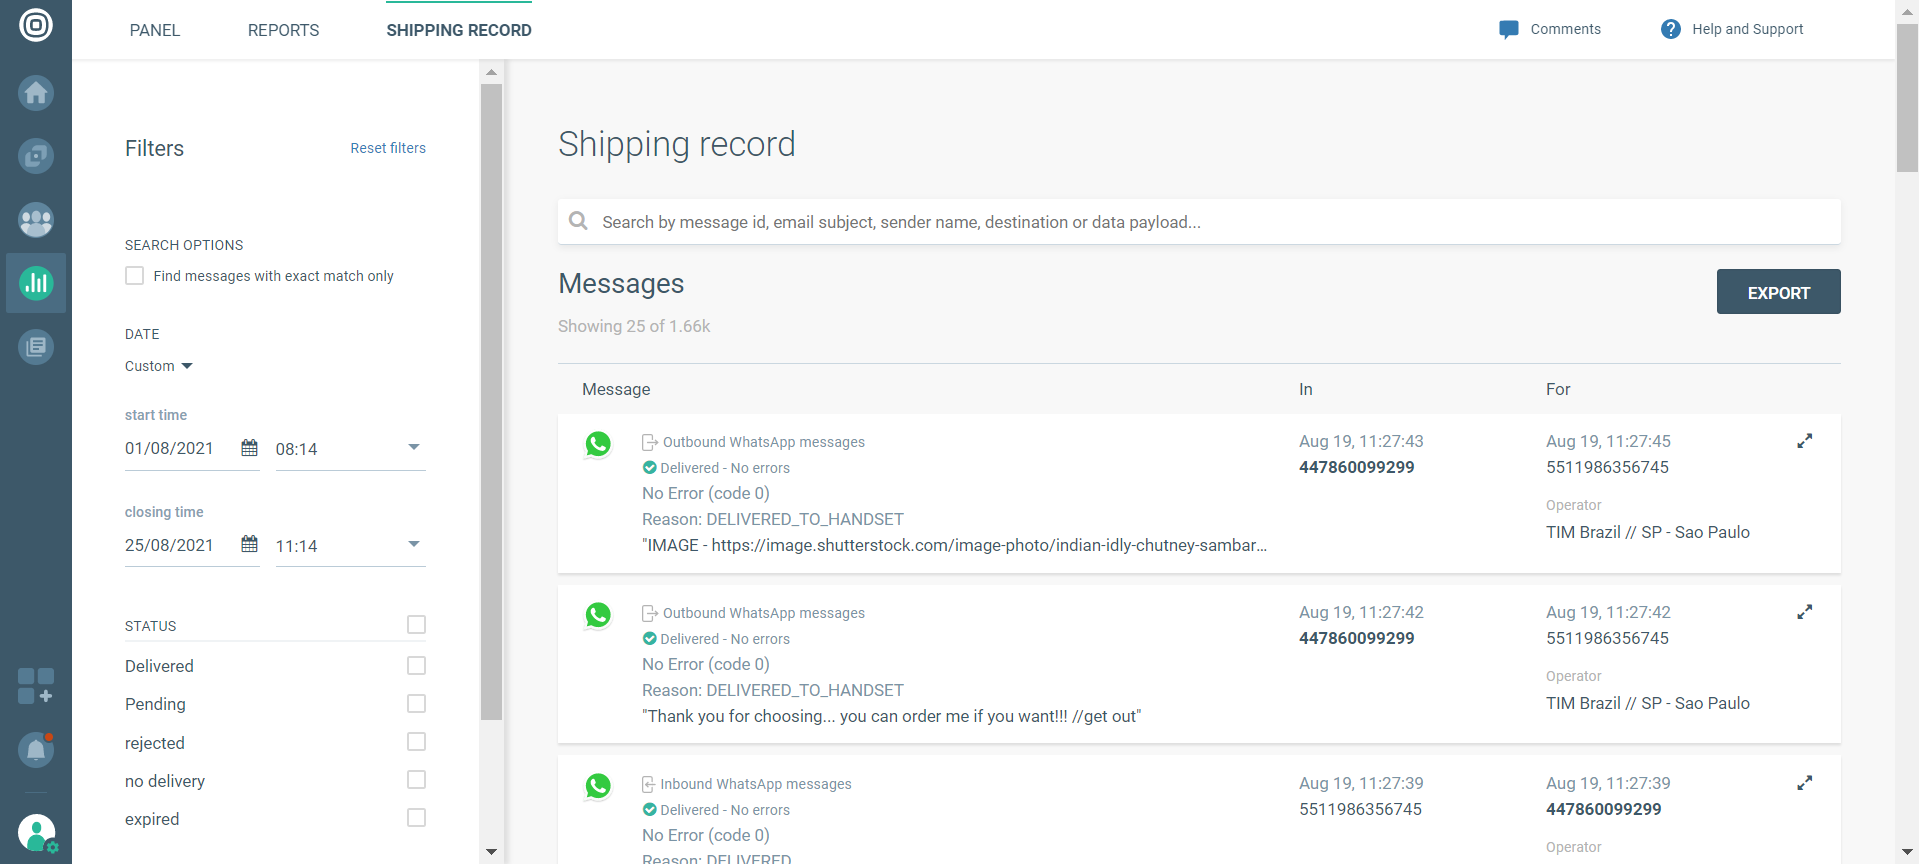
Navigate to Homepage → Applications → Whatsapp.
Under Whatsapp → View Logs, click on View logs.


Under the Shipping Records tab, you can view the details of messages sent and received via Infobip Whatsapp.