This feature helps organize skills and users together to define access to execute skills. For example an HR group will contain all HR skills and all HR users. This ensures that only users in that group can access the HR skills irrespective of the roles. Users in the Finance group will receive a message informing them they do not have access when attempting to execute the HR skills.
An Administrator can create, edit and delete groups to manage skills. Once the groups are created, assigning users to groups helps to allocate skills to a set of users in bulk, instead of assigning them to each user. This helps the Administrator manage which users can execute skills easily. Users can also be part of multiple groups.
Skills Builder includes an out-of-the-box group that contains all the skills and users. This simplifies access by ensuring that everyone has access to the existing skills and any newly created skills. This is called the Default Public Group. The Default Public Group cannot be edited or deleted. An Administrator can associate or disassociate skills to multiple groups. When a skill is assigned to another group, it is removed from the Default Public Group.
Note
- Only existing users and active groups can be associated with the skills.
- If a skill is unassigned from a group or user, it will not become part of the Default Public Group. Instead, it will be available to be assigned to another group or user.
- System type skills are not part of user and group access so that they will be available to all users. Only Custom and ITSM type skills are part of user and group access.
- A group can contain users with multiple roles. Users of that group can execute the skills based on the roles specified in the skills. To learn more, see Creating your First Skill.
Create a Group
An Administrator can create and edit a group. To create a user group:
- On the Settings page, click the Group Management tab.
The Group Management list appears as shown below.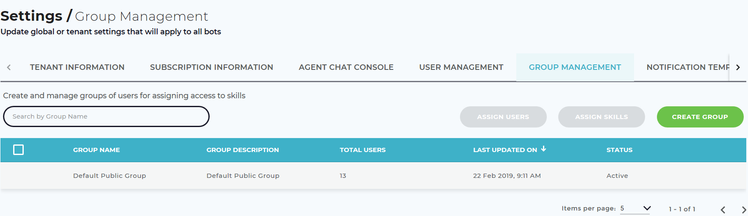
- Click Create Group.
The Create Group pop-up window appears as shown below.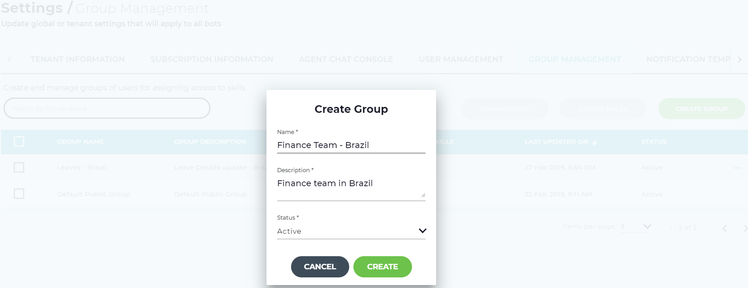
- Enter a unique group Name.
- Enter the group Description.
- By default, the Status is automatically selected as Active.
- Click Create.
The newly created group is now available in the list. The next step is to assign the skills and users to the group.
Assign Skills and Users to a Group
An Administrator can assign users and groups to skills in order to set up more granular access. This feature is helpful if an organization has different departments, locations or business units. Each department may have different policies and software solutions that other regions do not have access to. For example, there can be different set of policies in Brazil and in Chile. When a user based in Brazil chats with Luma, they should only be able to access skills related to Brazil HR and not be able to access skills related to Chile HR policies. Skills can be executed based on the roles defined for the skills and the permissions provided to the role and user. Following is an overview of the different user roles and the permissions available to each role.
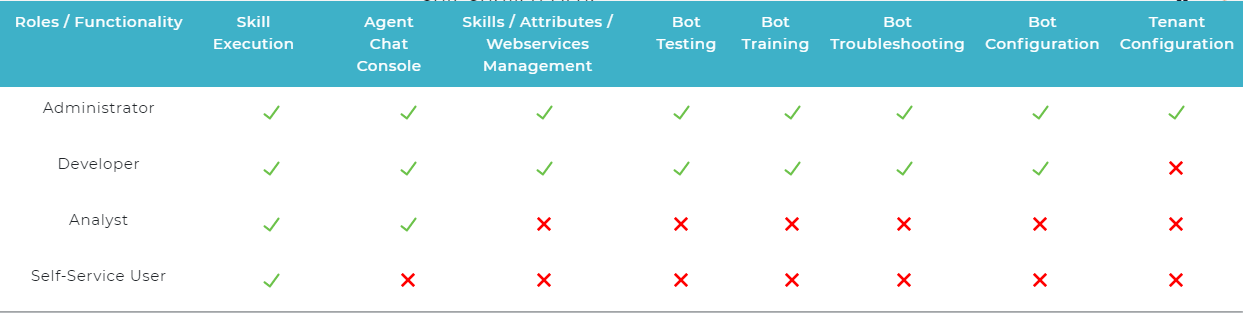
To learn about the various user roles and their respective permission, see Define Roles and Permissions. To assign skills and users to a group:
- In the Group Management list, click the required group as shown below.
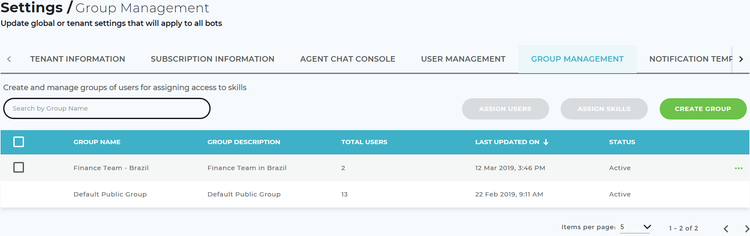
A new page appears, where you can assign the required skills and users to the group as shown below.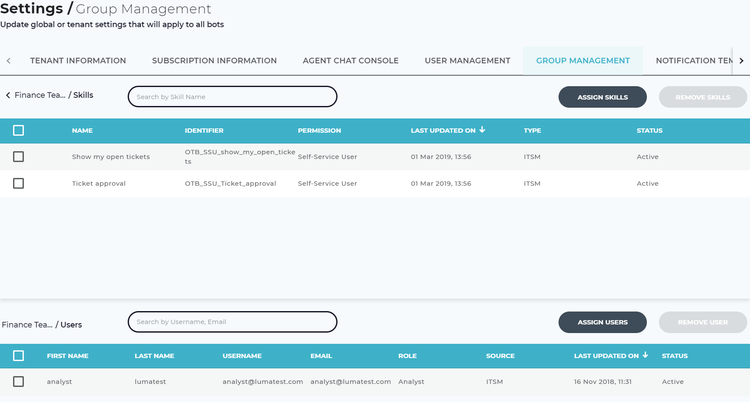
- To assign a single or multiple skills to the group, click Assign Skills.
The Assign Skills pop-up window appears as shown below.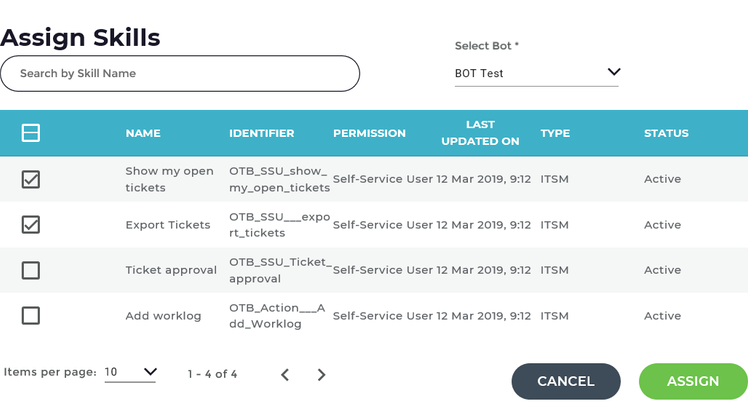
Select the required skill(s) and click Assign.
Note
The Assign Skills list displays all the available skills and the user roles to which the skill can be assigned.
The selected skills are listed in the Skills section.Note
Use the search bar to search the required skill instead of navigating through the list.
- Similarly, to assign the users, click Assign Users in the Users section.
The Assign Users pop-up window appears as shown below.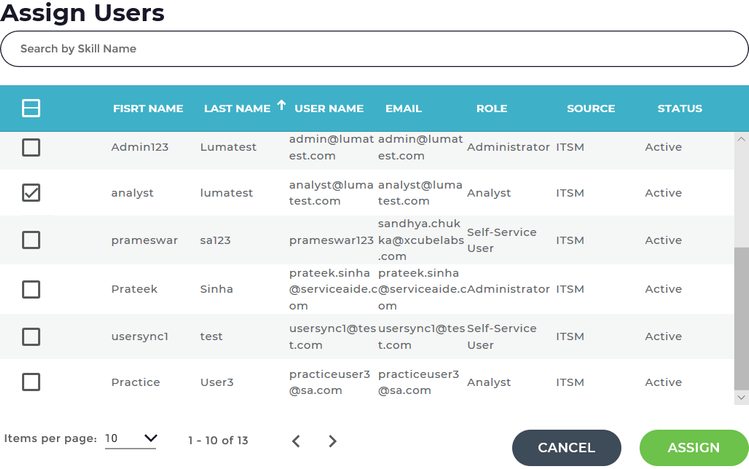
Select the required user(s) and click Assign.
The selected users are listed in the Users section.Note
- Use the search bar to search the required user instead of navigating through the list.
- Only active users are listed for selection.
- Users and skills can be part of multiple groups.
- Once a user or skill is assigned to a group, then the user or skill is no longer available for selection for that group.
Troubleshooting Tips
This section deals with the common errors encountered by users while executing skills if the required user level access or roles are not assigned. If the skills are assigned to a role, but restricted to a user and vice versa, then they cannot execute the skill. For example, if a user is in the Self-Service role and is part of Group A and is assigned 10 skills. If the user tries to execute an 11th skill which is not assigned to Group A or the Default Public Group, then the following response appears "I am sorry you do not have access to execute the skill <skill name>", also shown below:
To resolve the response, Administrator can do the following:
- Obtain the username and the skill name they are having trouble accessing.
- First find the skill and check the permission/role for the skill.
- Next Search for the user in the User Management tab under Settings. If the roles do not align that is why they do not have access.
- Next from the user list open the user to validate their skill access. On the user screen view the Assigned Skills and Derived Skills tabs. If the skill is not in either of those lists they do not have user level or group level access to the skill.
- The final area to validate is the user's group membership as well as the group that the skill is a part of. Navigate to Group Management under Settings and review existing groups and skills within those groups.
Add Comment