Manage Groups
- Reena Wadekar (Deactivated)
- Richard Graves (Deactivated)
Groups are a way to organize users related to a department, region or topic area. This feature helps organize skills and users together to define access to execute skills. Groups in Luma allow for simple assignment of skill permissions as well as for managing groups of support Agents. Groups of support agents are used for the transfer to agent processing and ensuring the user's request goes to the right subject matter experts. For example, a user requesting assistance with Human Resources issues should be directed to the HR group as it contains agents that are experts in that area. Groups can be created to only manage skill permissions, or only to transfer to an agent or both. Once the groups are created, assigning users to groups helps to allocate skills to a set of users in bulk, instead of assigning them to each user. This helps the Administrator manage which users can execute skills easily. Users can also be part of multiple groups.
Note
- Only existing users and active groups can be associated with the skills.
- If a skill is unassigned from a group or user, it will not become part of the Default Public Group. Instead, it will be available to be assigned to another group or user.
- System type skills are not part of user and group access so that they will be available to all users. Only Custom and ITSM type skills are part of user and group access.
- A group can contain users with multiple roles. Users of that group can execute the skills based on the roles specified in the skills. To learn more, see Creating your First Skill.
Create Group
A user can be part of multiple groups. Default Public Group and Default Support Group are the two out-of-the-box groups. By default, all the users are part of the Default Public Group. This simplifies access by ensuring that everyone has access to the existing skills and any newly created skills. The Default Public Group cannot be edited or deleted. When a skill is assigned to another group, it is removed from the Default Public Group. Analysts, developers and administrators are part of the Default Support Group. If custom groups are not created, then the agent chat requests are automatically directed to the Default Support Group.
Note
When a group is created to transfer a request to an agent, then only users with an agent or a higher-level role can be added. Self-service users can be added to the group.
To create a new group, do the following:
- On the Settings menu,
 click the Group Management tab.
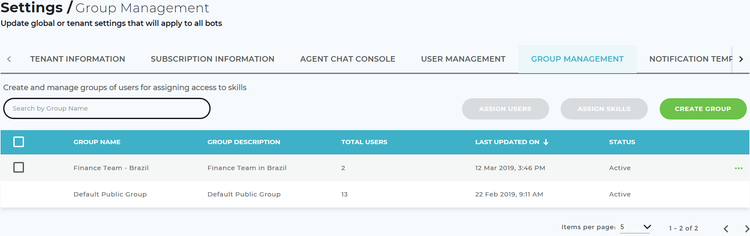
The Group Management page appears as shown below.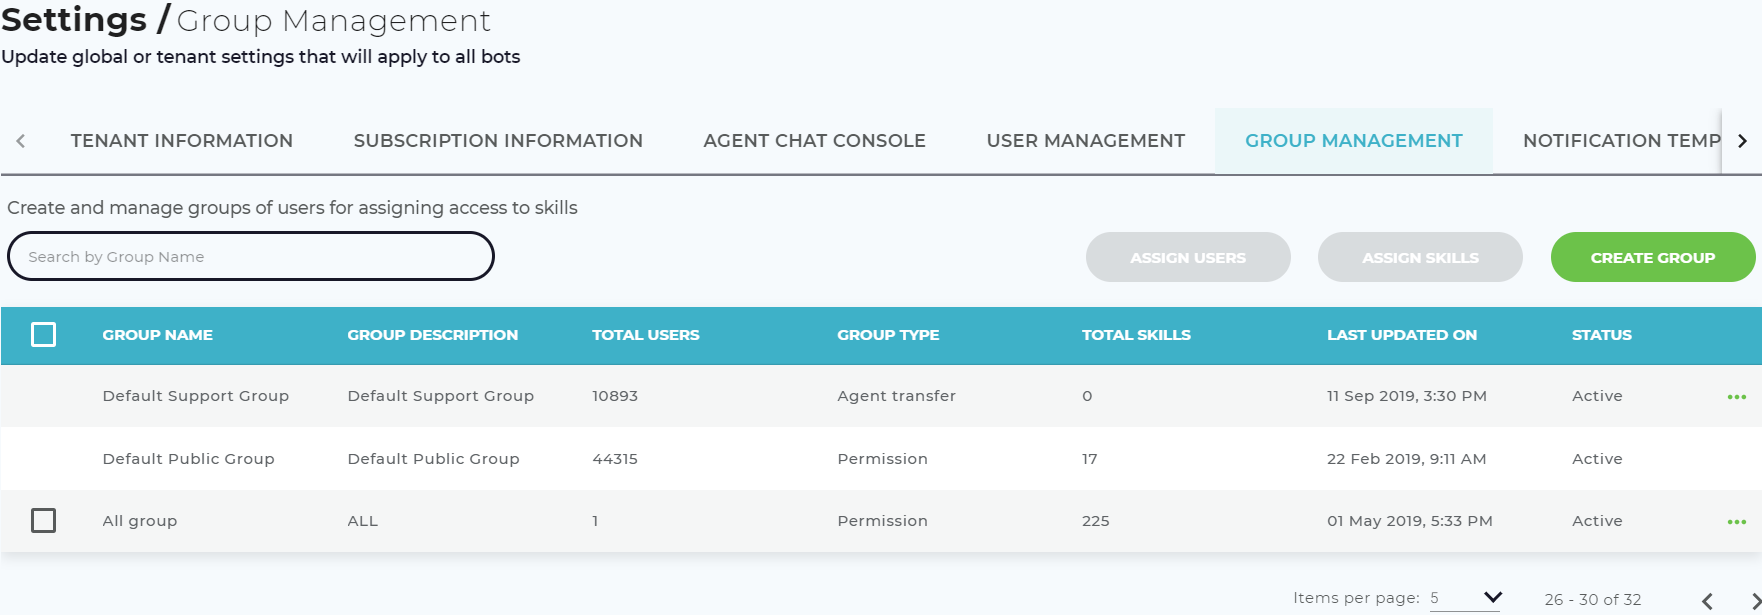
- Click Create Group.
The Create Group page appears as shown below.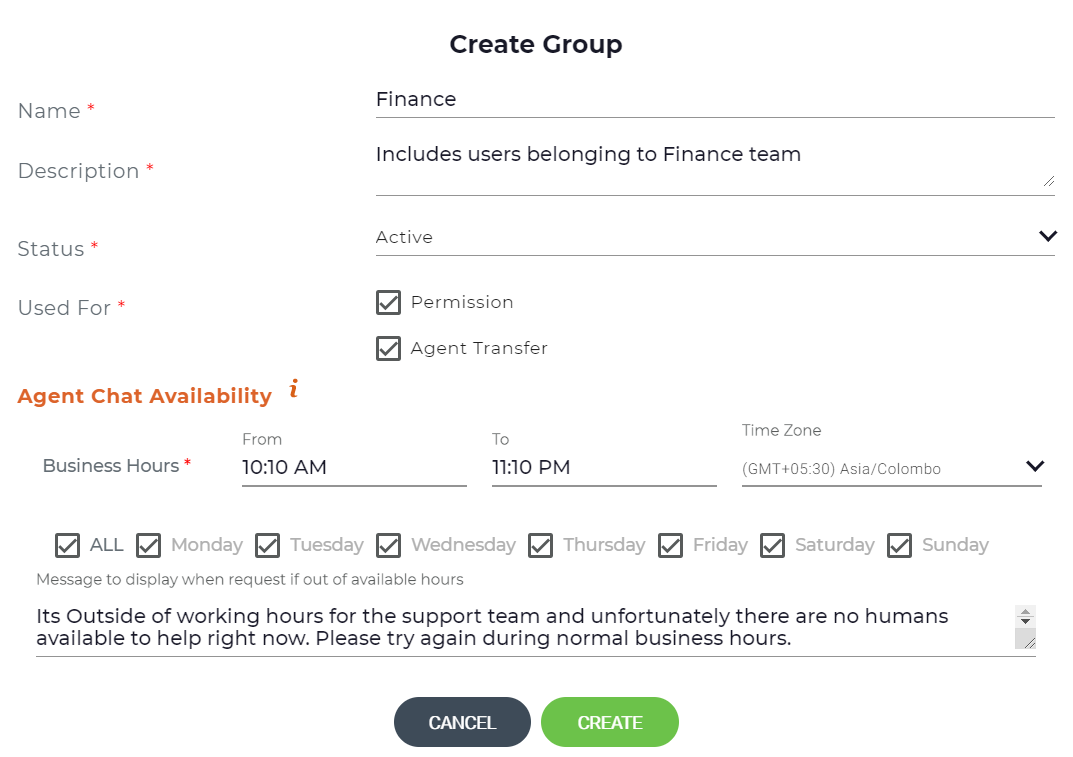
- Enter the group Name.
- Provide a Description to the group.
Select the group Status.
Note
- If the group status is set to inactive, then the group will not be displayed when a user selects the transfer to an agent option.
- In case of skills, if a group is set as inactive, then the skills associated to the group cannot be executed by the group members.
Select the purpose for creating the group in the Used For field.
Note
- If you select the Used For option as Permission, and the status is set to active, then all the skills assigned to that group can be executed by the group members.
- If you select the Used For option as Agent Transfer, and the status is set to active, then users can select the group during agent transfer process.
- If you select the Used For option as Permission and Agent Transfer, and the status is set to active, then the skills can be assigned to that group, as well as the group can be selected during transfer to agent process.
- You can select Permission, Agent Transfer or both.
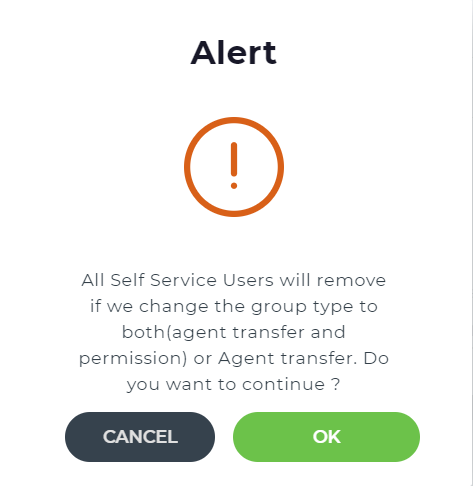
- If an existing permission group has self-service users in it, and if the Group Type is changed to both (agent transfer and permission) or agent transfer, then all the self-service users will be removed from the group. The following alert message appears stating the same.
- If an existing permission group has self-service users in it, and if the Group Type is changed to both (agent transfer and permission) or agent transfer, then all the self-service users will be removed from the group. The following alert message appears stating the same.
Agent Chat Availability
Specify the group business hours when support analysts will be available to chat with the end users. Select the From time, To time, Time Zone and the working days. The default operating hours is set to 24 hours, which can be changed. The end user will also be able to see the estimated wait time in the Agent Chat Console wait queue. This provides the user with visibility on how long they should expect to wait for an agent so that they can make a decision to wait or exit. The estimated wait time is calculated by the previous seven days average wait time (it is the sum of time taken for each agent chat request to be accepted divided by the total number of chat requests accepted). You can also customize the message to be shown to the end users when the chat request is outside the available business hours.
Click Create to create the user group.
Assign Skills and Users to a Group
An Administrator can assign users and groups to skills in order to set up more granular access. This feature is helpful if an organization has different departments, locations or business units. Each department may have different policies and software solutions that other regions do not have access to. For example, there can be different set of policies in Brazil and in Chile. When a user based in Brazil chats with Luma, they should only be able to access skills related to Brazil HR and not be able to access skills related to Chile HR policies. Skills can be executed based on the roles defined for the skills and the permissions provided to the role and user. Following is an overview of the different user roles and the permissions available to each role.
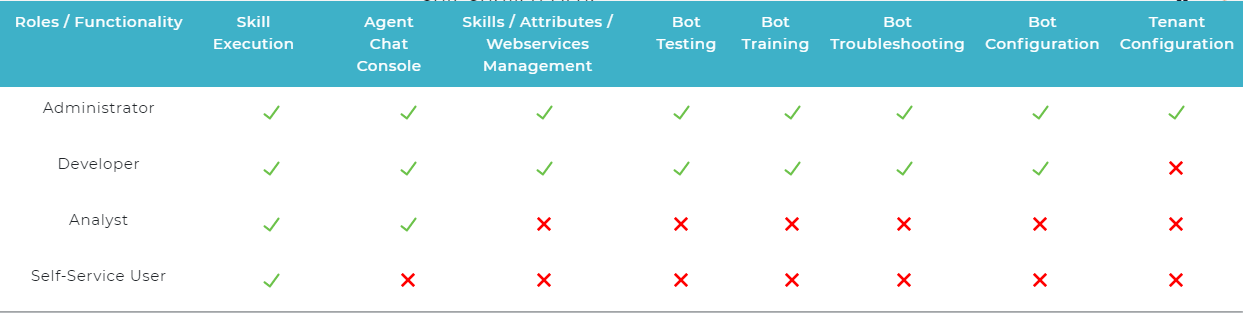
To learn about the various user roles and their respective permission, see Define Roles and Permissions. To assign skills and users to a group:
- In the Group Management list, click the required group as shown below.
A new page appears, where you can assign the required skills and users to the group as shown below.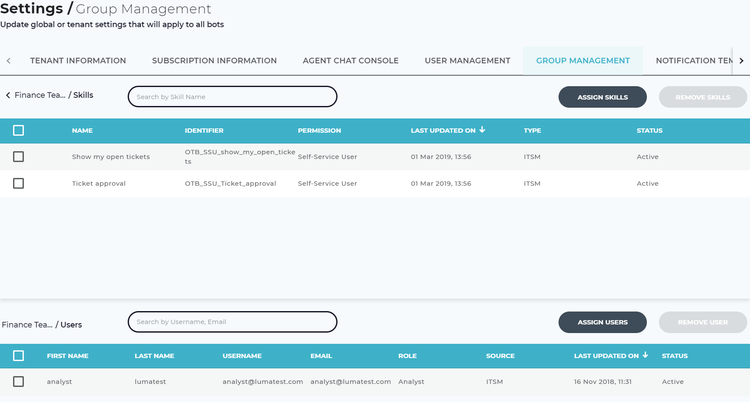
- To assign a single or multiple skills to the group, click Assign Skills.
The Assign Skills pop-up window appears as shown below.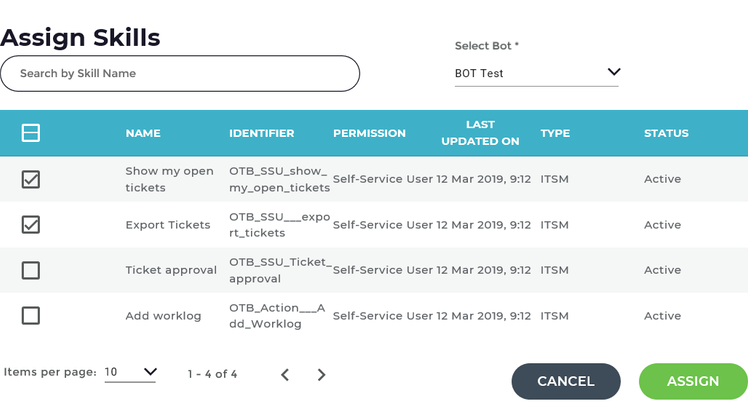
Select the required skill(s) and click Assign.
Note
The Assign Skills list displays all the available skills and the user roles to which the skill can be assigned.
The selected skills are listed in the Skills section.Note
Use the search bar to search the required skill instead of navigating through the list.
- Similarly, to assign the users, click Assign Users in the Users section.
The Assign Users pop-up window appears as shown below.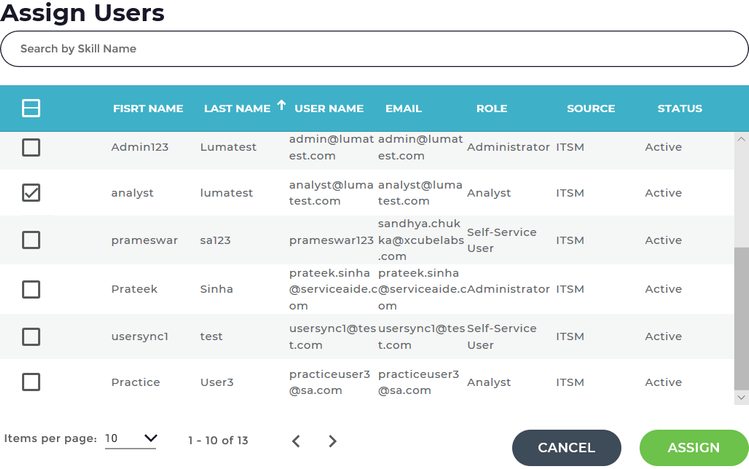
Select the required user(s) and click Assign.
The selected users are listed in the Users section.Note
- Use the search bar to search the required user instead of navigating through the list.
- Only active users are listed for selection.
- Users and skills can be part of multiple groups.
- Once a user or skill is assigned to a group, then the user or skill is no longer available for selection for that group.
Transfer to Agent
During the business hours, when the user requests to be transferred to an agent, the following message appears.
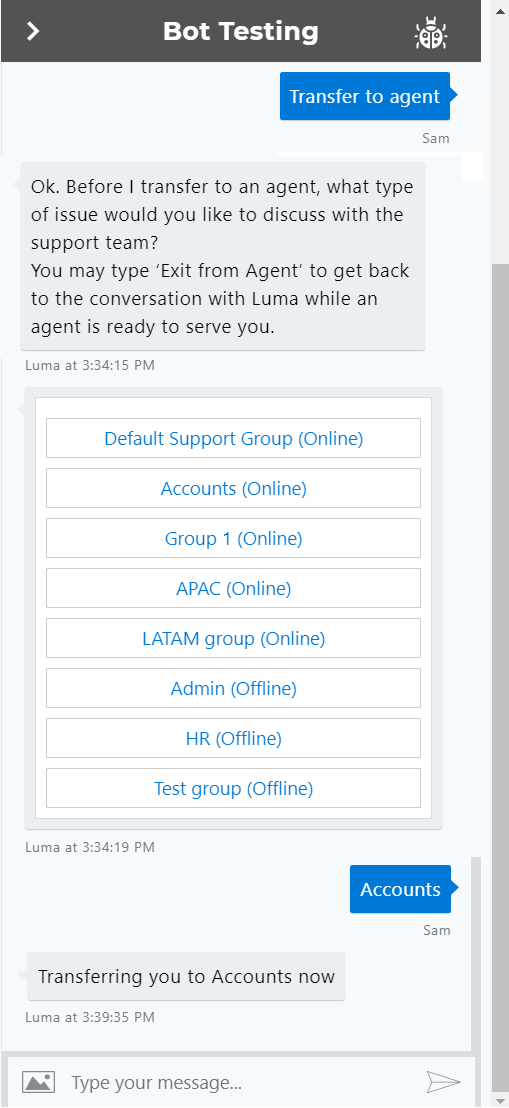
The end user can view whether the agent group is online and available to receive the chat request or is offline.
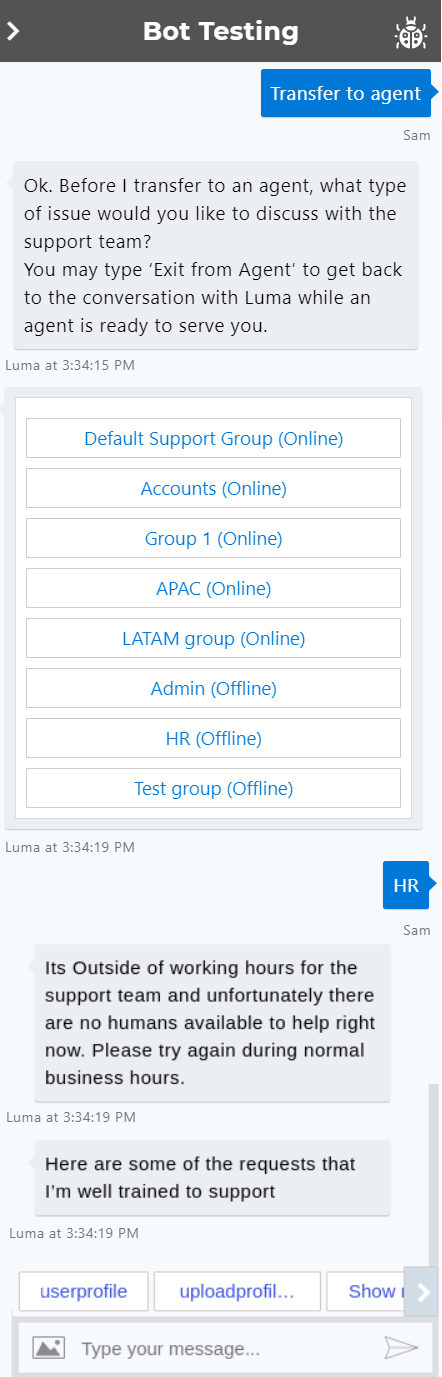
If the user requests to be transferred to a group outside their working hours, then the following message appears.
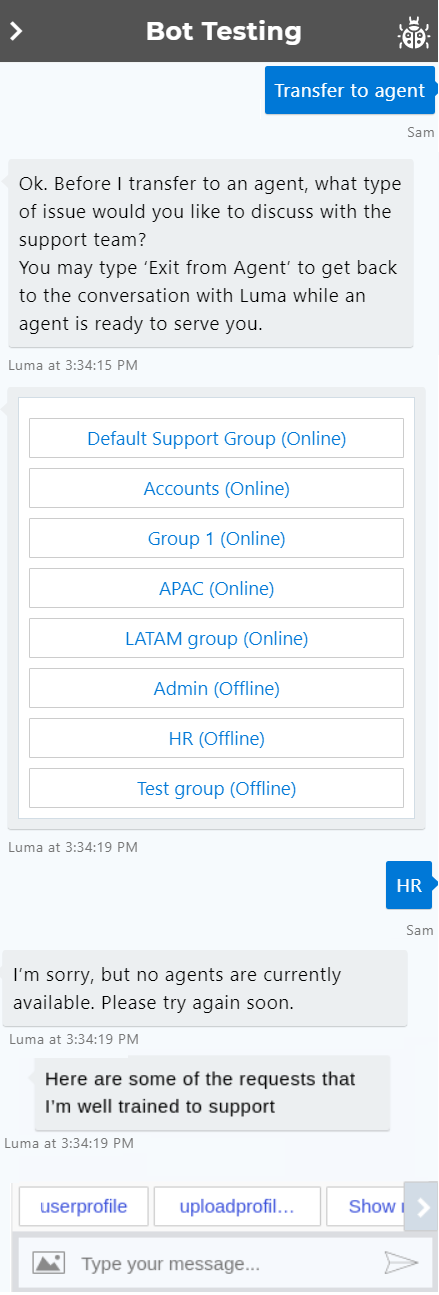
If the user requests to be transferred to a group when the group is offline (no agents currently online), then the following message appears.
Troubleshooting Tips
This section deals with the common errors encountered by users while executing skills if the required user level access or roles are not assigned. If the skills are assigned to a role, but restricted to a user and vice versa, then they cannot execute the skill. For example, if a user is in the Self-Service role and is part of Group A and is assigned 10 skills. If the user tries to execute an 11th skill which is not assigned to Group A or the Default Public Group, then the following response appears "I am sorry you do not have access to execute the skill <skill name>", also shown below:
To resolve the response, Administrator can do the following:
- Obtain the username and the skill name they are having trouble accessing.
- First find the skill and check the permission/role for the skill.
- Next Search for the user in the User Management tab under Settings. If the roles do not align that is why they do not have access.
- Next from the user list open the user to validate their skill access. On the user screen view the Assigned Skills and Derived Skills tabs. If the skill is not in either of those lists they do not have user level or group level access to the skill.
- The final area to validate is the user's group membership as well as the group that the skill is a part of. Navigate to Group Management under Settings and review existing groups and skills within those groups.
Related content
© 2019 Serviceaide 1-650-206-8988 http://www.serviceaide.com info@serviceaide.com