SOAP Integrations
- Bhavani.tvr (Unlicensed)
- sneha.tripathi
SOAP ( Simple Object Access Protocol) is a message protocol that allows applications running on different operating systems and with different technologies, to communicate with each other. It is an XML-based protocol for exchanging information between applications using Web Services. SOAP messages are written entirely in XML and are therefore platform and language independent.
Luma Virtual Agent supports SOAP protocol to interface with 3rd party applications.
Create App
To create an app:
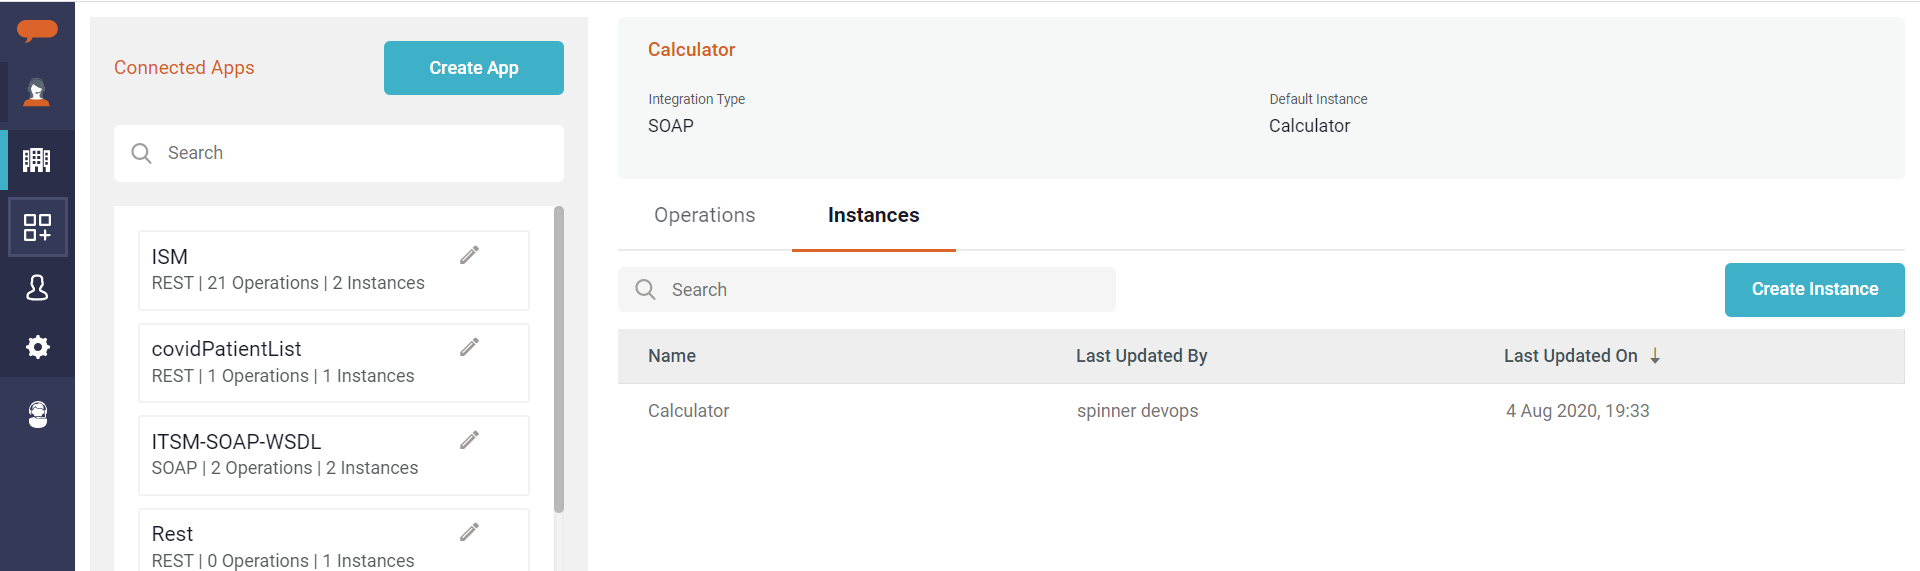
- On the Tenant menu, click Integrations. The Connected Apps page appears as shown below.
Here we can set up an integration between Luma and a 3rd party system. Once the Connected App is created, the next step is to create the App Instance and the respective web service operations.
- Click Create App to create a new app.
The Create App page appears as shown below.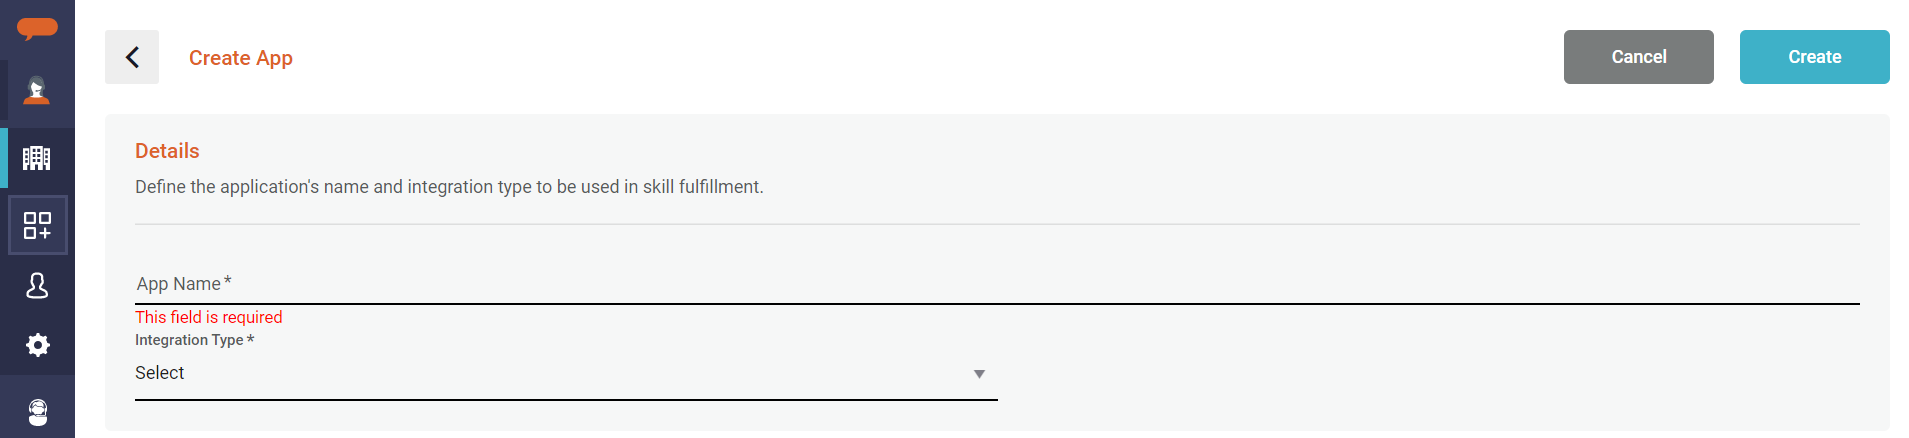
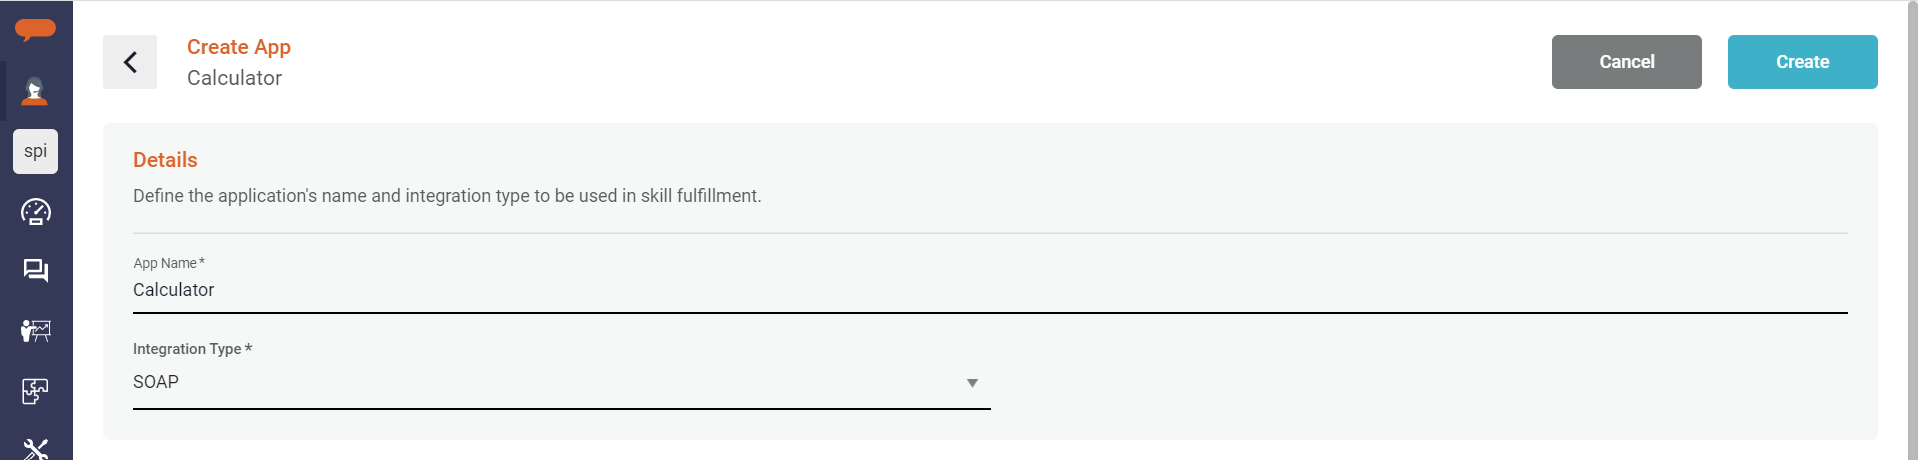
Details:
- Enter the App Name.
- Select the Integration Type as SOAP
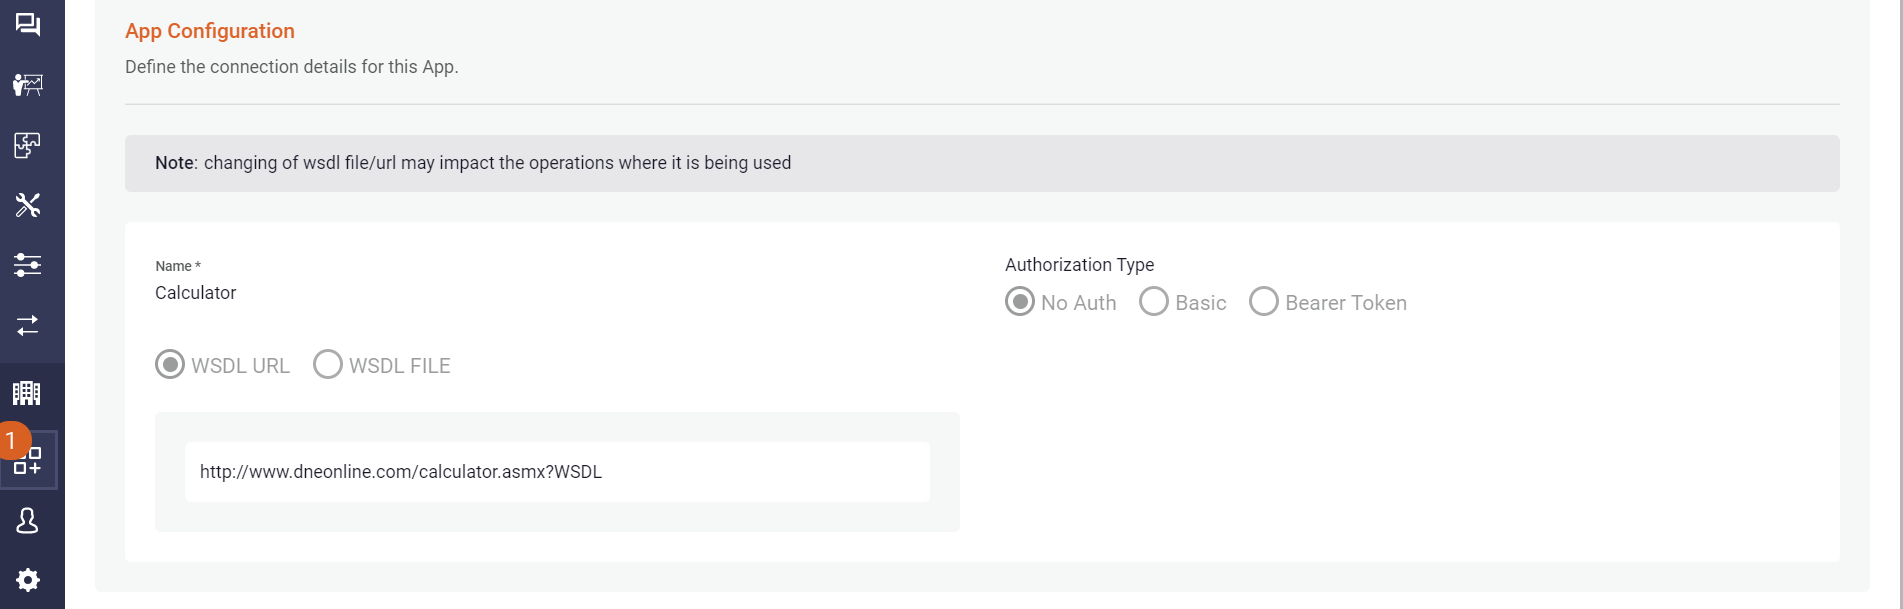
App Configuration: The following are the list of details to be configured.
- Enter the App Name
- Select WSDL URL or WSDL Filename
- Enter WSDL URL WSDL URL Name OR WSDL Filename
- Authorization Type :
- No Auth: Use this option, if you do not need any authentication to log in to the third-party systems.
- Basic Auth: Use this option to authenticate the external applications to interact with the Luma tenant. Basic auth consists of the following fields:
- Username: Specify the Username. Luma uses it as an authentication username to login to third-party systems.
- Password: Specify the Password. Luma uses this password while authenticating to the third-party system.
- Authorization Header Name: By default the Authorization Header Name is specified as Authorization by Luma.
- Bearer Token: This is the unique authentication token required for external applications to communicate with the Luma API.
- Click Create to complete the app creation.
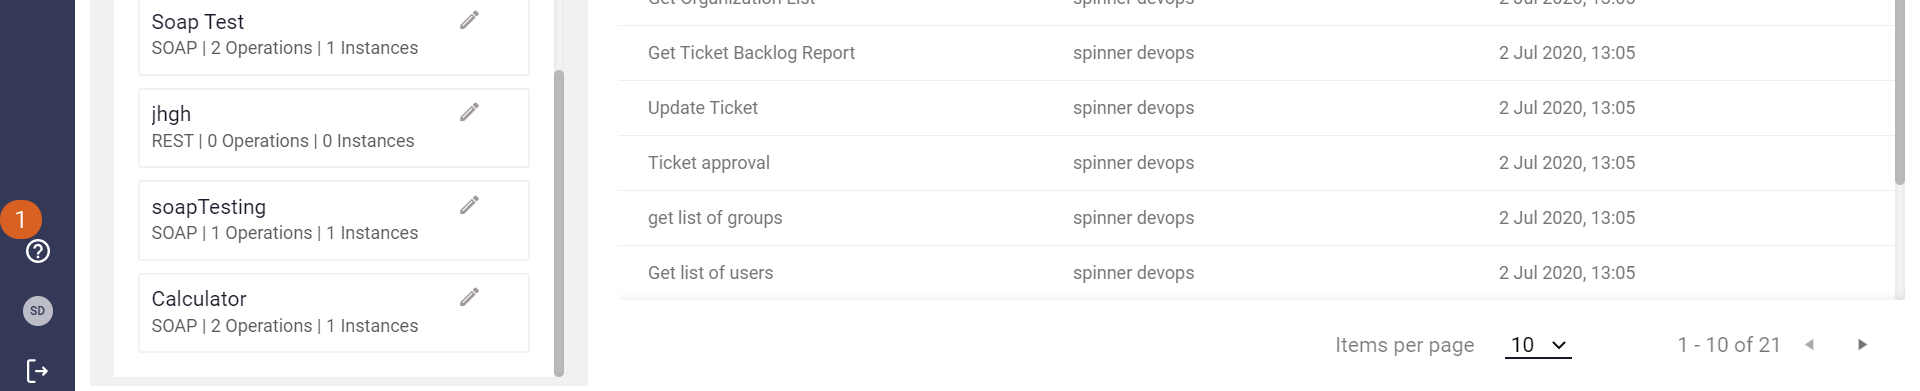
The created app is available in the Connected Apps list. The next step is to create an instance.
If the 3rd party application requires different WSDL URLs or Files to connect to different environments or modules, you can add Multiple WSDL Files or URLs with authentication details.
Create Instance
Once the App is created, you need to create the App Instance. In the case of SOAP integration type, you may provide Request Configuration (Global Headers) at the App instance-level that is common for all Web Service Operations created for the application.
To create an instance:
- On the Connected Apps page, click Create Instance as shown below.
- The Create Instance page appears.
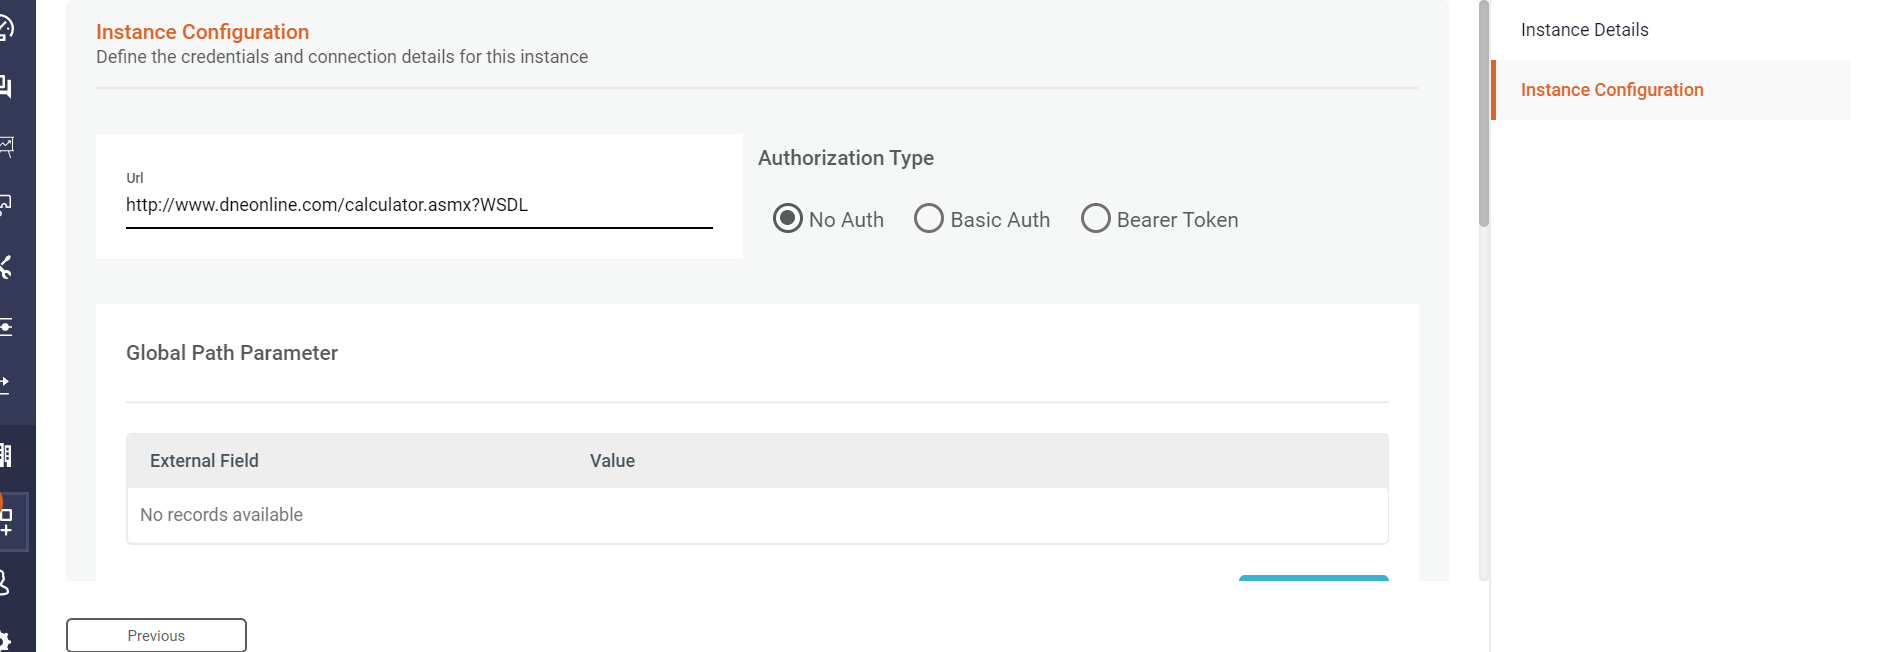
- Enter the instance Name and Description. The next step is to define the credentials and connection details for this instance.

- Add Instance configuration details:
Enter the base URL to which Luma needs to connect.
The Authorization Type is used by Luma to login and perform the specified operations as part of the Web Service operation. Luma supports the following authorizations types:
- No Auth: Use this option, if you do not need any authentication to log in to the third-party systems.
- Basic Auth: Use this option to authenticate the external applications to interact with the Luma tenant. Basic auth consists of the following fields:
- Username: Specify the Username. Luma uses it as an authentication username to login to third-party systems.
- Password: Specify the Password. Luma uses this password while authenticating to the third-party system.
- Authorization Header Name: By default the Authorization Header Name is specified as Authorization by Luma.
- Bearer Token: This is the unique authentication token required for external applications to communicate with the Luma API. Bearer token consists of the following fields:
- Authorization Header Name: By default the Authorization Header Name is specified as Authorization by Luma.
- Token: Enter the unique authentication token required for external applications to communicate with the Luma API.
Click Create to create the app instance.
The first instance that you add is considered as the default instance.
Create Operations
Once the application and instance are created, you can create the required operations to be executed with the integrating system. An operation defines the task you need to perform as part of the skill.
To create an operation:
- On the Connected Apps page, click Create Operation as shown below.
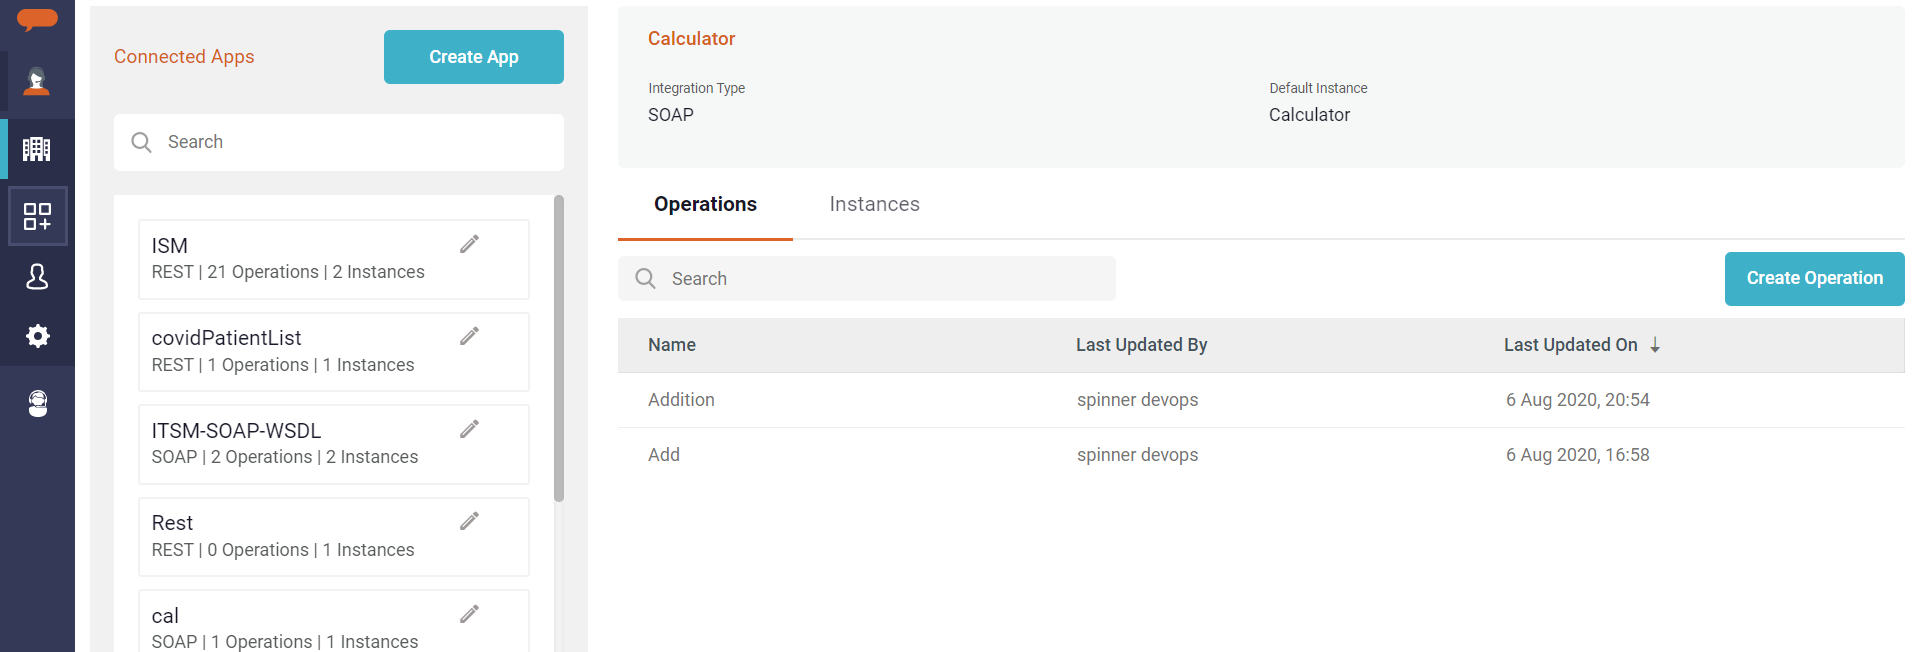
- The Create Operation page appears.
- On the Operation Details tab, add operation details:
- Enter the Operation Name.
- Select one of the WSDL added for the application.
- Select the Binding method. Binding methods are automatically populated based on selected WSDL
- Select the operation. The system automatically displays the Supported Operations for the selected WSDL and Binding method
- Specify the operation Timeout (in milliseconds). This is the amount of time to wait for a web service response when invoking an outbound request. The default value is 10000 milliseconds, 10 seconds, the minimum value is 1000 milliseconds and the maximum allowed value is 3 mins, 180000 milliseconds.
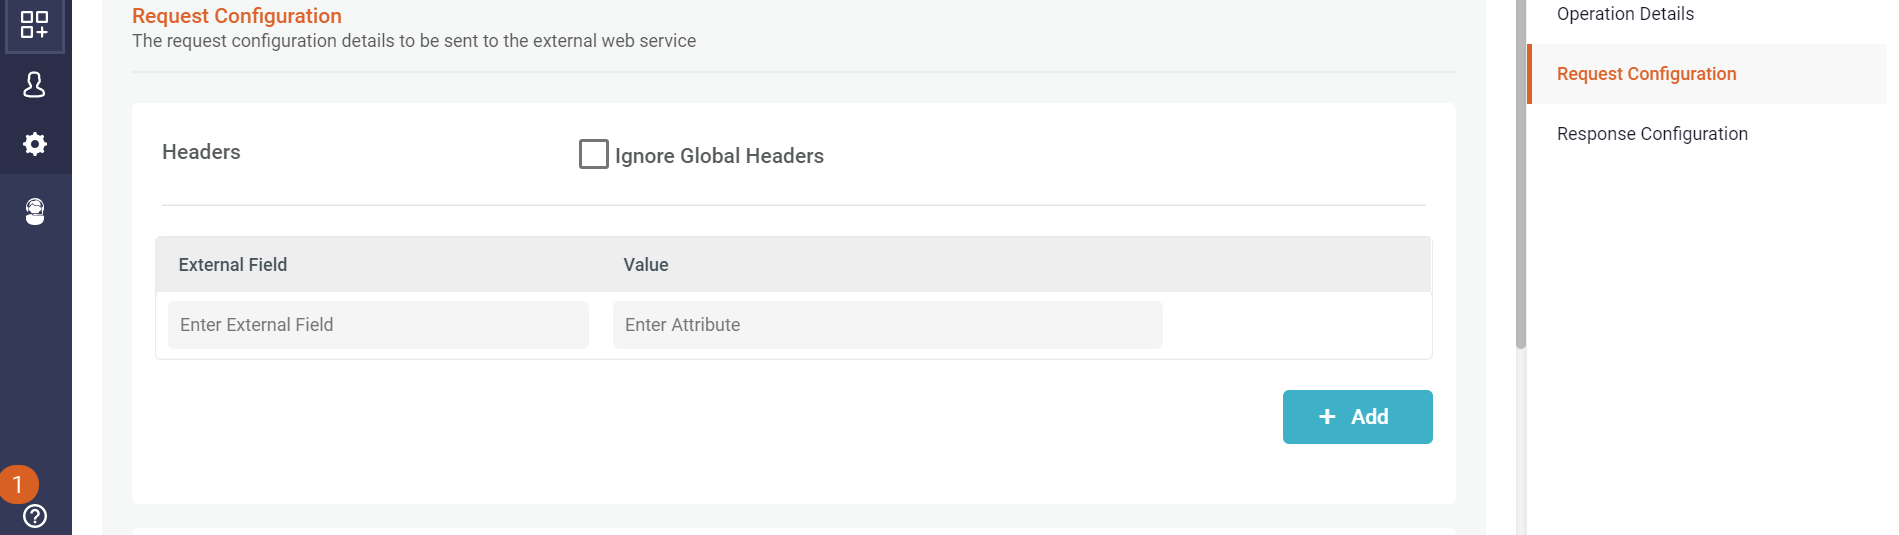
- Click Next to specify the Request Configuration details. The Request Configuration page appears as shown below.
- Headers: Headers are mostly classified as request headers. You will have to set the request headers when you are sending the request. The headers specified at instance level are automatically populated. You can overwrite the configuration defined at the instance level or continue using the same
- Ignore Global Header: If you need to overwrite the configuration defined at the instance level, select Ignore Global Headers and you can add the operation-specific variable and values.
- Enter the External Field and the Value.
- Enter the External Field and the Value.
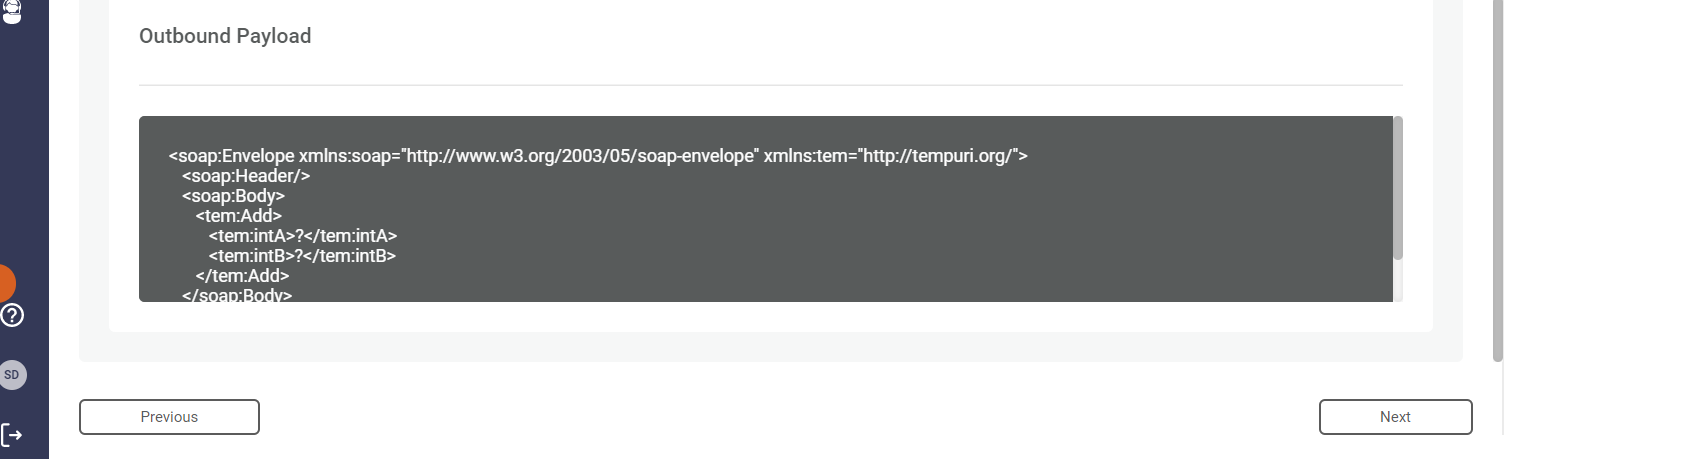
- Outbound Payload: Request payload that should be passed to the external application.. Form Data is the default encoding a web form uses to transfer data. The text box area accepts simple key-value pairs and complex/nested JSON.
- Click Next to create the Response Configuration. The Response Configuration section is used to process the data or response received from the external web service.
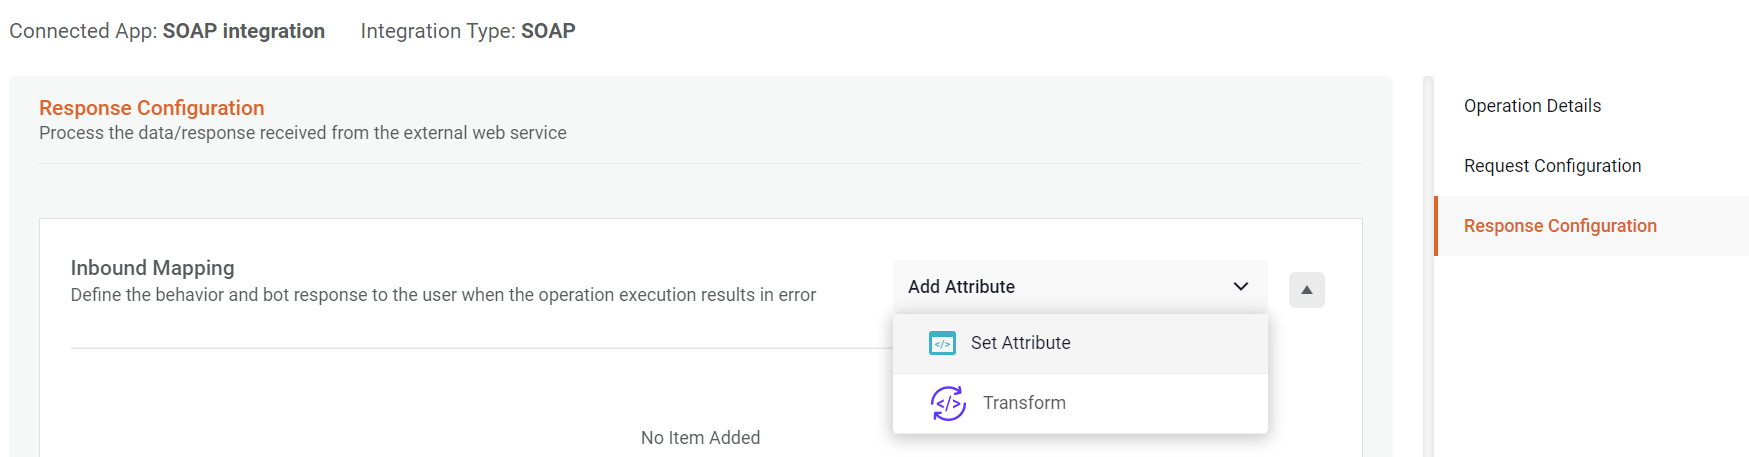
- Inbound Mapping: In this section, you may transform the data that is received as a response and assign it to Local, Global, and Custom user attributes. . This data in turn can be used in skill building such as third-party operations, evaluation of rules, defining bot responses, assigning values to the user custom attributes. There are two ways of setting up attributes.
- Set Attribute: This is used to store information in an attribute. Select Set Attribute .
- Transform: Transform functions are used when the information received from the integration must undergo conversion before it is used in an operation or in the Skill.
For example, extracting the Ticket number from the Ticket identifier received from an ITSM system and providing it to a customer. Luma provides a range of Transformation functions to allow skill developers to manipulate the data as required such as Split, Trim, Substring, Replace, Custom Date-Time, etc.
To set Inbound mapping, follow the below steps:- Add Expression Type and Expression: These represent the type (Value or JSON) and the location path of the value to be assigned to attribute
- Use Expression Type → Value when a value is to be assigned to the attribute e.g. @{response.body}, @{response.code}.
- Use Expression Type → JSONPath when a value from the received JSON response is to be assigned to the attribute e.g. Expression points to a JSON path
- Use Expression Type → Indirect JSONPath when a value from a JSON type attribute is to be assigned to the attribute e.g. Expression points to an attribute that holds a JSON path e.g. @{local.items}→$.[*].TicketIdentifier
- Use Expression Type → XPath when a value to be assigned to the attribute i.e. Expression points to a Path e.g. //AddResponse/AddResult
- Set Output to Attribute: This is used to store the data.
- Scope: Represents the scope of the attribute to be used to hold the inbound values
- Use Global to assign value to a Global attribute to be used in the skill. Though the attributes are available for other skills to use, the value is retained during the skill execution.
- Use Local to create and set the value to a local attribute. These attributes are only valid and available during skill execution. The local variable value is retained between the prompts and is used to pass data between multiple integrations, user messages, or rules. If used after a bot response, the value in the Local attribute is lost.
- Use User Custom to assign value to a User Custom Attribute. These attributes retain values assigned unless overwritten.
- Attribute: This is the name of the attribute
- Data Type: Represents the data type of the value. Integer, Long, Boolean, etc
- Scope: Represents the scope of the attribute to be used to hold the inbound values
To use the Transformation function use Transform in Set Attribute. For more information on how to use Transform functions, refer Transformation functions
- When an Operation is added to the Conversation Flow of a skill, Local attributes created in the Operations can be used to build the skill. A local attribute can be referred to as @{local.<Attribute identifier>}
- Use XML type attributes to store XML data received from Integration. To refer to a list/array of values in an XML path, use the LIST type attribute.
- INDIRECT JSONPATH & INDIRECT XPATH expression can be used to assign values to JSON and XML type attributes.
- Add Expression Type and Expression: These represent the type (Value or JSON) and the location path of the value to be assigned to attribute
- Error Handling: This section is used to define the behavior and bot response to the user when the operation execution results in an error. You can create multiple rules handling errors from web service operations.
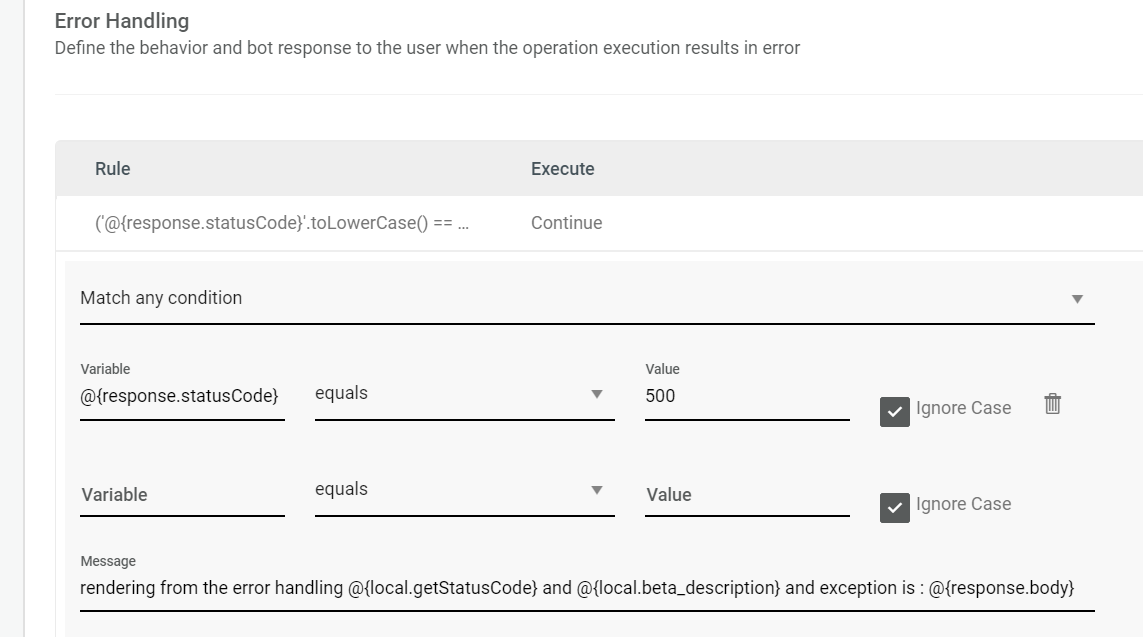
- Select one of the following options to define a rule to send the error message. The error message will be sent only if the specified conditions are validated:
- Match any conditions below: one of the specified conditions must match to parse the error message.
- Match all conditions below: all the conditions specified must be validated to parse the error message.
- Define custom criteria: you can define your custom criteria based on the given conditions to parse the error message if validated.
For example, 1 and 2 or 3. 1st and second conditions must match or only the third condition must match. You can enter only numbers, and, or, (,)
Specify @response.StatusCode in the Key field followed by an operator. The following are the list of supported operators,- Equals
- Does not Equals
- Is Greater than
- Is Greater than or Equal to
- Is Less than
- Is Less than or Equal to
- Begins with
- Does not Begin with
- Ends with
- Does not end with
- Contains
- Doesn't Contain
- is Empty
- Is not Empty
- matches pattern
- No data Handling: This section is used to define the behavior and bot response to the user when the operation execution returns no data. You can create multiple rules handling no data scenarios from web service operations. Follow the API return values of external systems from which you receive the data and correspondingly write/evaluate the values inside the Rules/conditions section.
- Success Handling: This section is used to define the behavior and bot response to the user when the operation execution succeeds. Create multiple rules handling success from web service operations.
- Inbound Mapping: In this section, you may transform the data that is received as a response and assign it to Local, Global, and Custom user attributes. . This data in turn can be used in skill building such as third-party operations, evaluation of rules, defining bot responses, assigning values to the user custom attributes. There are two ways of setting up attributes.
Edit App
To edit an app:
- On the Tenant menu, click Integrations.
- All the Connected Apps are listed as shown below where the option to edit is available.
- Click on the Edit button
 . The Connected App page appears.
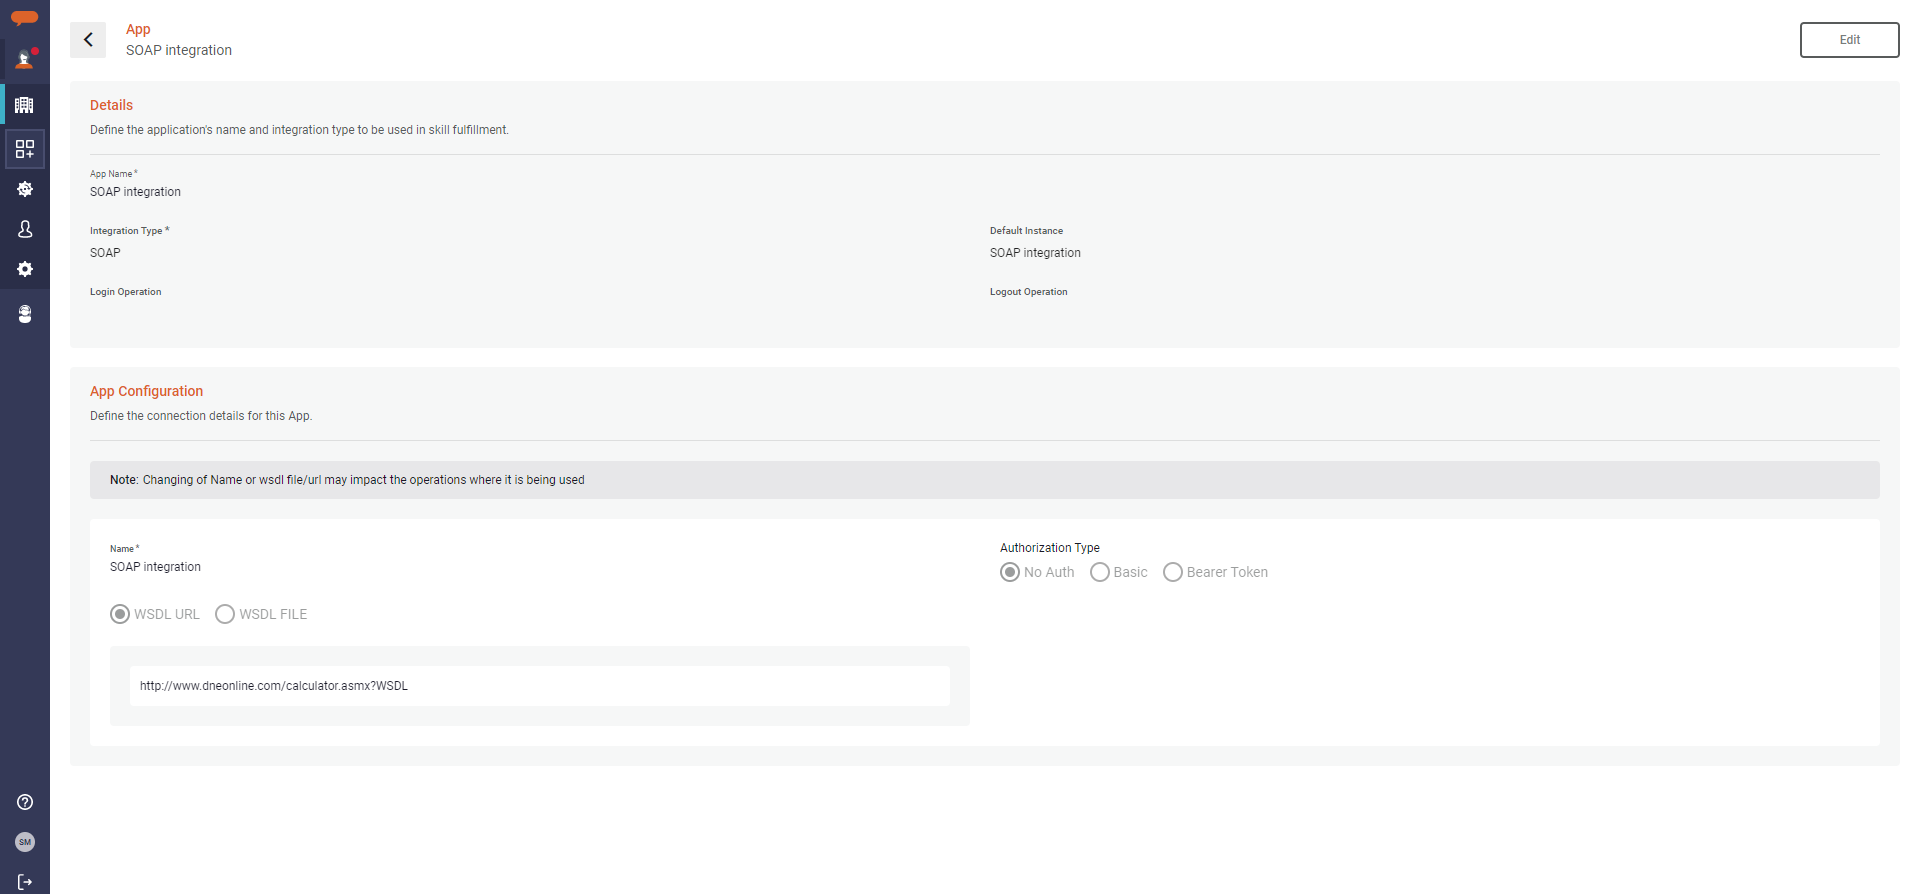
- Here we can edit the details like Integration Type, Default Instance, Login operation, and Logout Operation.
The Login and Logout operations are useful when a functionality/operation requires a pre-login and post-logout condition.
For example, the login and logout operation can be used for session control. When executing an operation through a skill the login operation would generate a token and reserve the session. Upon completion of the task, the log-out operation will release the session. This ensures optimal utilization of sessions allocated to the API user.
Once the required operations are selected click on Update to save the changes.
© 2019 Serviceaide 1-650-206-8988 http://www.serviceaide.com info@serviceaide.com