REST Integrations
- sneha.tripathi
A RESTFUL API is an application program interface (API) that uses HTTP requests to GET, PUT, POST, and DELETE data across multiple applications. Each URL is called a request while the data sent back to you is called a response.
Luma supports REST APIs to connect/interface with other 3rd party applications.
Create App
To create an app:
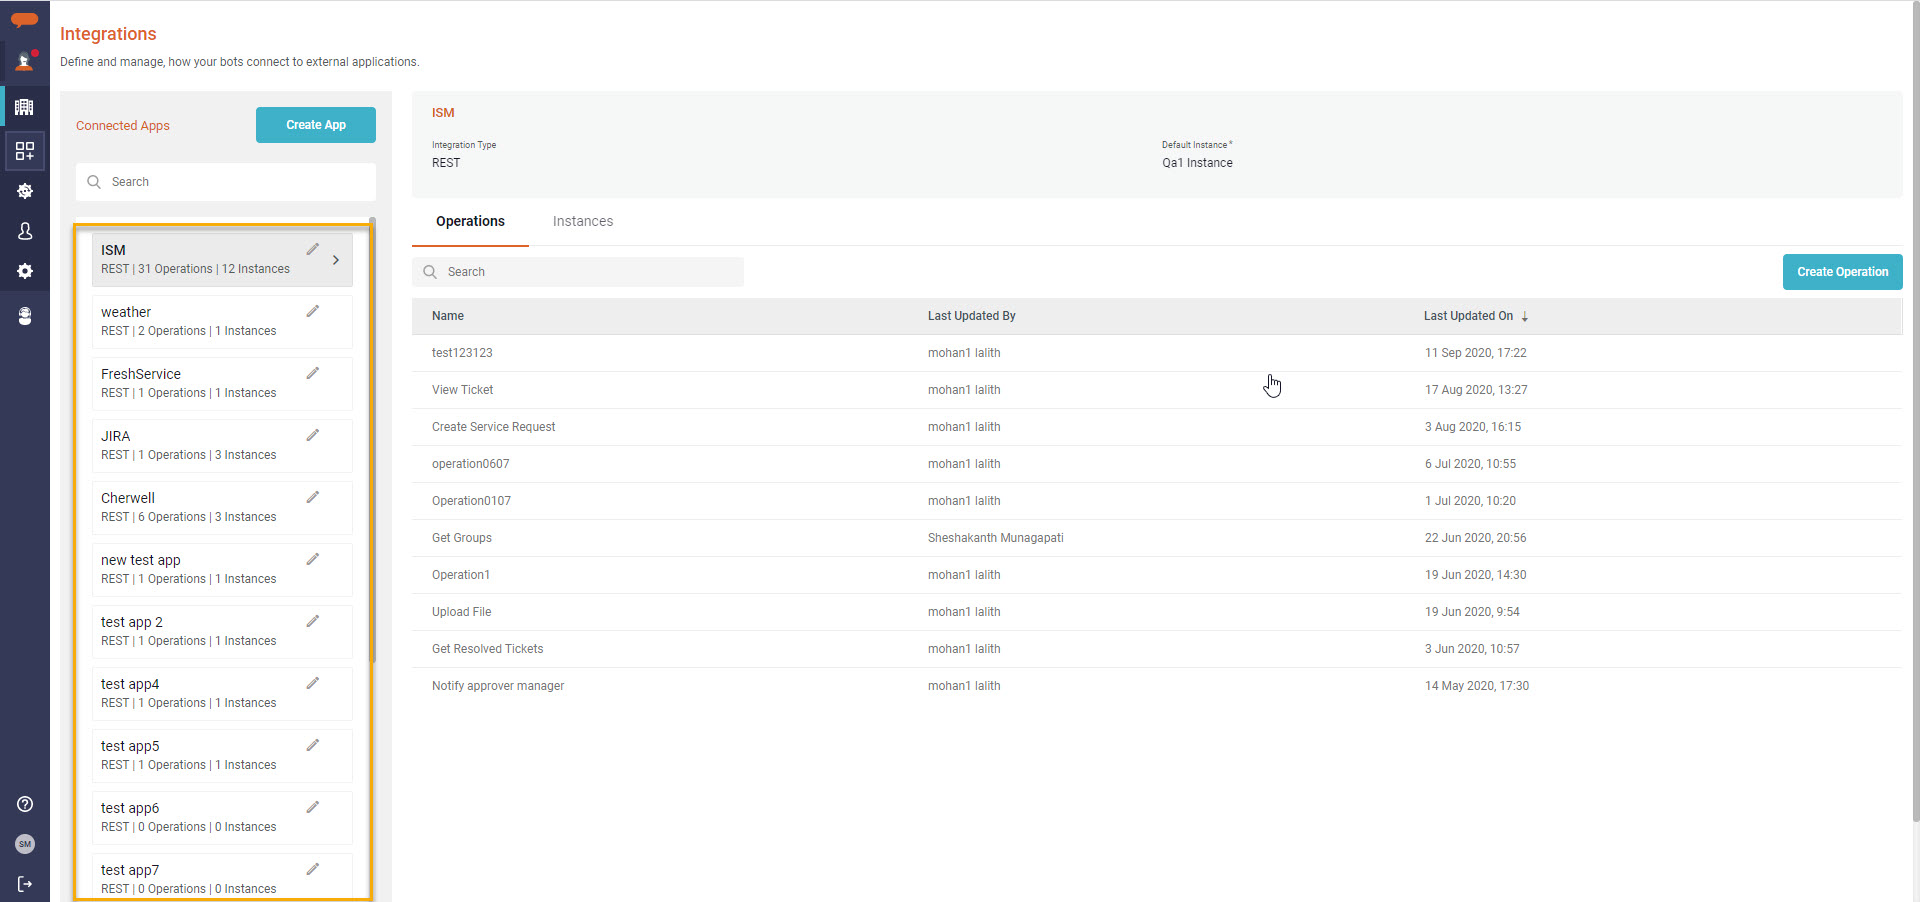
- On the Tenant menu, click Integrations.
The Connected Apps page appears as shown below.
Here we can set up an integration between Luma and a 3rd party system, which is valid at a tenant level. Once the Connected App is created, the next step is to create the App Instance and the respective web service operations.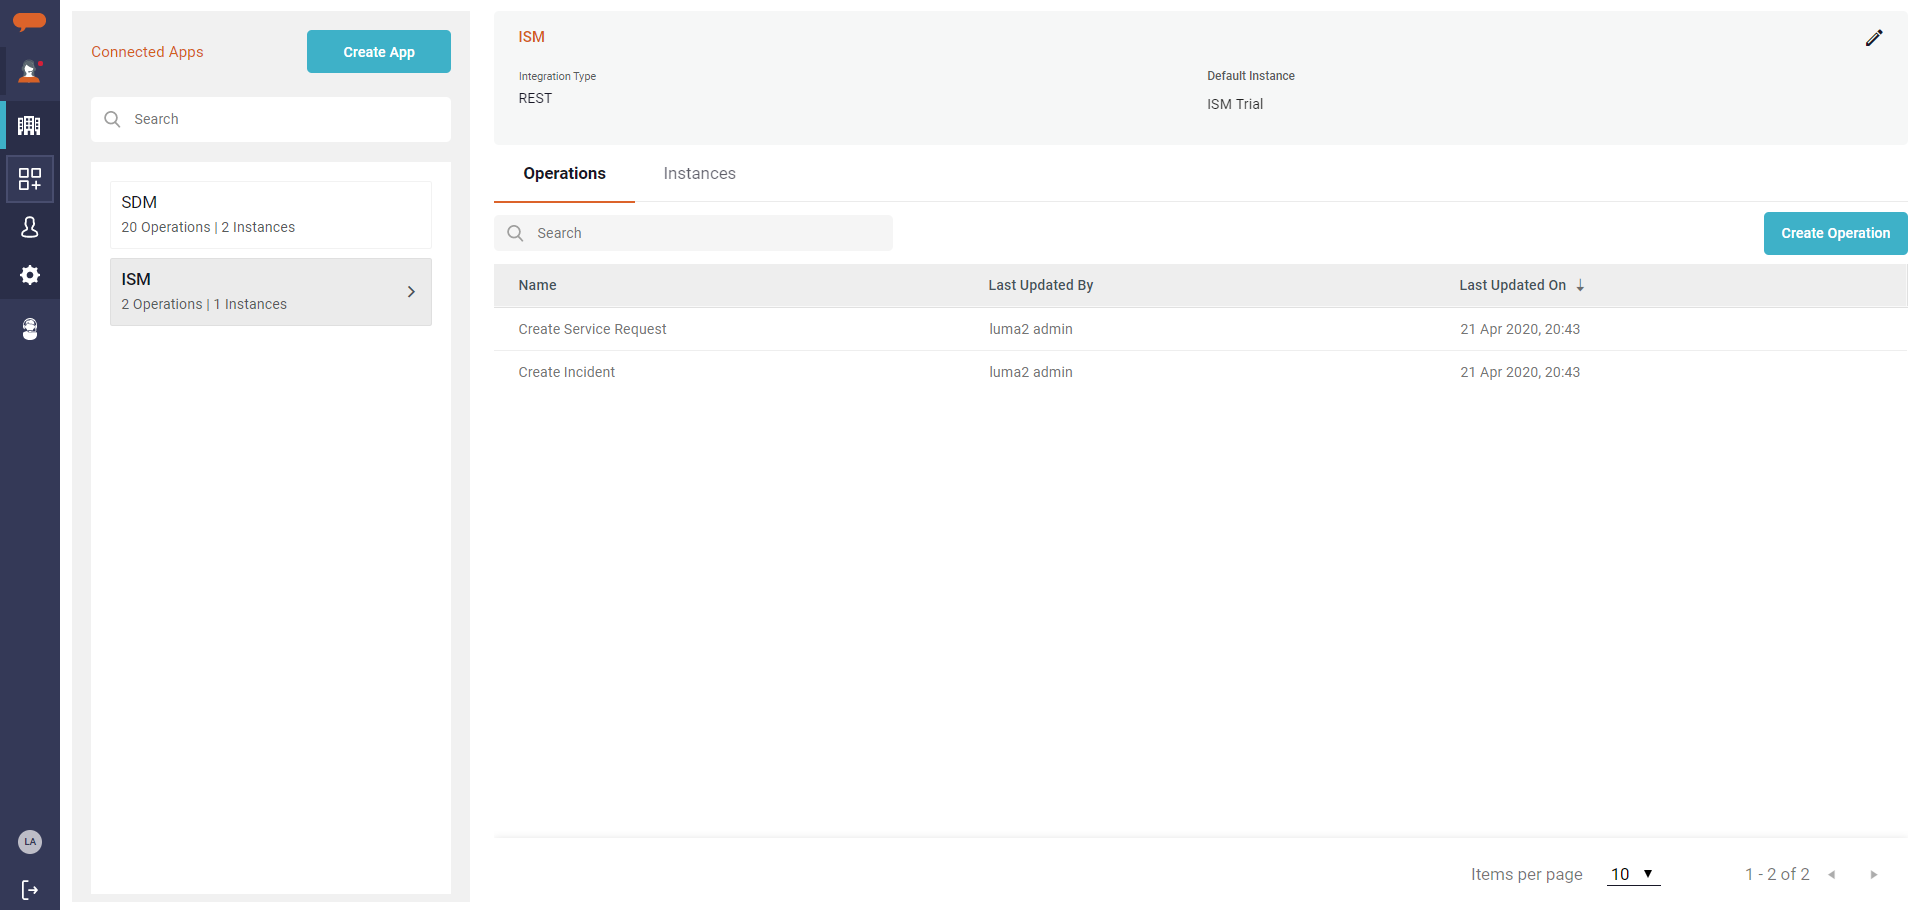
- Click Create App to create a new app.
The Create App page appears as shown below.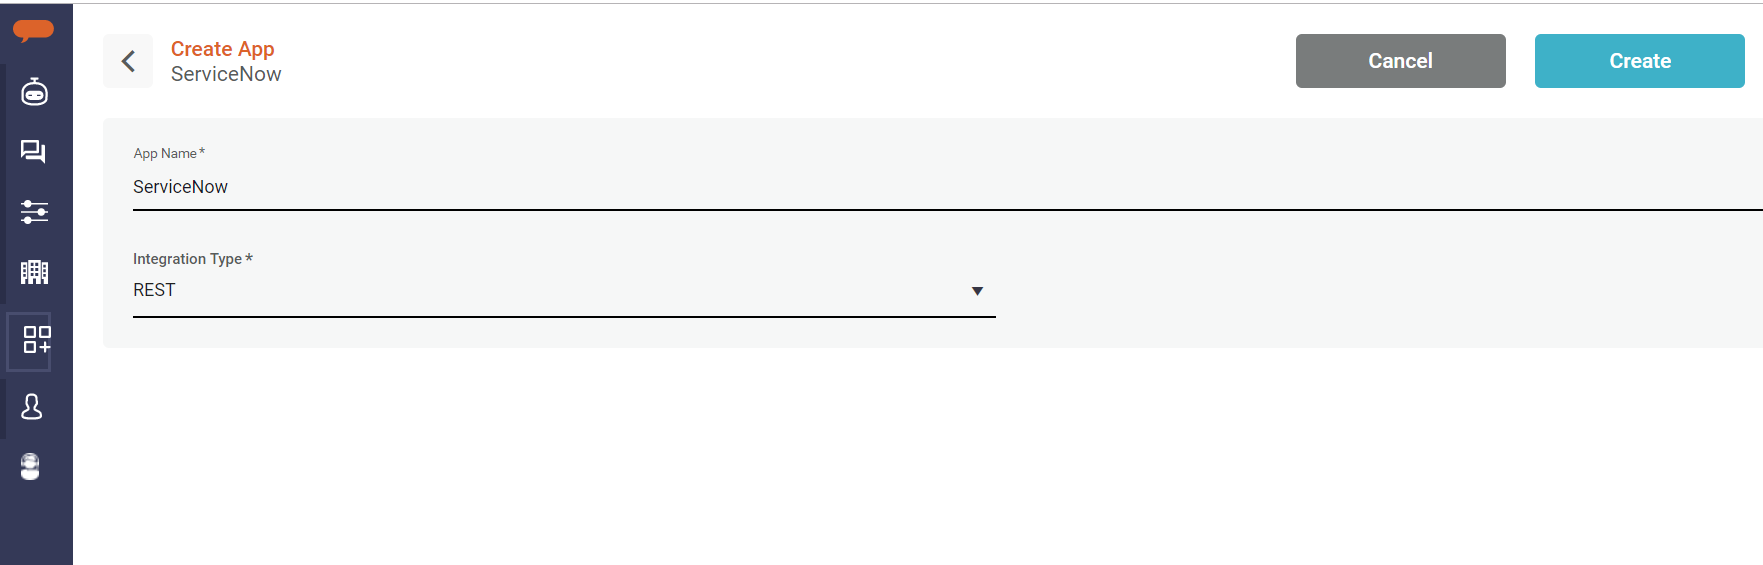
- Enter the App Name.
- Select the Integration Type.
- Click Create to complete the app creation.
The created app is available in the Connected Apps list. The next step is to create an instance.
Create Instance
Once the App is created, you need to create the App Instance. In the case of the REST integration type of the Connected App, you may provide Request Configuration (Path, Query, Headers ) at the App instance-level that are common for all Web Service Operations.
To create an instance:
- On the Connected Apps page, click Create Instance as shown below.
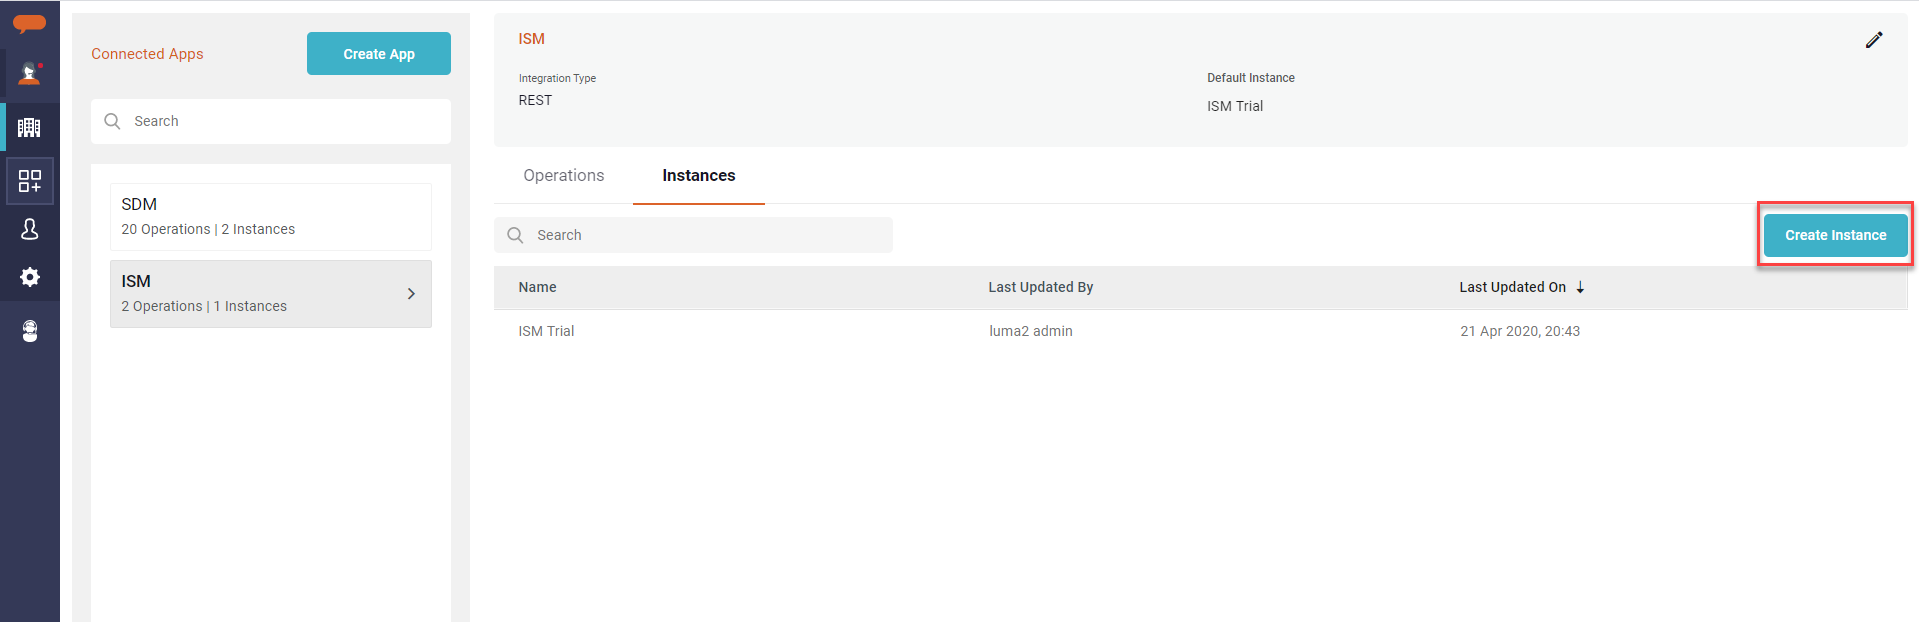
The Create Instance page appears as shown below..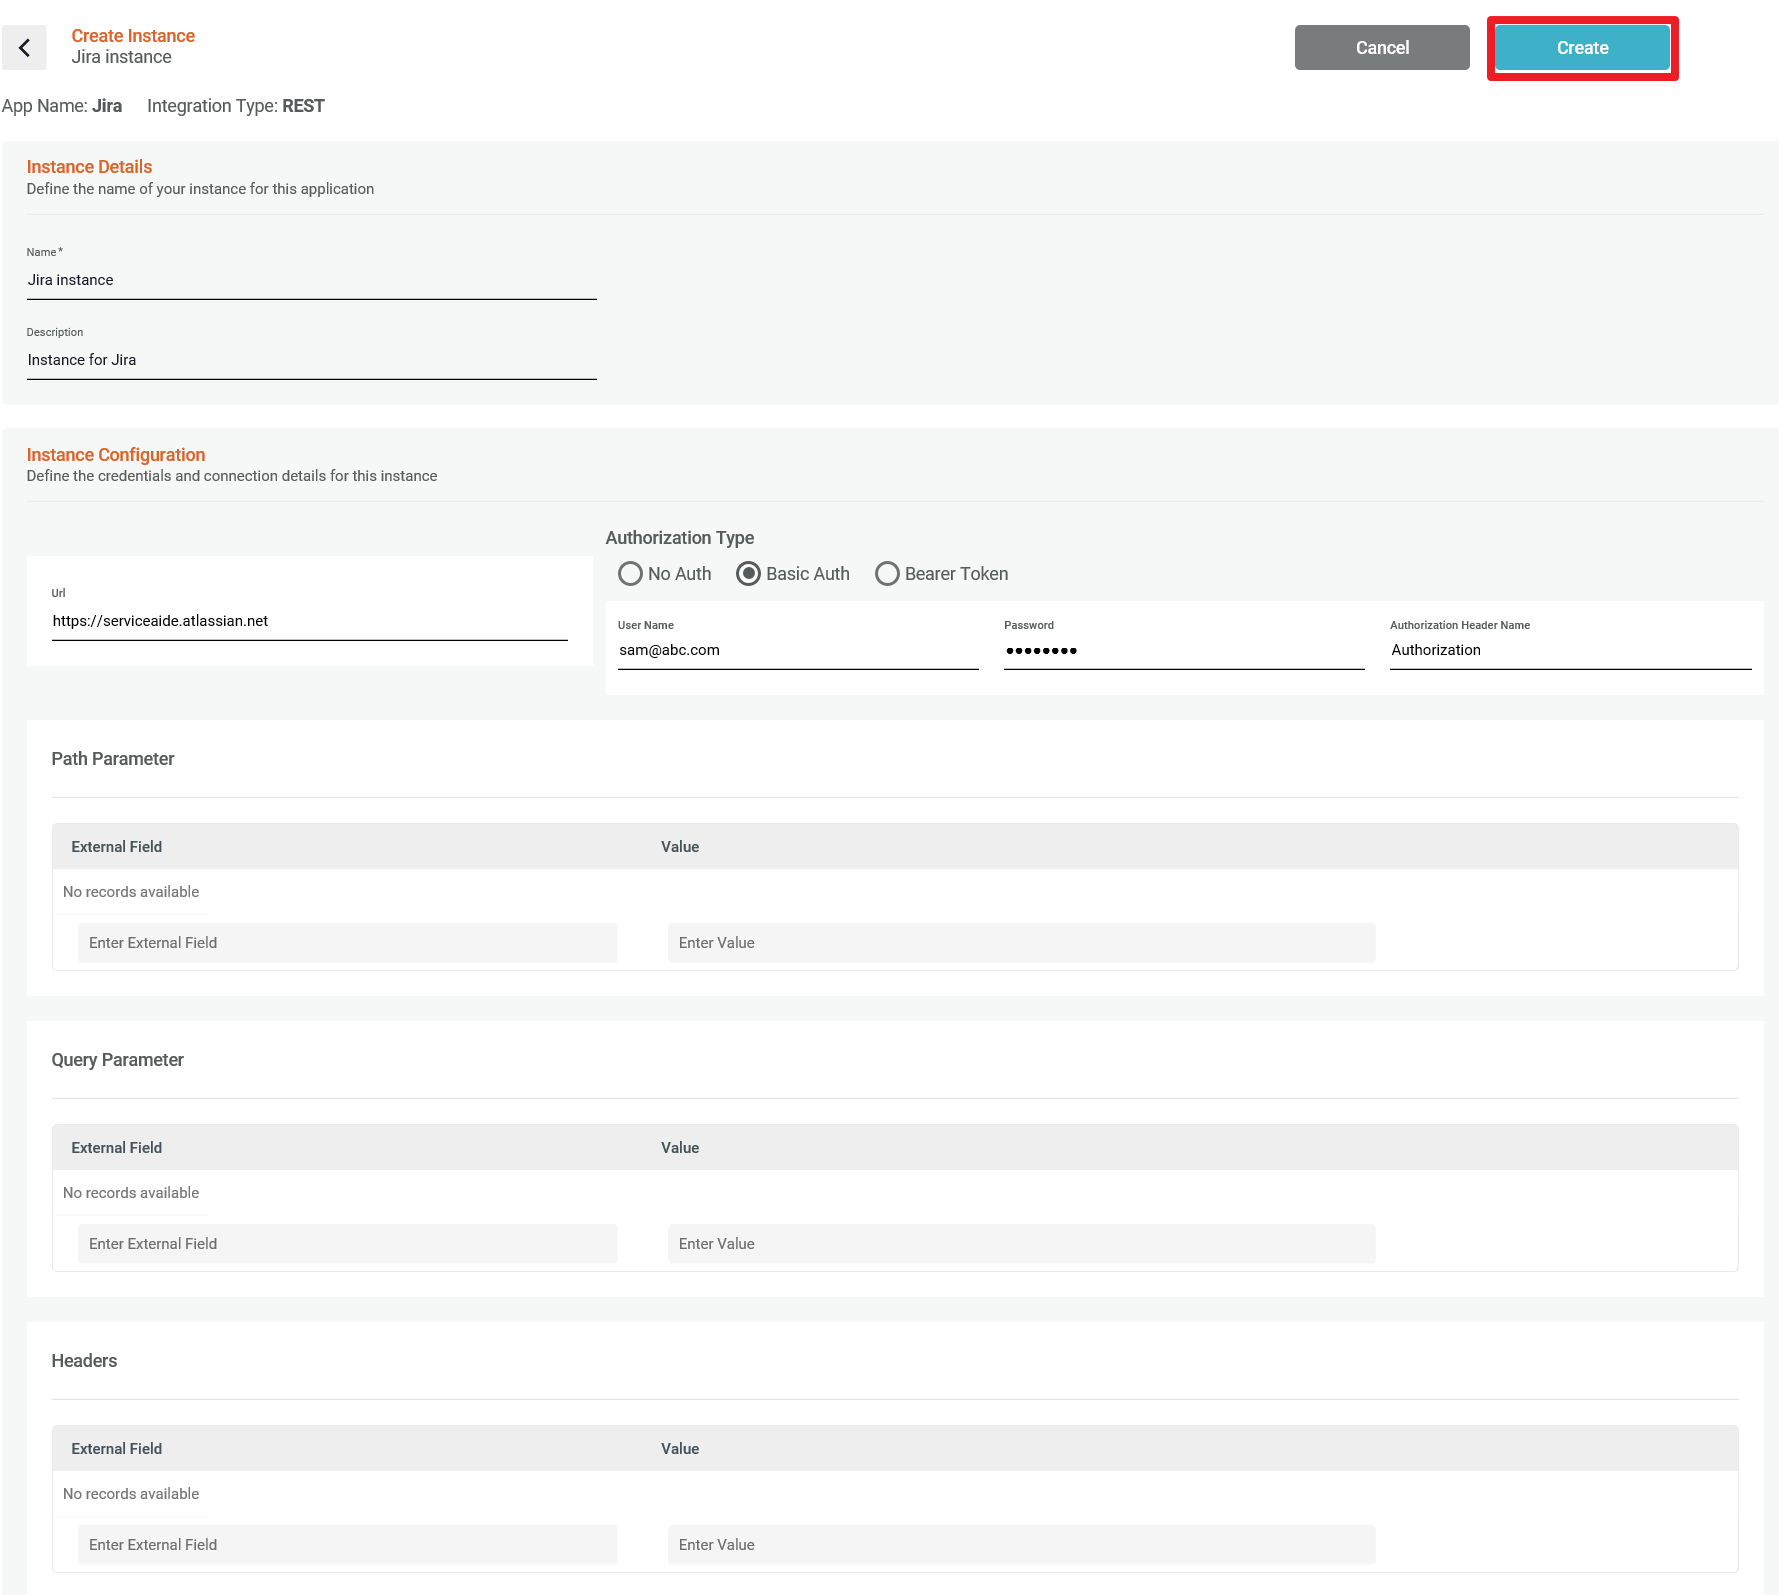
- Enter the instance Name and Description. The next step is to define the credentials and connection details for this instance.
Enter the base URL to which Luma needs to connect.
The Authorization Type is used by Luma to login and perform the specified operations as part of the Web Service operation.
Luma supports the following authorizations types:
- No Auth: Use this option, if you do not need any authentication to log in to the third-party systems.
- Basic Auth: Use this option to authenticate the external applications to interact with the Luma tenant. Basic auth consists of the following fields:
- Username: Specify the Username. Luma uses it as an authentication username to login to third-party systems.
- Password: Specify the Password. Luma uses this password while authenticating to the third-party system.
- Authorization Header Name: By default the Authorization Header Name is specified as Authorization by Luma.
- Bearer Token: This is the unique authentication token required for external applications to communicate with the Luma API.

Bearer token consists of the following fields:- Authorization Header Name: By default the Authorization Header Name is specified as Authorization by Luma.
- Token: Enter the unique authentication token required for external applications to communicate with the Luma API.
- Path Parameter: The path parameter is part of a path segment that occurs after its name. Path parameters offer a unique opportunity to dynamically replace the values and pass them in the URL. Example, http://myserver.com/some-path/{parameter1}/path-continued/{parameter2}.
- Enter the External Field and the Value.
- Query Parameter: The query parameters are sometimes referred to as optional parameters. The query parameters are separated from the hierarchical parameters by the question mark. Query parameters appear in the URL after the question mark (
?) after the resource name. https://myserver.com/resource-name?param1=value1¶m2=value2.- Enter the External Field and the Value.
- Headers: Headers are mostly classified as request headers. You will have to set the request headers when you are sending the request.
- Enter the External Field and the Value.
The following sample headers are encountered the most.- Authorization: Includes credentials containing the authentication information of the client for the resource being requested.
Accept-Charset: This is a header that is set with the request and tells the server about which character sets are acceptable by the client.
Content-Type: Indicates the media type (text/HTML or text/JSON, XML/custom) of the response sent to the client by the server, this will help the client in processing the response body correctly.
- Enter the External Field and the Value.
Click Create to create the app instance.
The first instance that you add is considered as the default instance.
Create Operations
Once the application and instance are created, you can create the required operations to be executed with the integrating system. An operation defines the task you need to perform as part of the skill.
To create an operation:
- On the Connected Apps page, click Create Operation as shown below.
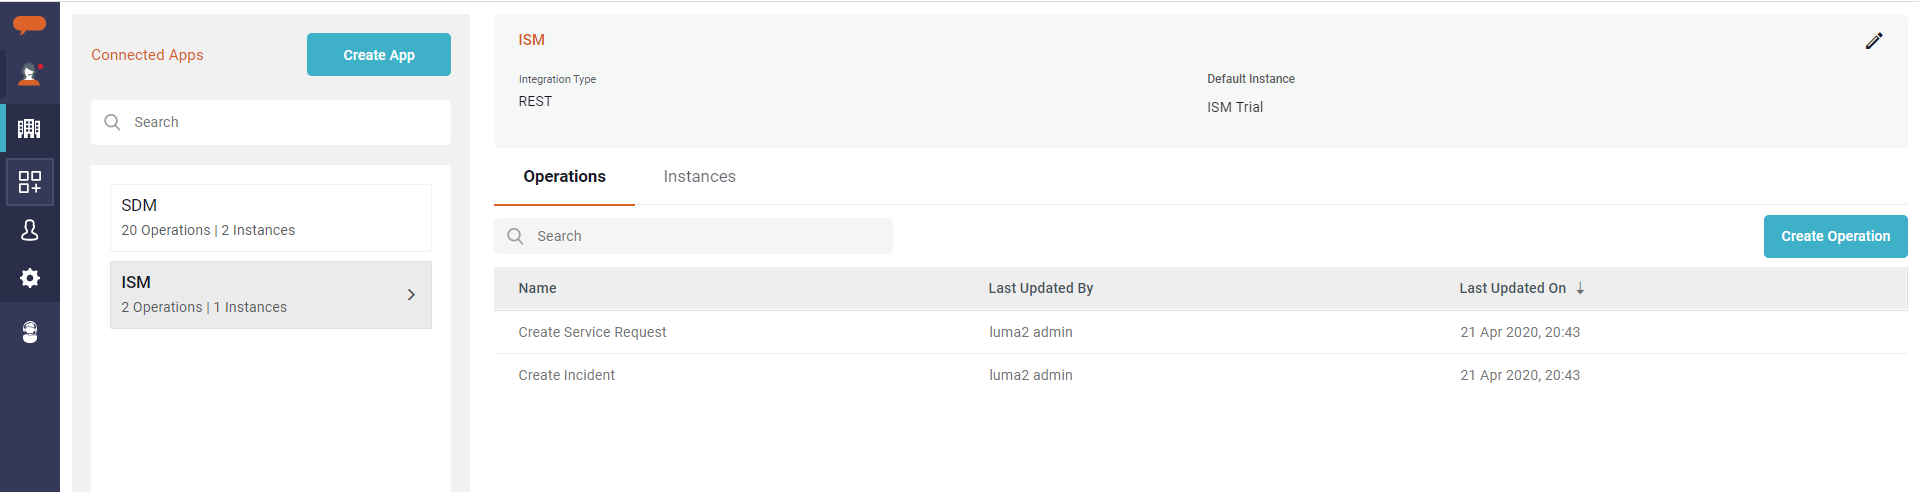
The Create Operation page appears as shown below.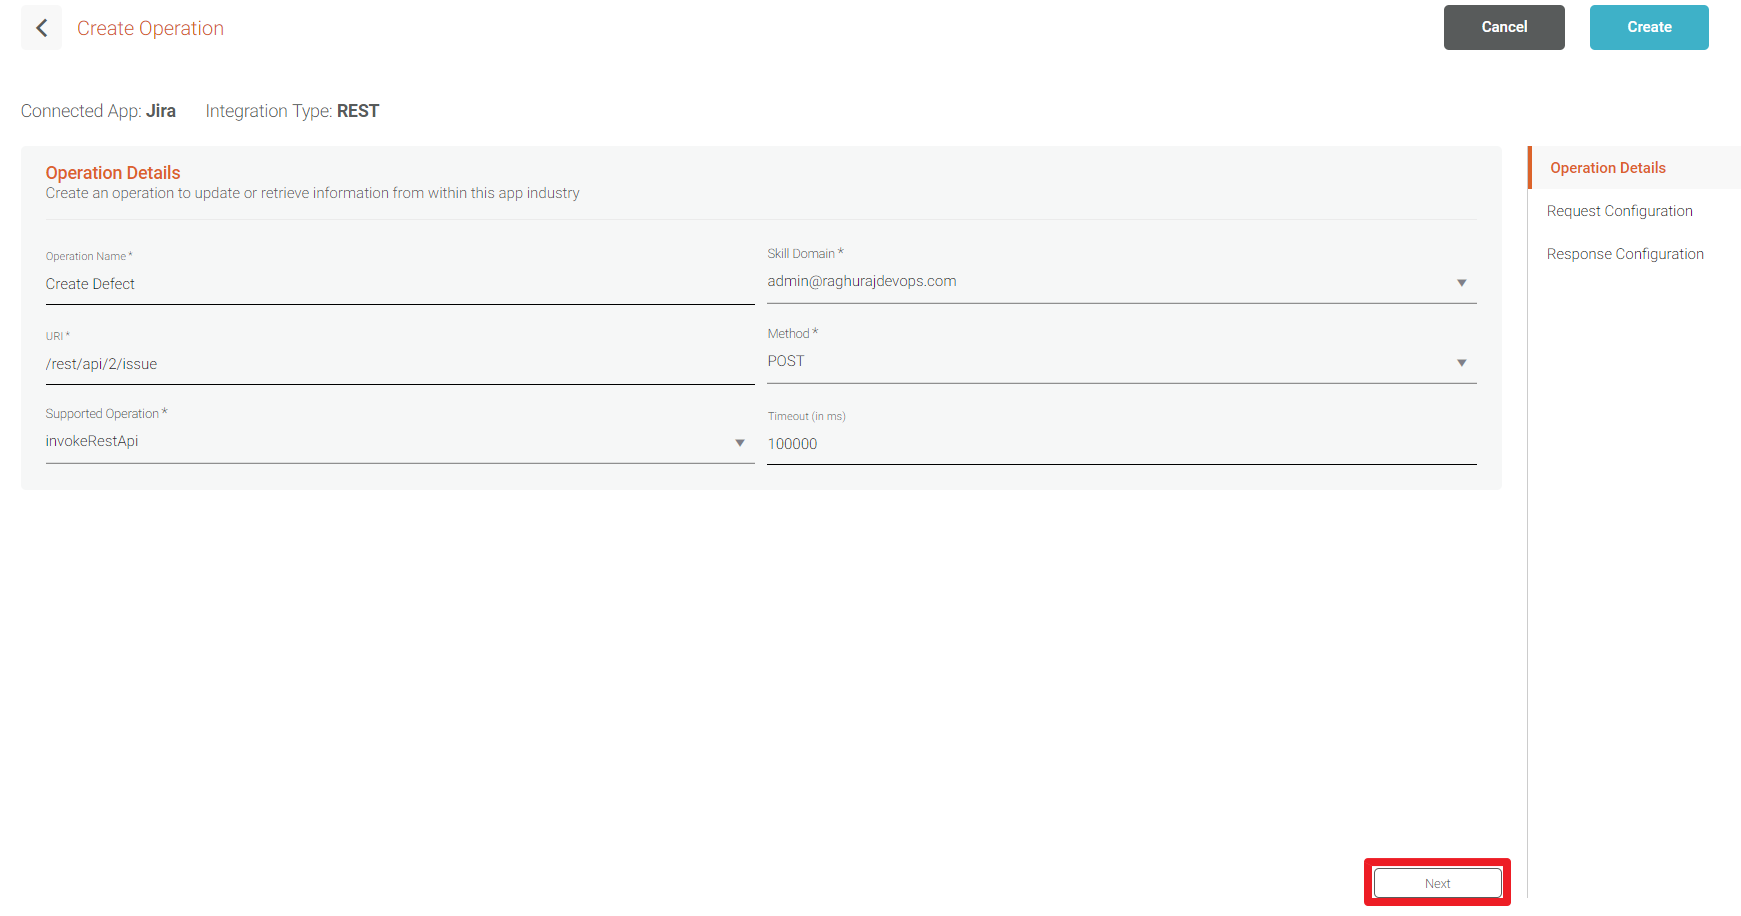
- In the Operation Details tab, enter the Operation Name.
- The system automatically displays the default Skill Domain of the tenant.
- Uniform Resource Identifier (URI), is used to refer to the information resource. Enter the URI.
- Select the operation Method. It uses an API request chaining framework for bots to push or request data from your websites, systems, and web applications using Webservices.
The following operation methods are available:- Get: To retrieve data
- Post: To create data
- Put: To edit the data
- Delete: To delete the data
- Patch: To make partial updates to the resource
- The system automatically displays the Supported Operation as invoke REST API.
- Specify the operation Timeout (in milliseconds), the amount of time to wait for a web service response when invoking an outbound request. The default value is 10000 milliseconds, 10 seconds, and the maximum allowed value is 3 mins, 180000 milliseconds.
- Click Next to specify the Request Configuration details.
The Request Configuration page appears as shown below. 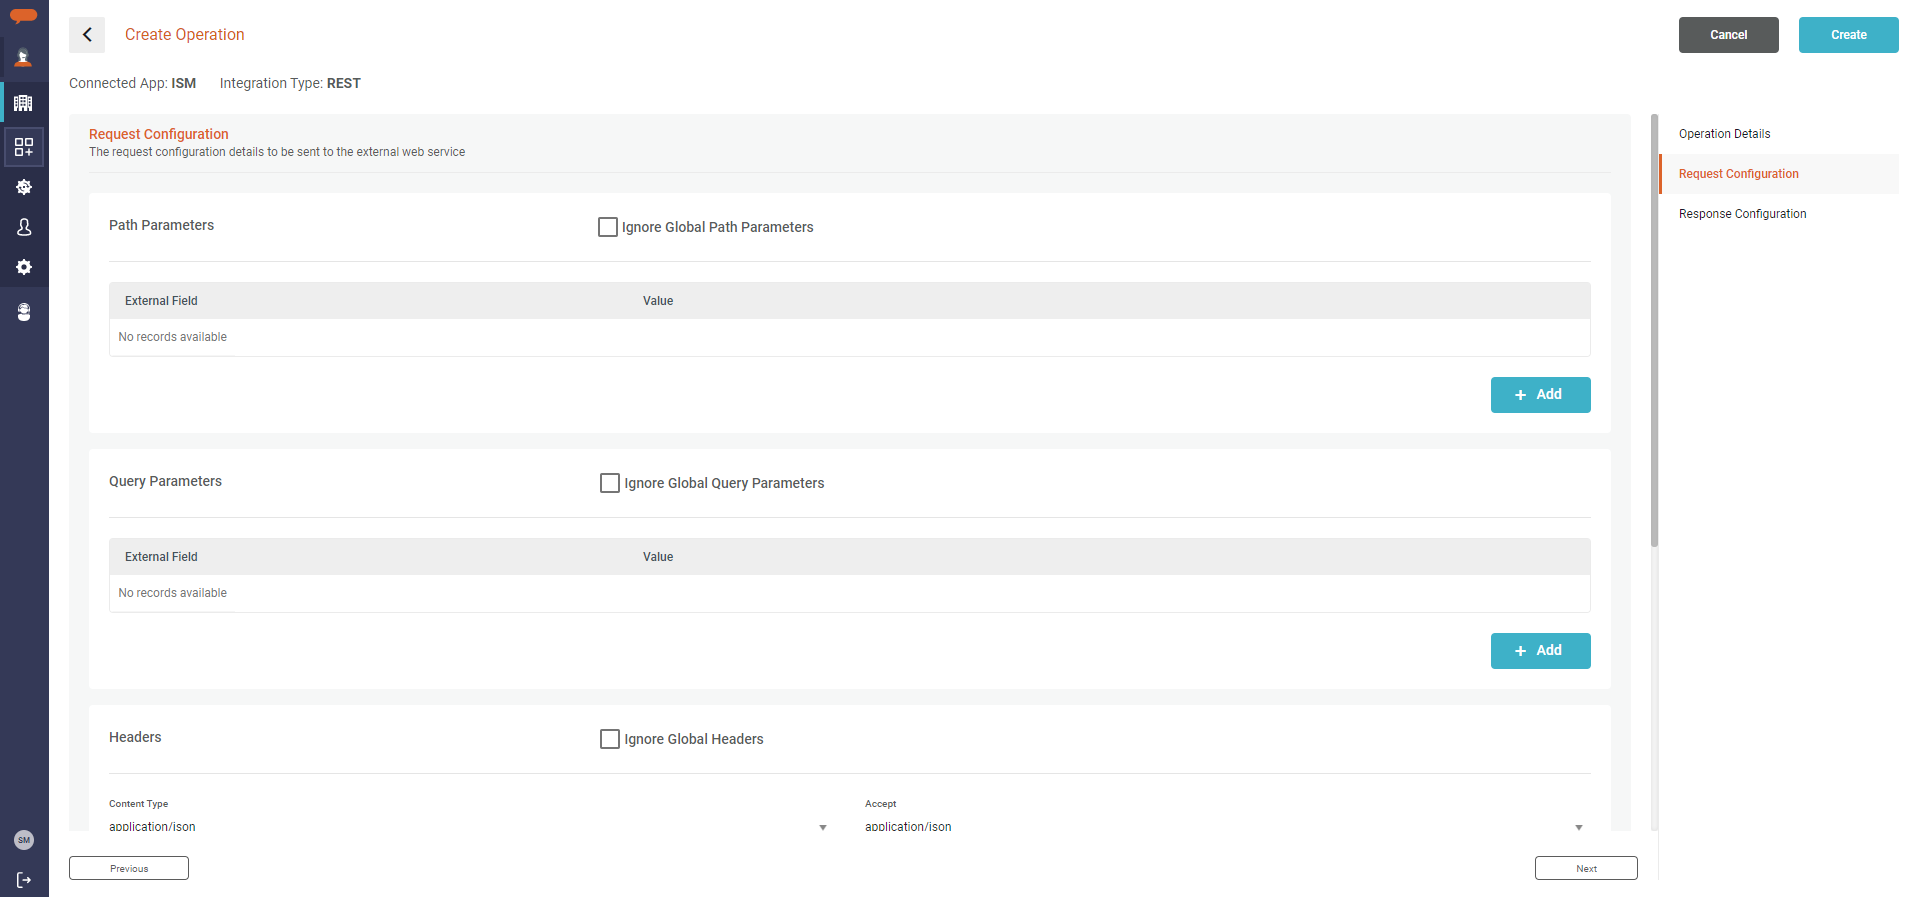
- Path Parameters: The path parameter is part of a path segment that occurs after its name. Path parameters offer a unique opportunity to dynamically replace the values and pass them in the URL. Example, http://myserver.com/some-path/{parameter1}/path-continued/{parameter2}. You can overwrite the configuration defined at the instance level or continue using the same and you may need to add the operation-specific variable and values.
- Enter the External Field and the Value.
- Query Parameters: The query parameters are sometimes referred to as optional parameters. The query parameters are separated from the hierarchical parameters by the question mark. Query parameters appear in the URL after the question mark (
?) after the resource name. https://myserver.com/resource-name?param1=value1¶m2=value2. You can overwrite the configuration defined at the instance level or continue using the same and you may need to add the operation-specific variable and values.- Enter the External Field and the Value.
- Headers: Headers are mostly classified as request headers. You will have to set the request headers when you are sending the request. You can overwrite the configuration defined at the instance level or continue using the same and you may need to add the operation-specific variable and values.
- Enter the External Field and the Value.
The following sample headers are encountered the most.- Authorization: Includes credentials containing the authentication information of the client for the resource being requested.
Accept-Charset: This is a header that is set with the request and tells the server about which character sets are acceptable by the client.
Content-Type: Indicates the media type (text/HTML, text/JSON, XML/custom or multipart/form-data) of the response sent to the client by the server, this will help the client in processing the response body correctly.
- Use multipart/form-data as Content-Type to send an attachment file to the client-server.
- If you wish to overwrite the Global Header configurations defined at the Instance level, select Ignore Global Headers. The system will then consider the configurations defined at the Operation level. Similarly, you may overwrite the Path Parameter and Query parameter as well.
- Enter the External Field and the Value.
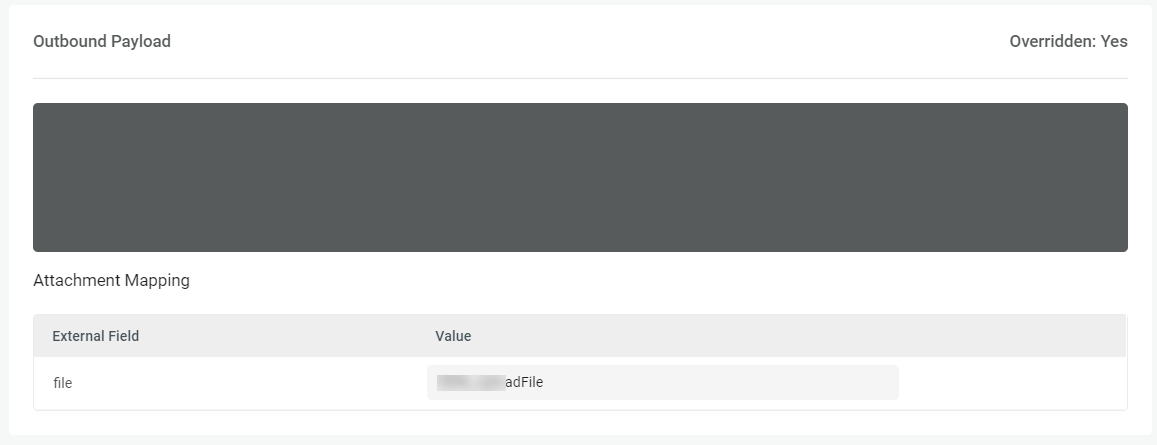
- Outbound Payload: Request payload needs to be passed to complete the request. Form Data is the default encoding a web form uses to transfer data. The text box area accepts simple key-value pairs and complex/nested JSON.
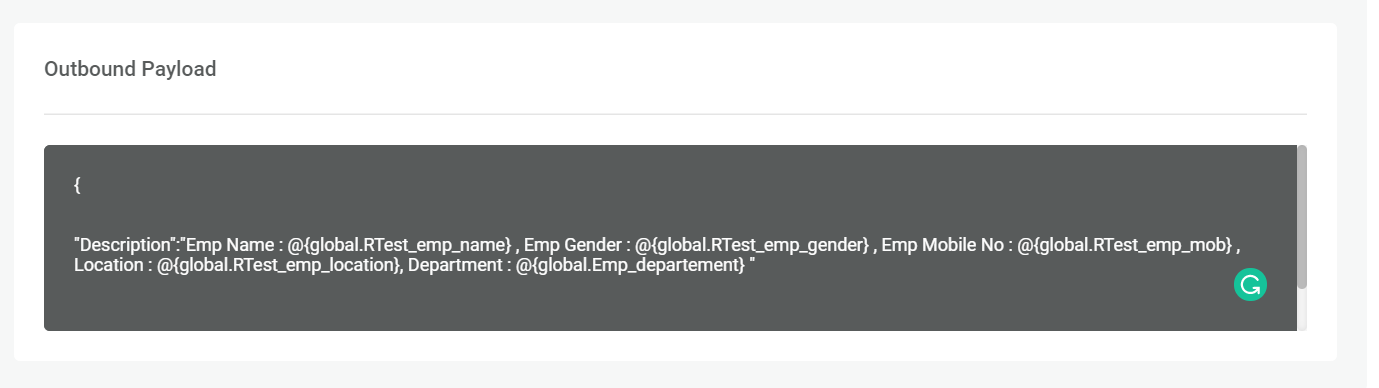
To send an attachment as Outbound payload, use Attachment Mapping. Enter a External Field and select an attribute with datatype File as Value.
- Click Next to create the Response Configuration.
You may refer to Global and User Custom attributes in Request Configuration to send information for access authorization or as outbound payload. Valid syntax is:
- Global attribute: @{global.<Attribute identifier>}
- Custom User attribute: @{user.<custom attribute identifier>}
Response Configuration
This section is used to process the data or response received from the external web service.
Inbound Mapping
In this section, you may transform the data that is received as a response and assign it to Local, Global, and Custom user attributes. This data, in turn, can be used in third-party operations, rule sets, skill execution, bot responses, and the Luma Bot builder application.
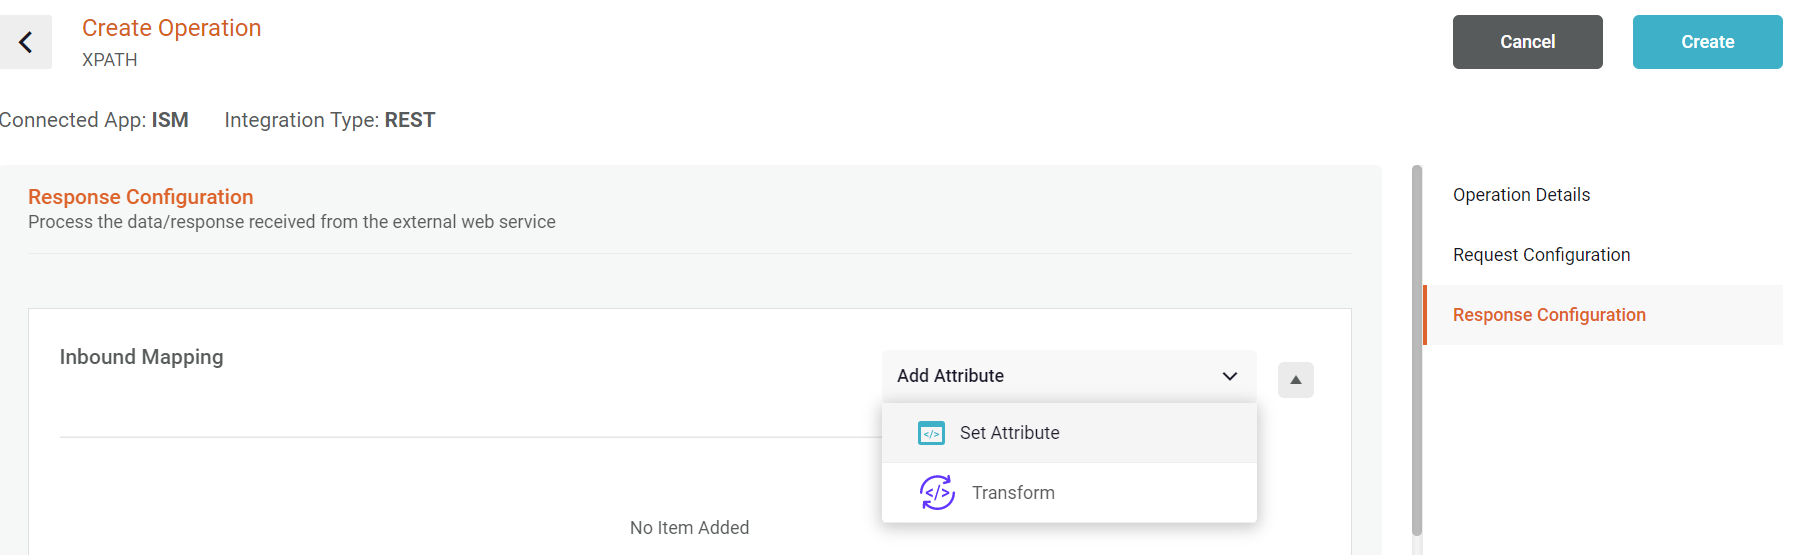
There are two ways of setting up attributes.
Set Attribute: This is used to store information in an attribute. Select Set Attribute .
Transform: Transform functions are used when information received from the user’s input or integration must undergo a transformation before it can be used in the Skill
For example, extracting the Ticket number from the Ticket identifier received from an ITSM system and providing it to a customer. Luma provides a range of Transformation functions to allow skill developers to manipulate the data as required such as Split, Trim, Substring, Replace, Custom Date-Time, and more.\

To set Inbound mapping, follow the below steps:
- Click on Add Attribute
- To Set an attribute, add the below details.
- Expression Type and Expression: These represent the type (Value or JSON) and the location path of the value to be assigned to attribute.
- Use Expression Type → Value when a value to be assigned to the attribute e.g. @{response.body}, @{response.code}.
- Use Expression Type → JSONPath when a value from the received JSON response is to be assigned to the attribute e.g. Expression points to a JSON path e.g. $.data.TicketIdentifier, $.data.items[*].Priority.
- Use Expression Type → Indirect JSONPath when a value from a JSON-type attribute is to be assigned to the attribute e.g. Expression points to an attribute that holds a JSON path e.g. @{local.items}→$.[*].TicketIdentifier
- Use Expression Type → Xpath when a value to be assigned to the attribute i.e. Expression points to a Path e.g. //AddResponse/Description
- Use Expression Type → Script when a value to be assigned to the attribute using a javascript.
- Scope: Represents the scope of the attribute to be used to hold the inbound values
- Use Global to assign value to a Global attribute to be used in the skill. Though the attributes are available for other skills to use, the value is retained during the skill execution.
- Use Local to create and set the value to a local attribute. These attributes are only valid and available during skill execution. The local variable value is retained between the prompts and is used to pass data between multiple integrations, user messages, or rules. If used after a bot response, the value in the Local attribute is lost.
- Use User Custom to assign value to a User Custom Attribute. These attributes retain values assigned unless overwritten.
- Attribute: This is the name of the attribute
- Data Type: Represents the data type of the value
- Expression Type and Expression: These represent the type (Value or JSON) and the location path of the value to be assigned to attribute.
- To use the Transformation function use Transform. For more information on how to use Transform functions, refer Transformation functions
- When an Operation is added to the Conversation Flow of a skill, Local attributes created in the Operations can be used to build the skill. A local attribute can be referred to as @{local.<Attribute identifier>}
- Use JSON type attributes to store JSON data received from Integration. To refer to a list/array of values in a JSON path, use the LIST type attribute.
- While using a script, use the follow syntax to use existing attributes in the script. To refer to the value of a context variables:contextAttributes.getAttribute("@{global.global1}")contextAttributes.getAttribute("@{local.local1}")
Error Handling
This section is used to define the behavior and bot response to the user when the operation execution results in an error. You can create multiple rules handling errors from web service operations.

Select one of the following options to define a rule to send the error message. The error message will be sent only if the specified conditions are validated:
- Match any conditions below: one of the specified conditions must match to parse the error message.
- Match all conditions below: all the conditions specified must be validated to parse the error message.
- Define custom criteria: you can define your custom criteria based on the given conditions to parse the error message if validated.
For example, 1 and 2 or 3. 1st and second conditions must match or only the third condition must match. You can enter only numbers, and, or, (,)
Specify @response.StatusCode in the Key field followed by an operator. The following are the list of supported operators,
- Equals
- Does not Equals
- Is Greater than
- Is Greater than or Equal to
- Is Less than
- Is Less than or Equal to
- Begins with
- Does not Begin with
- Ends with
- Does not end with
- Contains
- Doesn't Contain
- is Empty
- Is not Empty
- matches pattern
No data Handling
This section is used to define the behavior and bot response to the user when the operation execution returns no data. You can create multiple rules handling no data scenarios from web service operations. Follow the API return values of external systems from which you receive the data and correspondingly write/evaluate the values inside the Rules/conditions section.
Success Handling
This section is used to define the behavior and bot response to the user when the operation execution succeeds. Create multiple rules handling success from web service operations.
Edit App
To edit an app:
- On the Tenant menu, click Integrations.
- All the Connected Apps are listed as shown below where the option to edit is available.
- Click on the Edit button
 . The Connected App page appears.
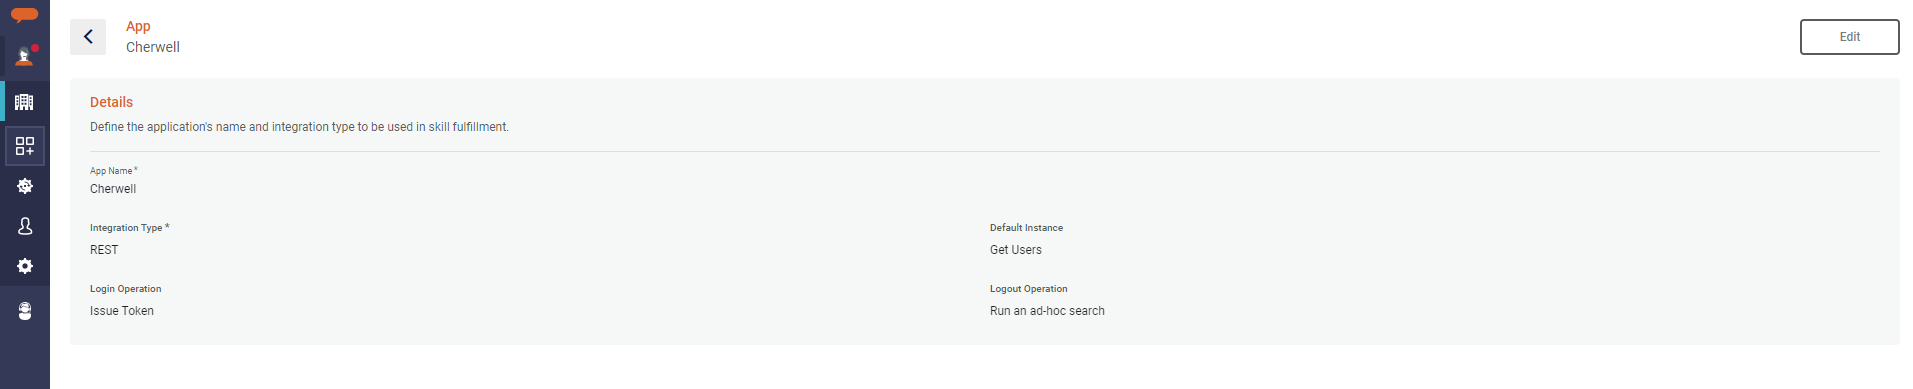
- Here we can edit the details like Integration Type, Default Instance, Login operation, and Logout Operation.
The Login and Logout operations are useful when a functionality/operation requires a pre-login and post-logout condition.
For example, the login and logout operation can be used for session control. When executing an operation through a skill the login operation would generate a token and reserve the session. Upon completion of the task, the log-out operation will release the session. This ensures optimal utilization of sessions allocated to the API user.
Once the required operations are selected, click on Update button to save the changes.
Related content
© 2019 Serviceaide 1-650-206-8988 http://www.serviceaide.com info@serviceaide.com