Create and Manage Configuration Items
- Former user (Deleted)
- Richard Graves (Deactivated)
- priti.hota (Deactivated)
This article contains the following topics:
Configuration Item (CI) is any component of an IT infrastructure that must be managed to deliver an IT Service. All IT objects such as hardware, software, networking devices, and peripherals are examples of configuration items. As an analyst you can create and manage configuration items. The configuration management capability lets you create and maintain a database of the supported CIs, devices, and service. Configuration items are grouped and classified according to their Class, Category, Type, and Item. All essential attributes of a configuration item is stored in the CI record. Examples of essential attributes are model, make, manufacturing date, and warranty details. Groups of CIs that together provide an IT service can also be configured as Service CIs.
A CI can be related to several other CI records. The relation depends on how the two items are related to each other. CIs can also be associated with contacts based on the role they play. For example, Owner, User, and Support. The Status of a CI indicates whether the CI is in use or not; and the stage in the life-cycle. By default, the status of a newly configured CI is Active. You can also relate configuration items and attachments to a ticket. For more information about relating CI's and attachments to a ticket, see Manage Ticket Relationships.
This article provides information about the configuration management capabilities. Also the actions analysts take to create the CI records in the application.Create a Configuration Item
With the required permissions, you can create configuration item records.
Follow these steps:
- Navigate to WORKSPACES> SERVICE DESK> Configuration Management> Actions> Create New.
Specify the Name, Identifier, Function, Description.
- Select the Status of the Configuration Item as required. Some of the statuses are as follows:
- New
- Active
- Backup
- Configured
- Deprovisioned
- Return to vendor and so on
- Select the impact from the following:
- High
- Medium
Low
Note
The CI impact influences the priority of the associated ticket automatically.
If the UPDATE_HIGHEST_RELATED_CI_IMPACT_TO_TICKET parameter value in the Configuration Parameter page is set to Yes:
- the Impact field appears as read-only in the ticket.
- the Impact field in the ticket is updated with the Impact value set in the Related CI of the Ticket. In the case of multiple CIs related to a ticket, the highest impact value of the related CIs is considered.
- Select the CCTI. It is a four-level hierarchical categorization - at the Class, Category, Type, and Item (CCTI) level to logically group objects and entities for a specific purpose. It is not mandatory to specify CCTI up to the fourth level. It is possible to define only Class, or only Class and Category or only Class, Category and type or to specify all four. Each CCTI has to be unique.
Click Save.
Note
- The identifier field is an extra identifier that is used to recognize the CI. For example, a Tag Name. You can select to relate an Organization in the Search Organization field. You can use Actions, Copy To New to create a CI based on the existing CI.
- You can only view those configuration items that are currently Active in Serviceaide Intelligent Service Management. You cannot view any CI record that is made inactive by your administrator. You cannot view them in the list CI or search CI links.
Hierarchical Tree Attribute for CI
As an Administrator you can add a Hierarchical Tree(HT) attribute based on the CCTI type, while creating a Configuration Item (CI). The HT attribute is used to add field values that depend on each other. You can configure a HT attribute to add more related information for the ticket that shows in a sequential manner in the Attributes section in a CI. You can fetch the field values for the Hierarchical Tree from an external data source through bulk upload. Using the Bulk Upload Template you can manage information through the custom Hierarchical Tree. For example, a mobile device followed by its Brand and Memory size.
Prerequisites to associate a HT custom attribute to a Configuration Item:
- Create a custom attribute. For more information, see Create and Manage Attributes
- Upload the data template using the Bulk Upload Process. See Use Bulk Process Templates and Worksheets and Use the Bulk Process to Import, Update, and Delete data
- Create a Custom CI Attribute Template. See Create and Manage Configuration Item Attribute Templates. To attach the CI to a CCTI, ensure that the CCTI records are created.
Using a Hierarchical Tree custom attribute on a Configuration Item
To create a hierarchical tree custom attribute, do the following:
- Navigate to Workspace and then Configuration Management.
- Click Create New
- Type the CI Name and other basic details.
- Associate the required CCTI.
- Associate the Organization.
- Click Save.
- Now you can see a new tab in the Attributes section. It populates the associated hierarchical custom attribute field.
- Click the look-up
 icon to search the exact data you want to associate. Based on the associated CCTI and the data available in the Bulk Upload process, the hierarchical tree attribute data is populated as shown below.:
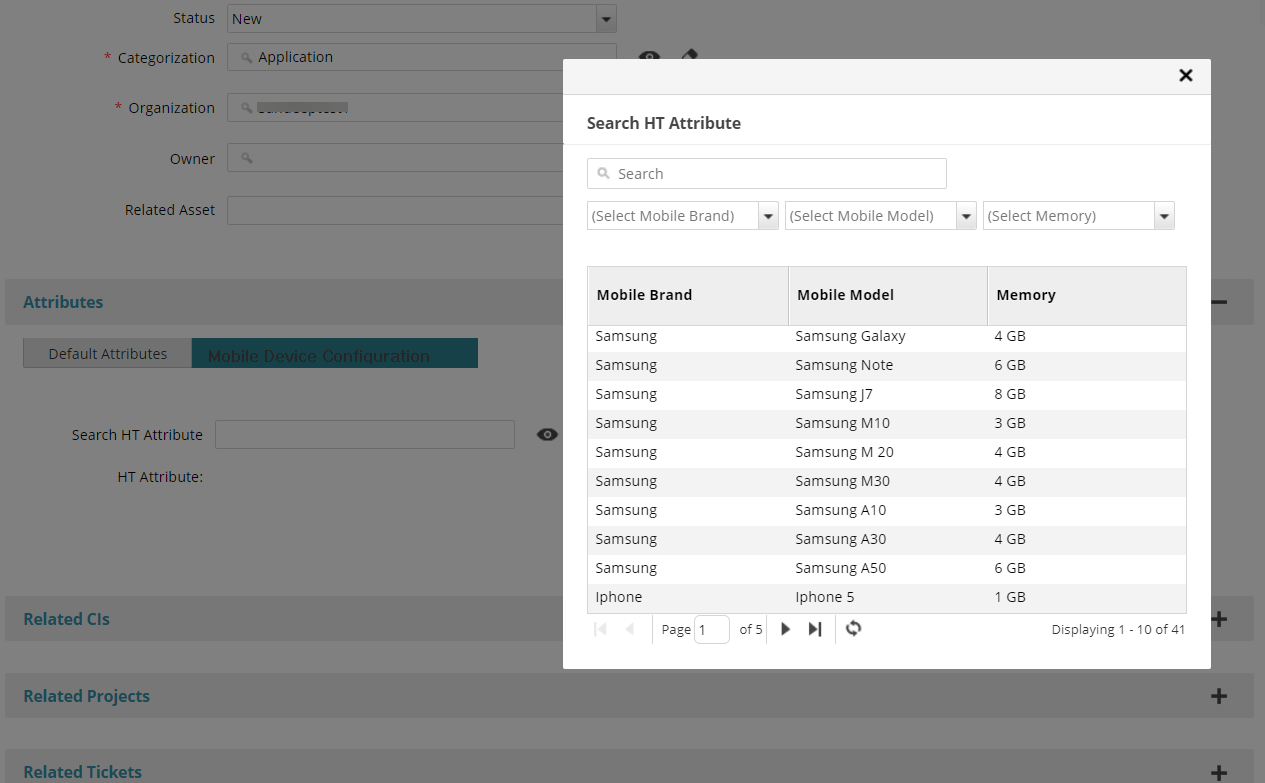
you can see the output as shown below: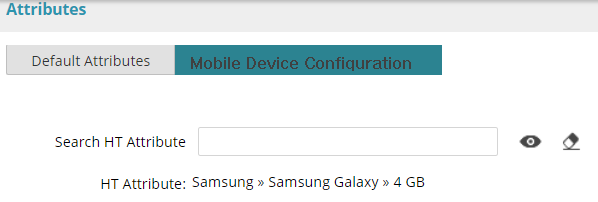
- Click Save & Exit to save the data.
Update a CI Record
You can modify a CI record from the list of CIs or using Search field to locate the required CI.
Follow these steps:
- Navigate to WORKSPACES> SERVICE DESK> Configuration Management.
- Open the CI and update the desired fields.
- Click Save.
Copy to New from existing CI
You can create a CI record by copying an existing CI record.
Follow these steps:
- Navigate to the desired CI, click Actions> Copy to New.
- Specify the Name, Identifier, other necessary details and click Copy.
Relate a CI to another CI
CIs are related to one CI in a Logical, Network, Power, or Service Relationship Domain.
Follow these steps:
- Navigate to the desired CI, click Related CIs in the anchor links, and click Relate CIs.
- Select the Relation Domain, Relation Type, and select the CI.
- Click Relate Selected Items.
Once related, the CI relationship graph is generated to view CI relationships by clicking View Relationship Graph.
Note: You can relate multiple CIs to one CI.
Relate Tickets to a CI
The Related Tickets section displays a list of tickets that are related to the CI. Use the Filter option the view tickets by status, type, and other necessary information.
Follow these steps:
- Navigate to the desired CI, click Related Tickets in the anchor links, and click Relate Tickets.
- Search for or select the ticket, and click Relate. You can relate multiple tickets to one CI.
Relate Attachments to a CI
You can relate attachments to provide more information about a CI. You can also drag and drop attachments to a CI. Five files can only be attached at a time using the drag and drop feature.
Note: You can specify the maximum size of the attachments, which you can drag and drop. Using the Configuration Parameter page, you can specify the parameter value for the attachment size.
Follow these steps:
- Navigate to the desired CI, click Attachments in the anchor links, and click Add New.
- Specify the Attachment Type, file, other necessary information, and click Upload. You can also relate existing attachments by clicking Relate Existing. You can relate multiple attachments to a ticket.
Note: You can also delete an existing attachment or specify the attachment as private. Hover over the required attachment, click the arrow and select Delete Attachment or Mark as Private.
Relate Contacts and Groups to a CI
Follow these steps:
- Click Contacts and Groups in the anchor links to view a list of related contacts and click New Related Contact.
- Select the Relation Type, other necessary information and click Relate. The phase field is enabled only if the Relation Type chosen is Change Approver or Change Reviewer.
Note: The administrator configures the approval phases available in the drop-down.
Relate Service Hours to a CI
Follow these steps:
- Click Service Hours in the anchor links to view a list of Service Hours and click Add Schedule.
- Select the Type, Start Date, End Date, and other necessary information.
- Click Save.
View all Changes Made to a CI
The Board displays the history of a CI. The Summary section gives a brief summary of the CI. The Upcoming Changes section displays a list of changes that are scheduled for the CI.
Follow these steps:
- Navigate to WORKSPACES> SERVICE DESK> Configuration Items .
- Open the desired CI and click Board in the anchor links.
Search for All CIs with a common CCTI
You can search for all CIs having a common CCTI using the Filter or the Search field.
Follow these steps:
- Navigate to WORKSPACES> SERVICE DESK> Configuration Items .
Click Filter and select the desired Class, or type the Class is the Search field.
Note:
- To narrow down your search, specify the Category, Type, and Item in the search field. Example, Hardware, Laptop, Lenovo, T410.
- Only those configuration items where the Class is specified as Service appear in the Affected Services list.
This video provides you more information about the drag and drop feature to quickly attach files or images.
Related content
© 2019 Serviceaide 1-650-206-8988 http://www.serviceaide.com info@serviceaide.com