Bot Export and Import
- Richard Graves (Deactivated)
- Shekar Iyer
- sneha.tripathi
This article describes how the Bot configurations, Tenant Configurations, Custom Skills and Attributes, and OOTB Skills can be exported from one Bot and imported to another. This feature is useful when you have already tested content in one Bot and want to move the content to another Bot without having the need to recreate the content in the target Bot.
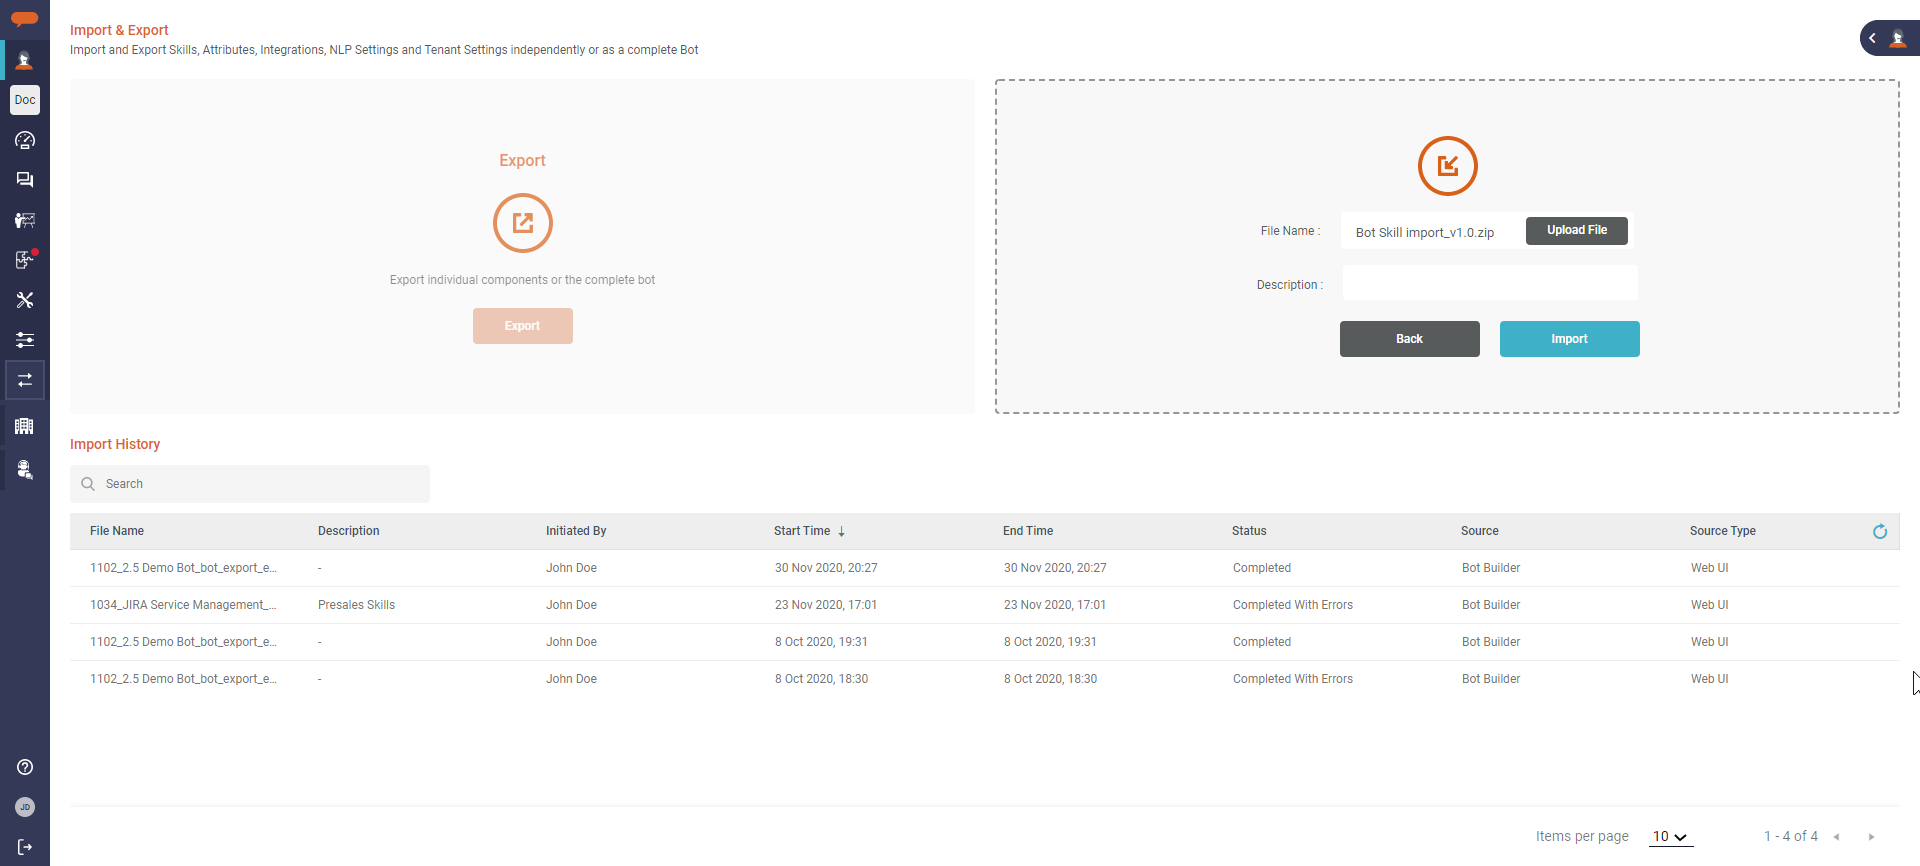
Navigate to the Export and Import page, by clicking on the Export & Import button on the left navigation panel in the Bot builder. The following page appears as shown below.
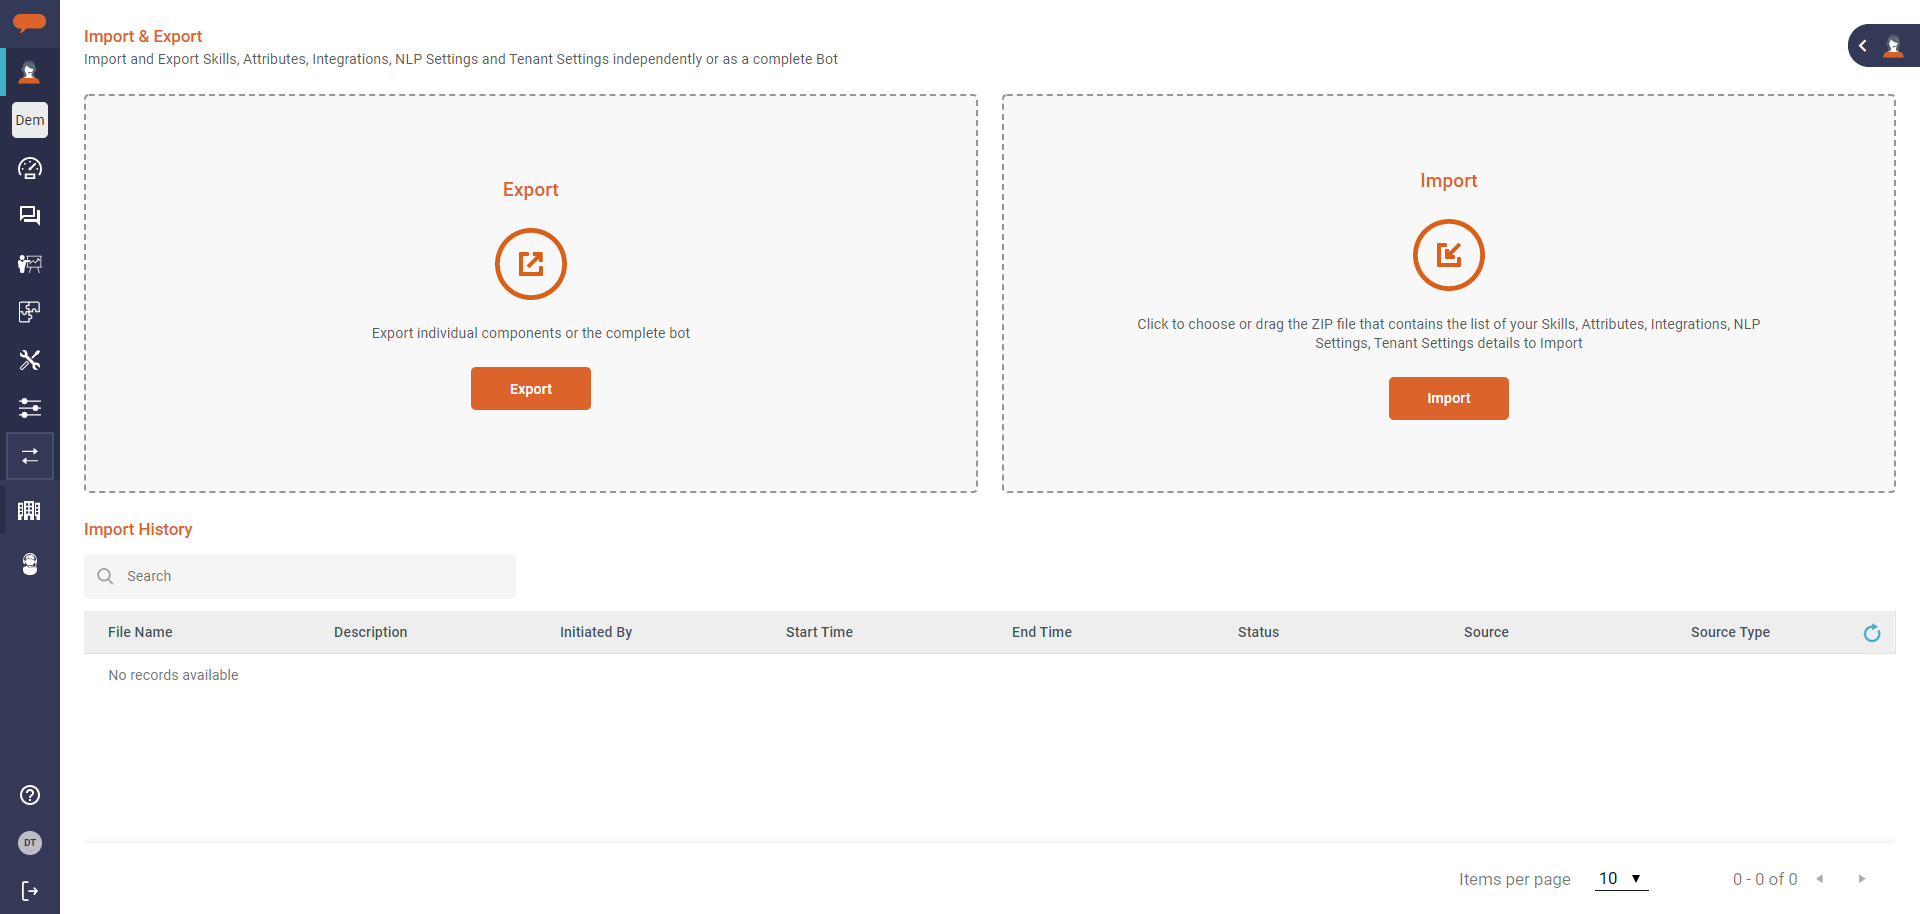
Export Process
The Export process allows us to export the complete bot or specific components. You will be prompted for this option when you want to start the export process.
To start exporting components, follow these steps:
- Click Export in the Export & Import page. The following screen appears:
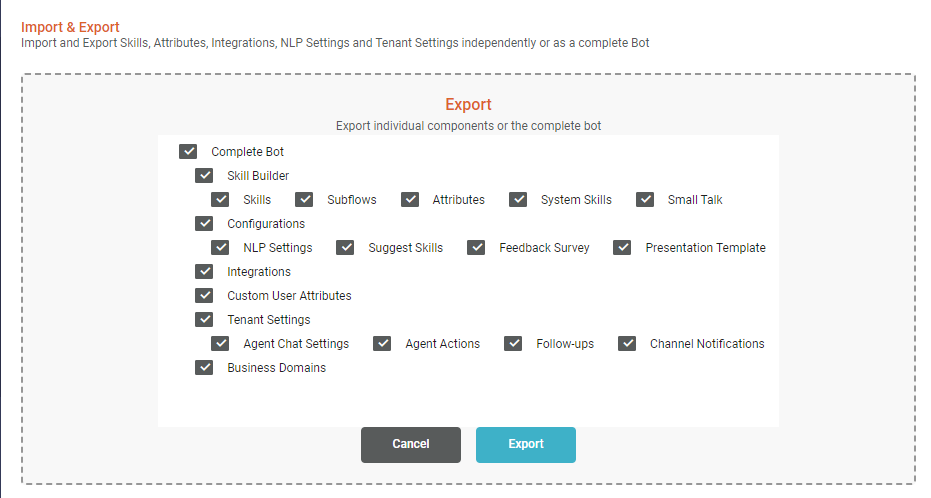
Various options are provided which you can select to export from the given Bot. You can export individual components or the complete bot. - Select the components which you want to export.
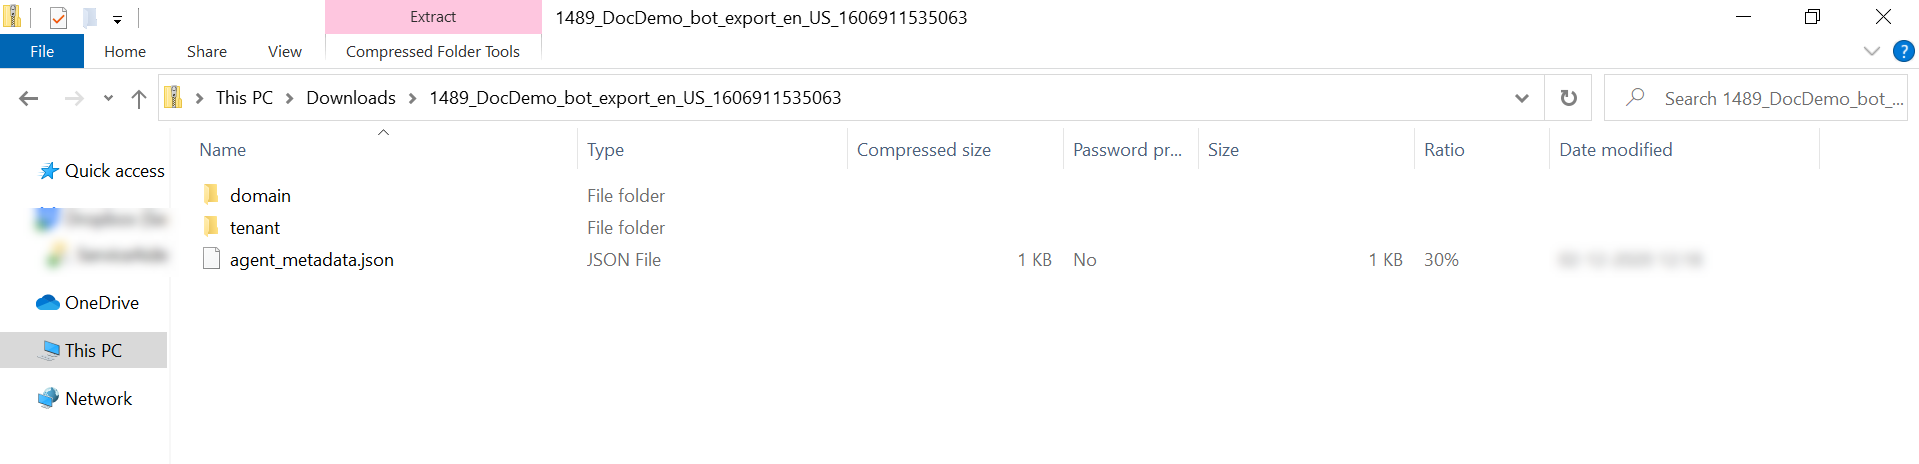
- Click Export. The components will be downloaded in a .zip file on your local computer and you will be redirected to the main Export and Import page.
When Exporting a specific component from the Bot, all the related components are also exported. This ensures that the component configured does not break and is usable upon import.
For Example:
- With Skill export, the related Attributes, Integrations, sub-skills, sub-flows, Custom User attributes, Email configurations, and Email templates are also exported.
- When exporting Integration, Email integrations, related instances, and configured Email templates are also exported.
- The configured skill definition is also exported in Suggest skills export, along with the Suggest skill configurations. Note: The skill suggestion configurations for both default & custom permission group configurations are exported & imported. However, Custom User Groups and Users are not exported.
Exporting Specific Skills
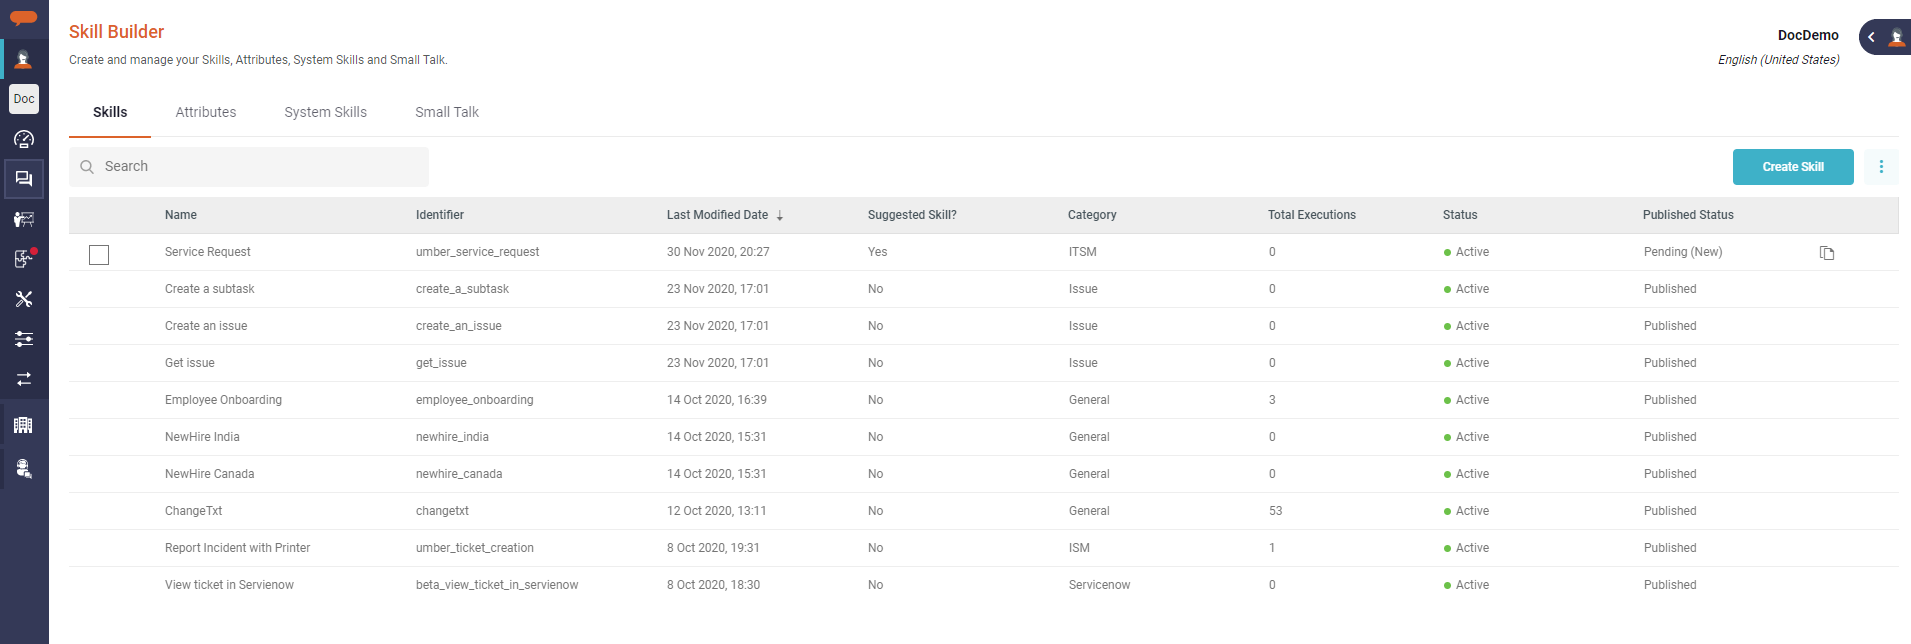
In addition to the Bot Export, an additional option to export All/Specific Skills is available in the Skills Builder on the Skills tab.
The following steps explain how to select All Skills or specific Skills for Exporting:
- Click Skill Builder on the Bots menu on the left navigation panel. The Skill list screen will appear as shown below:
- Select one or more skills by clicking the checkbox or select all skills by clicking the checkbox on the header grid. Click the more options icon
 on the right side of the grid. Click Export to continue.
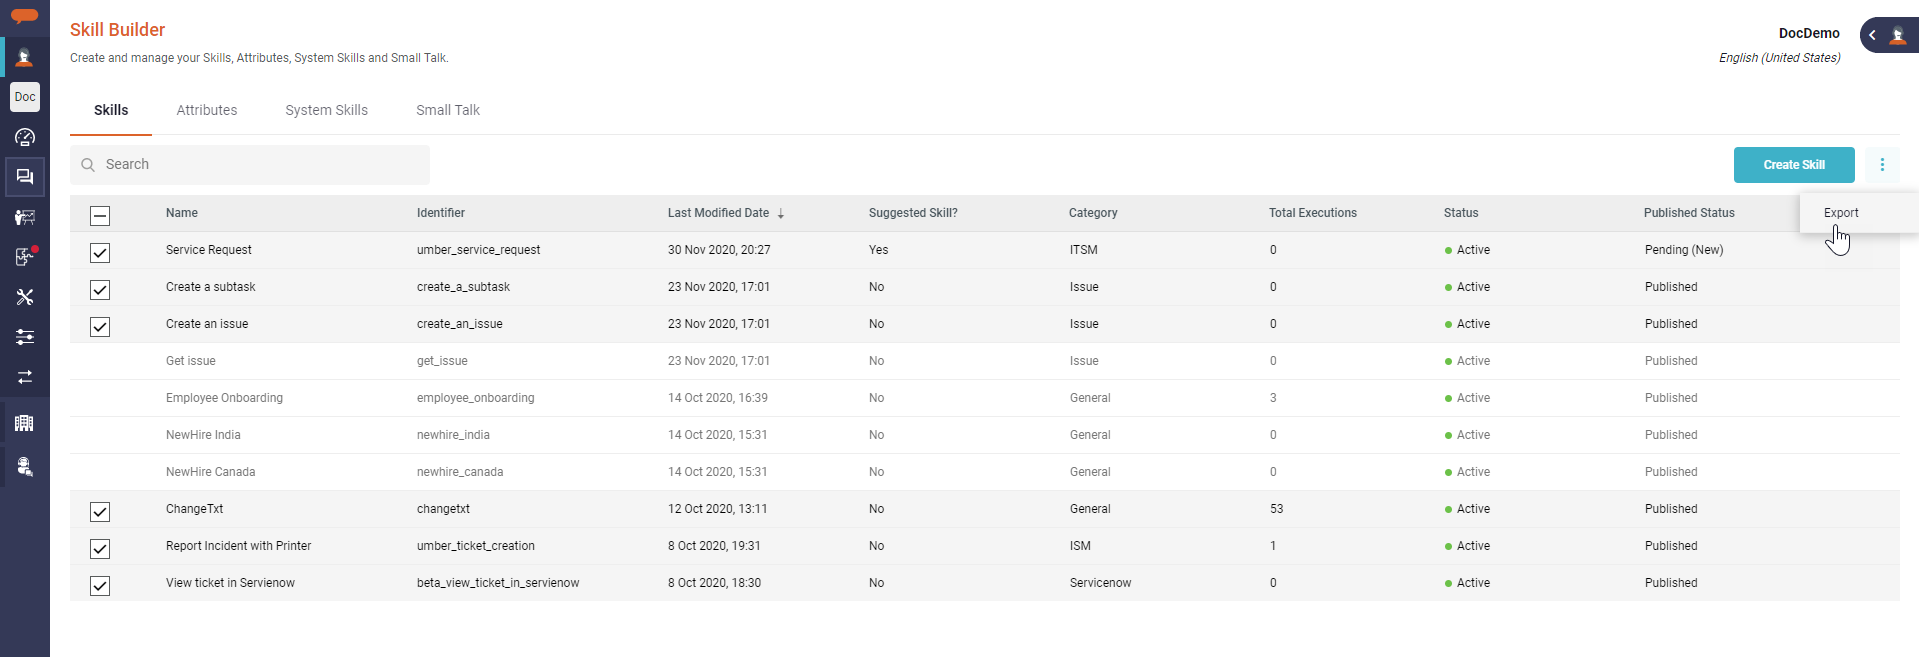
- A pop-up window appears as shown below. Select the required option to confirm whether you want to export the selected Skills or All Skills. Else, you can cancel the process also by clicking Cancel.
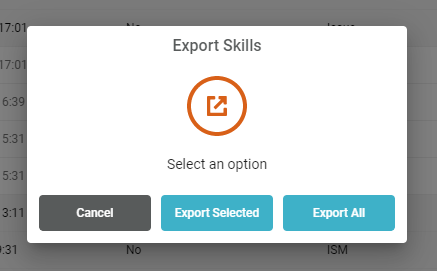
- The selected skills/all Skills will be downloaded to your local computer in .zip format.
- When a set of skills are exported, all related entities used in the skills like Attributes, Integrations, and Custom User Attributes are also exported to the zip folder. This ensures that the skills are not broken when imported into another tenant.
- Users and Groups related to the selected skills will not be exported.
Import Process
This section defines the details on how to import .zip file that contains the components (Entire bot or individual components of Bot) to be imported into the required target system. There are two ways of importing the exported file.
Import without preview:
You can import the exported file as is without previewing. Generally this is done if its a fresh tenant.
- Browse and select the exported file. Alternatively, you can also drag and drop the file in the designated area for import.The file name will automatically populate and you can add a description so that you have a history of what was imported.
- Click Import to begin the importing process.
- A confirmation pop-up will be displayed to the users as a warning that the process is non-reversible and aborting the operation in the middle of the process will not revert to the previous state of the Bot.
- Select Import without Preview to start importing the selected file.

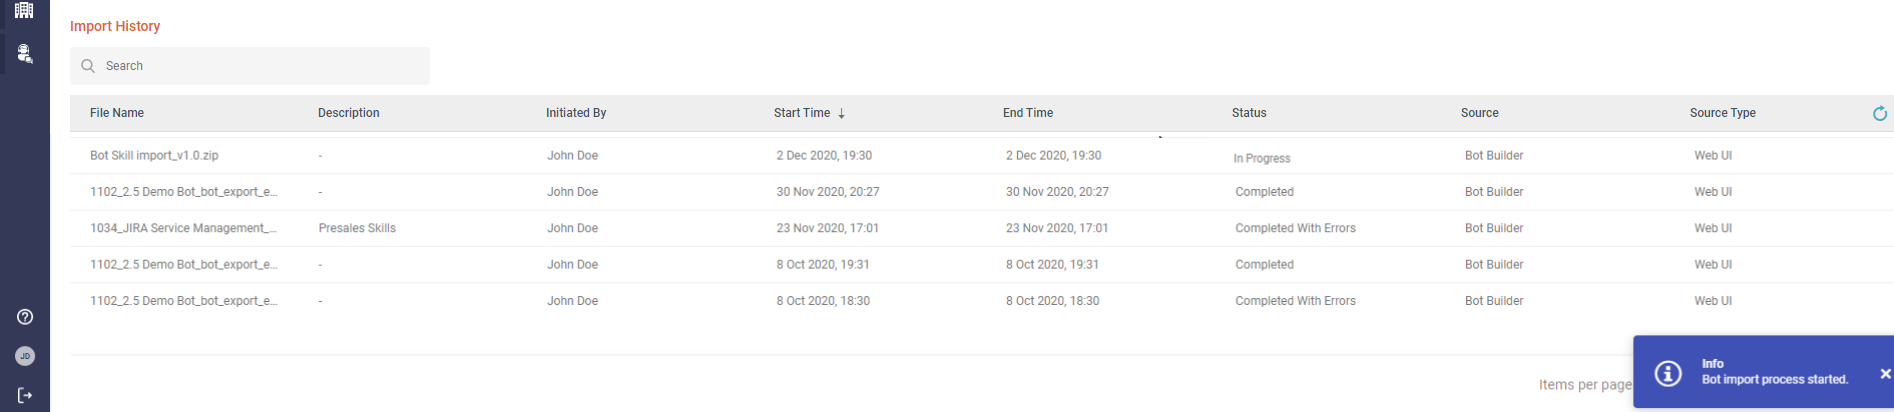
The Import status is displayed once the Import process starts. This shows the progress of the upload. - Click the Refresh icon to update the status of the Import process. The Import History section will also start displaying the recently imported files and the current import will have the status set to In Progress.
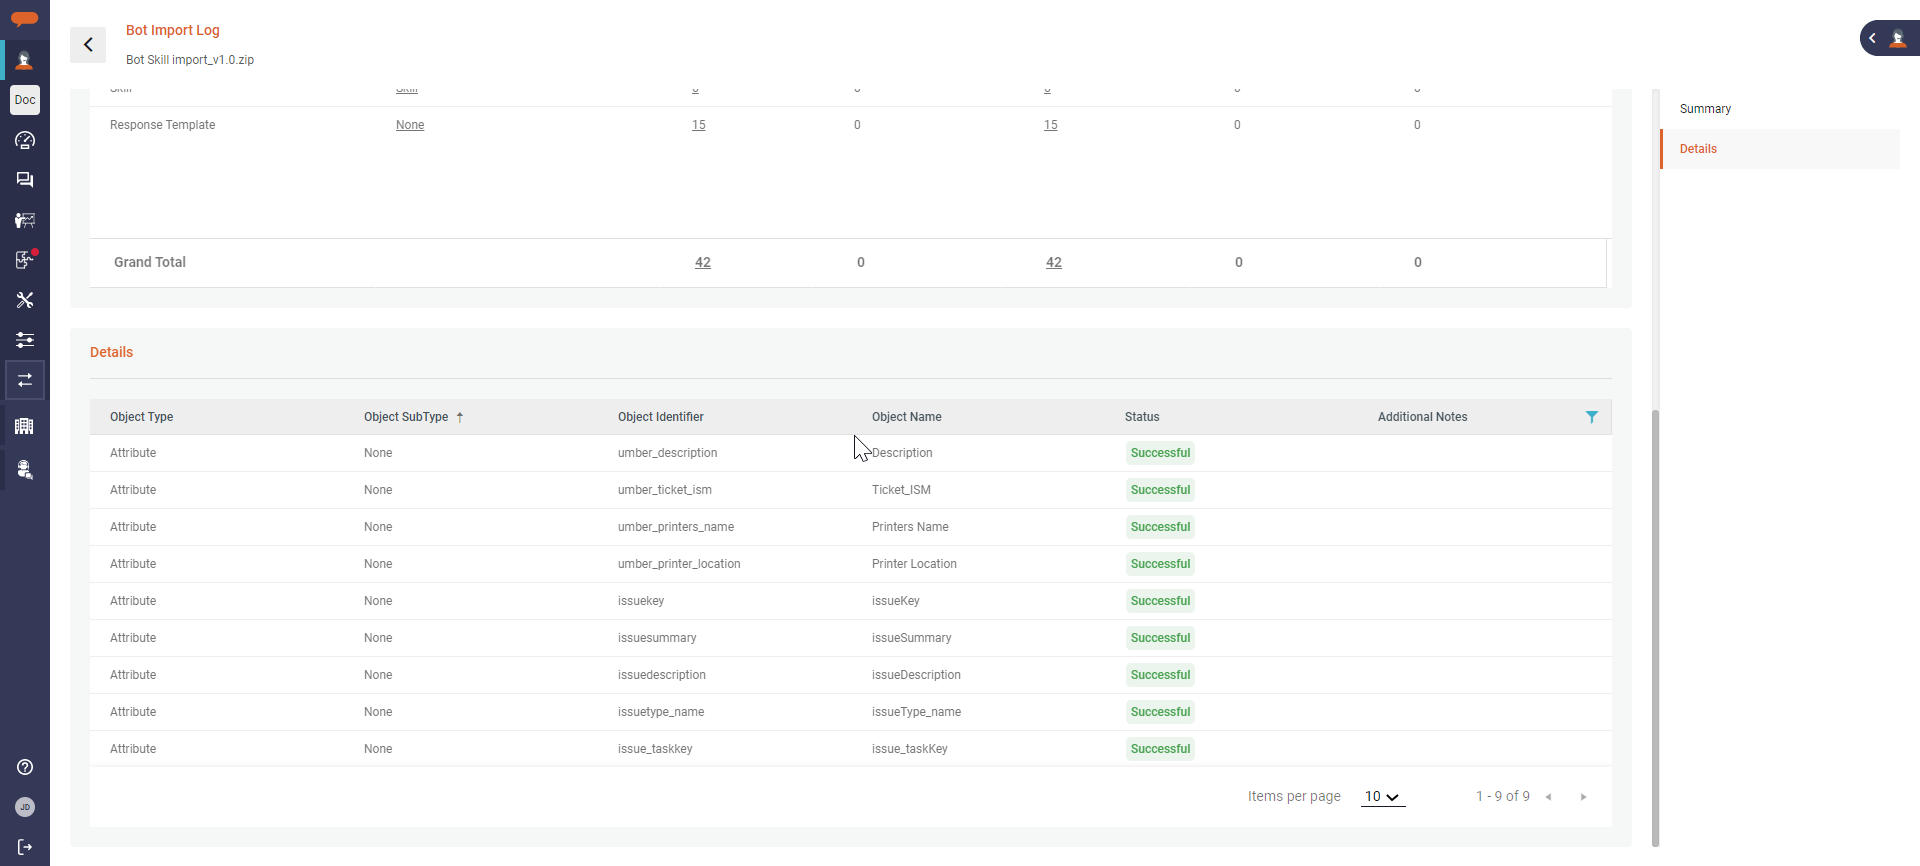
- Click on the record to view the detailed logs/summary of the import process. For example, the File Name, Initiated By, Status, Start Time, End Time, Total Time, and the details of what objects/components have been imported with its count.
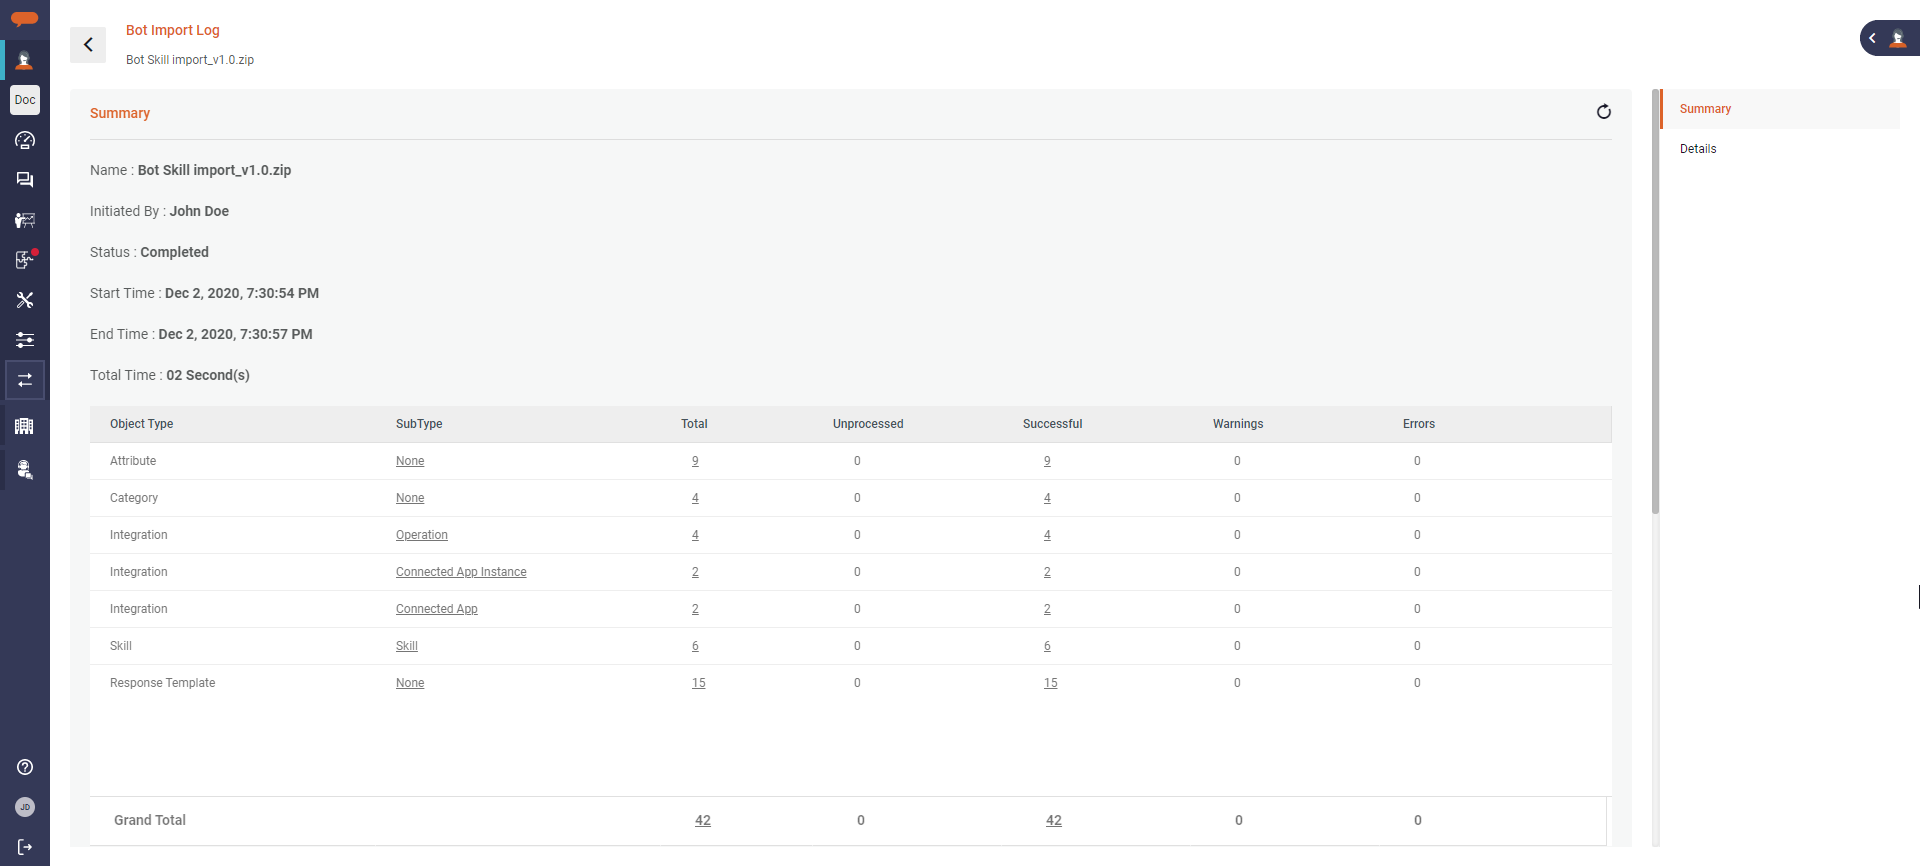
- The Details the section shows the objects imported and its status. In the summary grid, click on the count to filter the records in the Details section.
Preview and Import:
You can preview the imported contents and choose which items to include or exclude from the file. The preview will display items categorized as New or Existing.- New Items: These are items that are not currently present in your existing setup. If you choose to include these New Items, the system will create new controls based on this data. This ensures that any novel additions from the file will be integrated into your system without affecting the existing setup.
- Existing Items: These items match those already present in your current system. If you decide to include these Existing Items, the system will update or overwrite the existing controls with the new data from the file. This option is useful if you want to replace outdated information with the updated version from the import.
By carefully selecting which items to include or exclude, you can customize how the imported data will be integrated into your system, ensuring that new data is added appropriately and existing data is updated or preserved according to your needs.

- When importing Suggest Skills, the skill suggestion configurations for both default & custom group configurations are imported. In case the custom user group does not exist in the target bot, the suggestion configurations are for the custom group are NOT imported.
- The system does not allow more than 15 Custom User Attributes for a Tenant. After reaching the limit, any further attributes cannot be added to the tenant. In such a condition, Import fails. The remaining attributes and the skills or integrations related to these attributes are not imported and appear under Unprocessed objects.
- When follow-ups are imported,
- All related configurations such as Polling intervals, Integrations, attributes, Notification schedules, and Channels are also imported. This ensures that the Follow-ups are not broken when imported into another tenant.
- If the selected channel is not configured in the target system, Last Used Channel is selected as the default option and a warning message is given in the import summary.
© 2019 Serviceaide 1-650-206-8988 http://www.serviceaide.com info@serviceaide.com