Salesforce Integration
- priti.hota (Deactivated)
- Richard Graves (Deactivated)
Important
This integration only works with Salesforce Enterprise Edition.
Overview
Salesforce is a platform to empower your business by providing a complete profile of your customer. The integration between Salesforce and Intelligent Service Management is a step ahead to maintain transparency and enhance visibility into salesforce data and support information. This integration enables the sales and support team to track and manage the customer lifecycle with access to the support data in Salesforce. The sales and support team can view support incidents and service request history, create new tickets, and add work log updates to an existing ticket. By providing complete visibility of the sales cycle and post-sales support, teams can be prepared well for customer interactions, discuss service and support plans.
Features:
- Maximize efficiency and clarity for sales and support team.
- Improved customer experience.
- Prioritize tickets based on the level of criticality.
- Easy and faster access to the customer information.
Serviceaide App Installation with Salesforce
Follow this article to install the Serviceaide app in your Salesforce sandbox or production environment.
Serviceaide Configuration
The administrator can assign user name and password for a new user with the rights to create or edit tickets. The administrator can also customize the Serviceaide Tickets workspace by enabling or disabling the required fields, for the intended user.
Follow these steps to configure Serviceaide support in Salesforce:
- Log in to Salesforce using the Administrator's credentials, such as User name and Password.
- To access the Serviceaide Configuration window, click
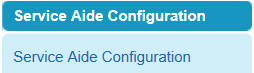 on the left panel, in Salesforce.
 - Based on the requirement, the administrator can choose to create and assign new users. The Administrator can also choose to provide authorizations to specific users to view or edit tickets.
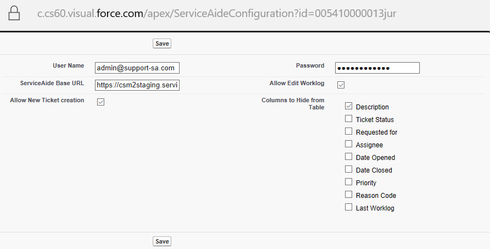
Specify the following details to complete the configuration process:
a. User Name: Specify the name of the user.
b. Password: Specify the password.
c. ServiceAide Base URL: Specify the log in URL for your existing Intelligent Service Management application. For example, https://csmt3.serviceaide.com
d. Allow New Ticket Creation: If this check box is selected, the specified user can create a new ticket in the ServiceAide Tickets section on the Accounts tab, in Salesforce.
If this check box is cleared, the New Ticket button is not visible to the user.
e. Allow Edit Worklog: If this check box is selected, the specified user can add work log in the ServiceAide Tickets section on the Accounts tab, in Salesforce.
If this check box is cleared, the Add Worklog button is not visible to the user.
f. Columns to Hide from Table: You can hide the columns in the ServiceAide Tickets section as required. The columns such as Description, Ticket Status, and Assignee, can be hidden using the check boxes.
4. Click Save.
View and Manage Tickets
Serviceaide tickets are displayed in the Account Detail page.
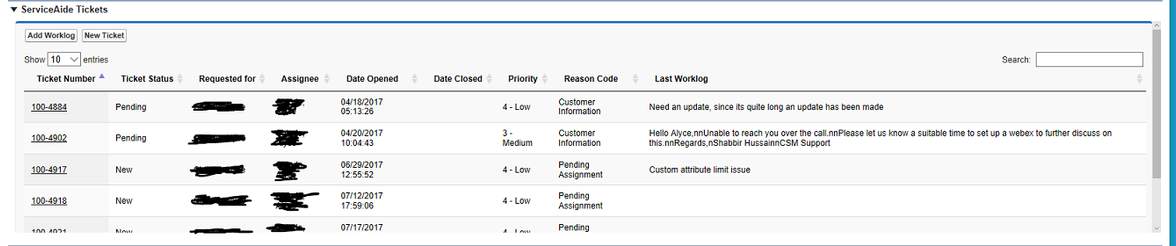
To view and edit the tickets you must perform these steps:
- Log in to Salesforce using a valid user name and password.
- Click Accounts in the Salesforce Home page.
- Select the account name from the Recent Accounts list.
Account details are displayed. Accounts are organizations or customers with which you have a business deal.
Serviceaide Tickets section is displayed as part of the account details.
Related content
© 2019 Serviceaide 1-650-206-8988 http://www.serviceaide.com info@serviceaide.com