Configure Google Hangouts
- Prudhvi Praveen Uppuluri (Deactivated)
- Richard Graves (Deactivated)
- Reena Wadekar (Deactivated)
You can configure your bot to communicate with users via Google Hangouts. To do so, you need to first generate the Google API key. API keys are used to identify the calling project (in this case the Bot) which makes a call to an API (in this case, Google Hangouts). It also verifies whether the calling Bot has been granted access to call the API and has enabled the API in their project. API keys are generated on the project making the call, and their use can be restricted to a specific environment such as an IP address range, or a specific Android or iOS app. Project number (App ID) are used to identify the user or person using the Google Hangouts. Its purpose is to inform Google Hangouts that the bearer of this token has been authorized to access the API and perform the set actions.
Enter the Business Hangouts API key and the Hangouts Project number (App ID) in the Configure Google Hangouts dialog box of the Skills Builder. Later, you need to specify the Bot URL (referred to as Message URL in the Skills Builder) on the Google Hangouts API. Bot URL is used to pass data between your Bot and Google Hangouts.
Note
Google Hangouts Channel is currently not available for customers in mainland China.
Create Google Hangouts Project
The following steps will walk you through generating the API key that you need to allow your Bot in Skills builder to communicate with your users over Google Hangouts.
- Generate the APIs for Google Hangouts by navigating to https://console.developers.google.com/project/_/apiui/apis/library page.
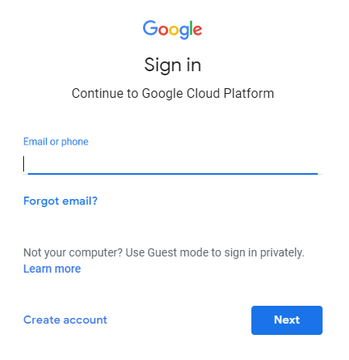
- Sign into Google Cloud Platform using your login credentials.
- Once you are signed in successfully, the following Google APIs page opens.

- If required, click Select to choose any of the existing projects or else define a new project, from the Library menu.
- Click Create to open New Project page and specify the following details:
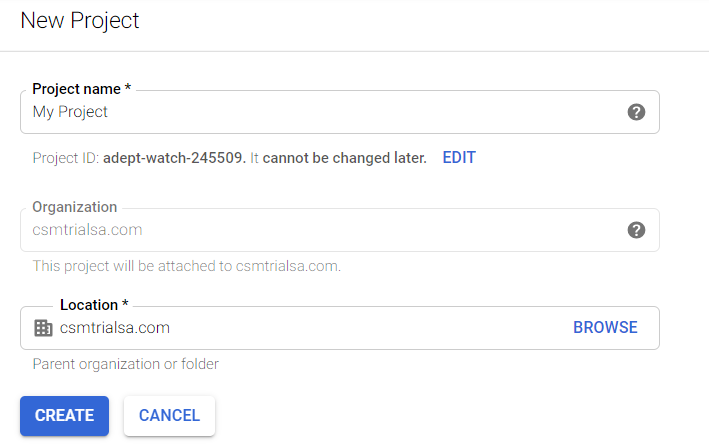
Enter the unique Project Name. Google generates and displays the unique Project ID, which cannot be changed once the project is created. The Project ID is the globally unique identifier for your project.
System automatically displays the Organization details based on the login details.
- If there is a single Location, then the details are automatically displayed. In case multiple locations are available, then from the Location field, click Browse and select the Parent organization or folder.
- Click Create to create a new project, or else click Cancel.
- Click Create to open New Project page and specify the following details:
- Once the new project is created, the following API Library page opens with the specified project name.
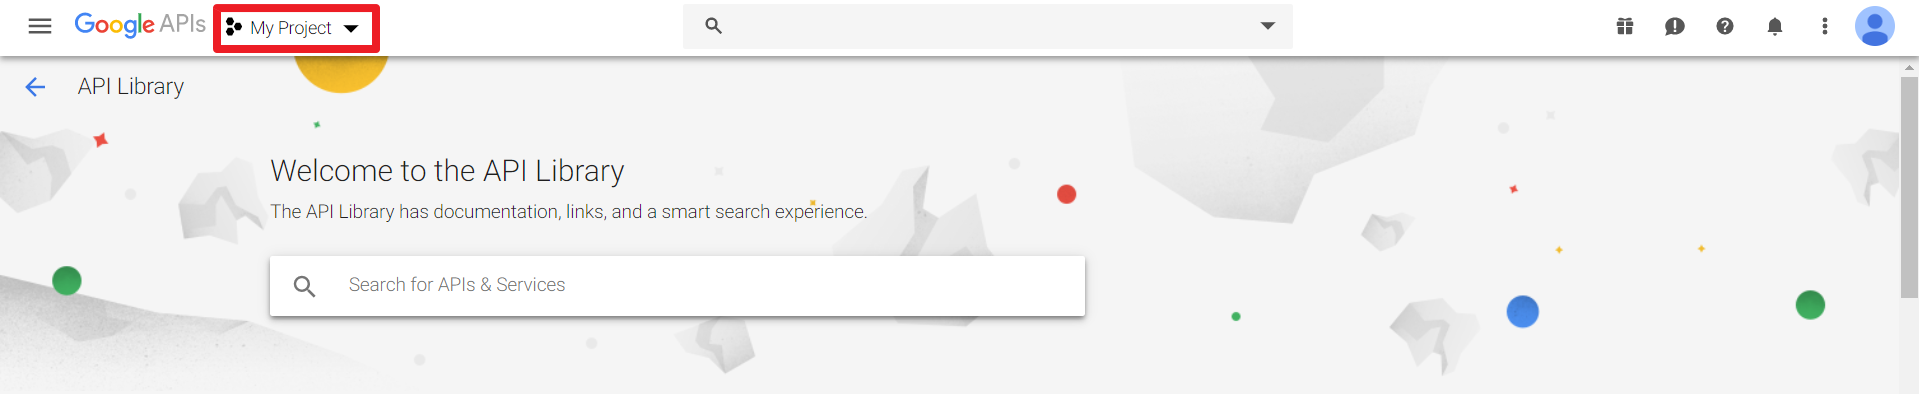
- On the Search bar, search for Google Hangouts.
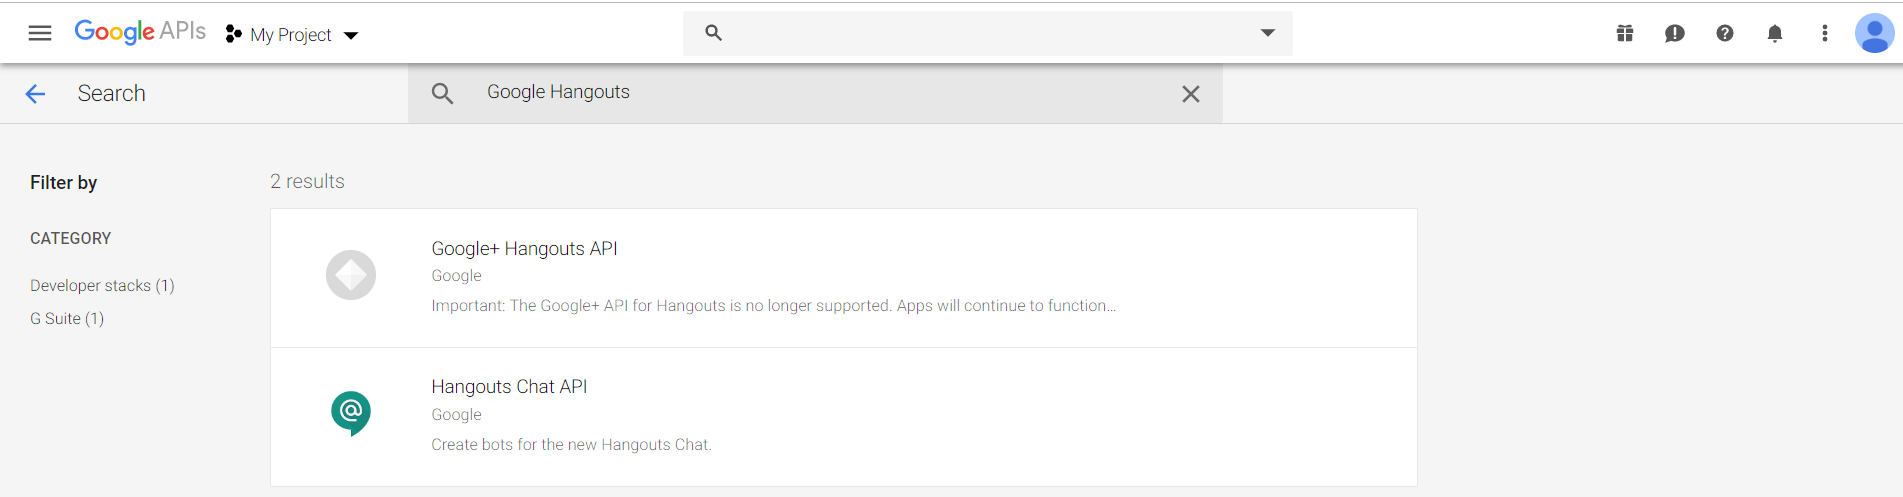
- Click Hangouts Chat API to open it on a separate page.
- Click Enable to enable the Google Hangouts API.
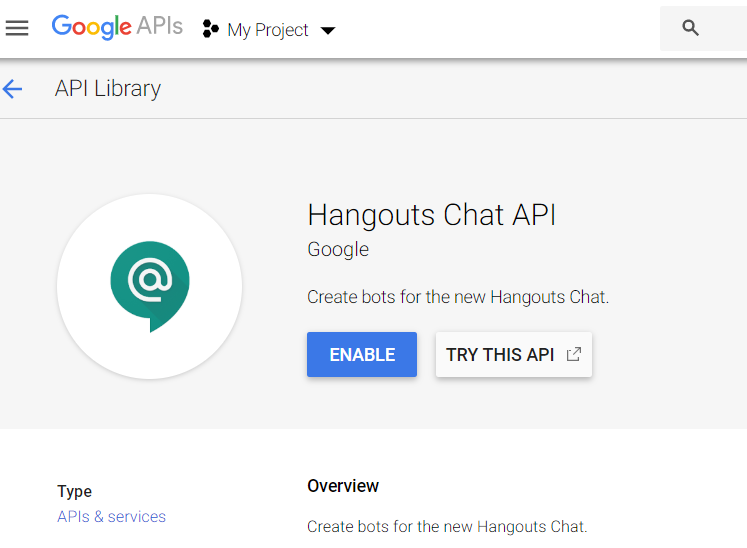
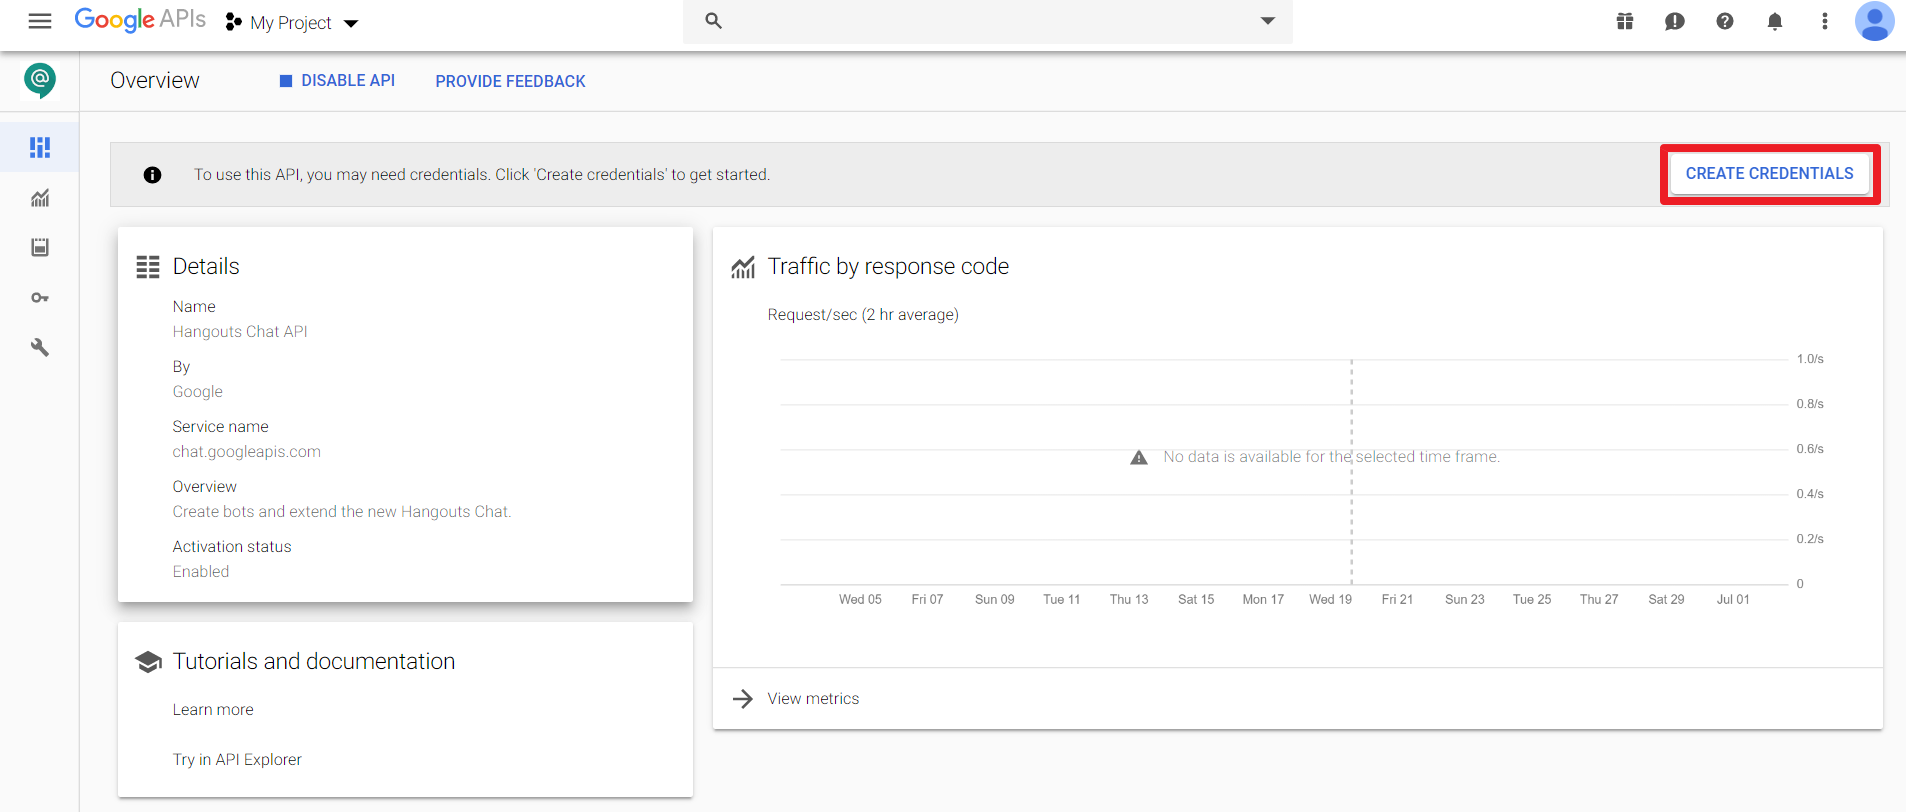
- The Hangouts Chat API page appears. To use the API, click Create Credentials to open it on a separate page.
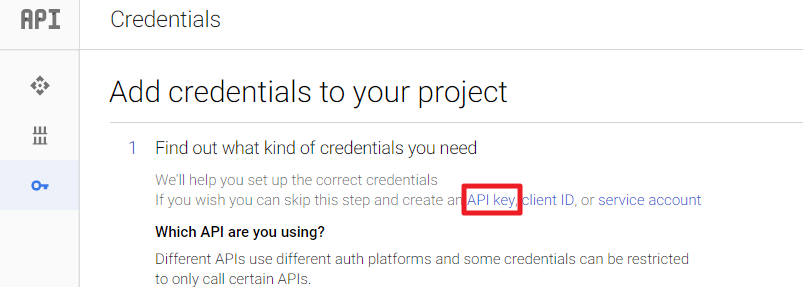
On the Credentials page, click API Key to open it on a separate page.
Note
API key can be used in a project and with any API that supports it.
- Specify the API Key Name.

- Select the required Application restrictions. Specify the required web sites, apps or IP addresses which can use this key. You can set the following restriction types for the key.
- None
- HTTP referrers (websites)
- IP addresses (web servers, cron jobs, etc.)
- Android apps
iOS apps
Click Create to generate the API key.
Note
It may take up to 5 minutes for the settings to take effect.
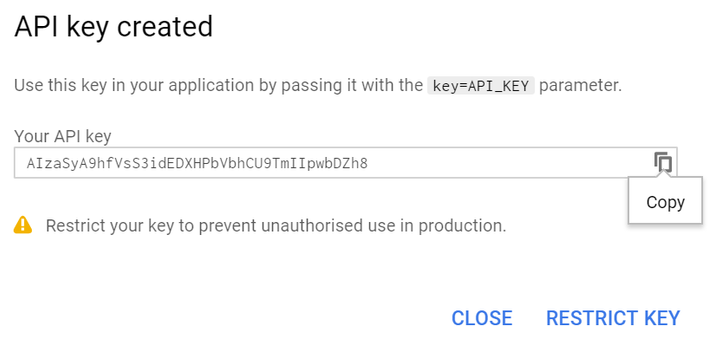
- Once the API key is created, the following page appears with the generated API key.
- Specify the API Key Name.
Copy the API Key and retain it, so that it can be used in the Skills Builder to communicate with the Google Hangouts.
Note
The API Key is used in Step 4 of Enable Google Hangouts Channel in Skills Builder section.
- From the Dashboard, go to Configuration for Hangout API.
Copy the generated Project number (App ID) and retain it, so that it can be used in the Skills Builder in order to authenticate the messages received from the Skills Builder.
Note
The Project number (App ID) is used in Step 4 of Enable Google Hangouts Channel in Skills Builder section.
- Specify the unique Bot Name with which you interact.
Specify the Avatar URL.
Note
Avatar URL is an image URL used to identify the bot.
- Specify the Description in a maximum of 40 characters and then select both checkboxes under Functionality
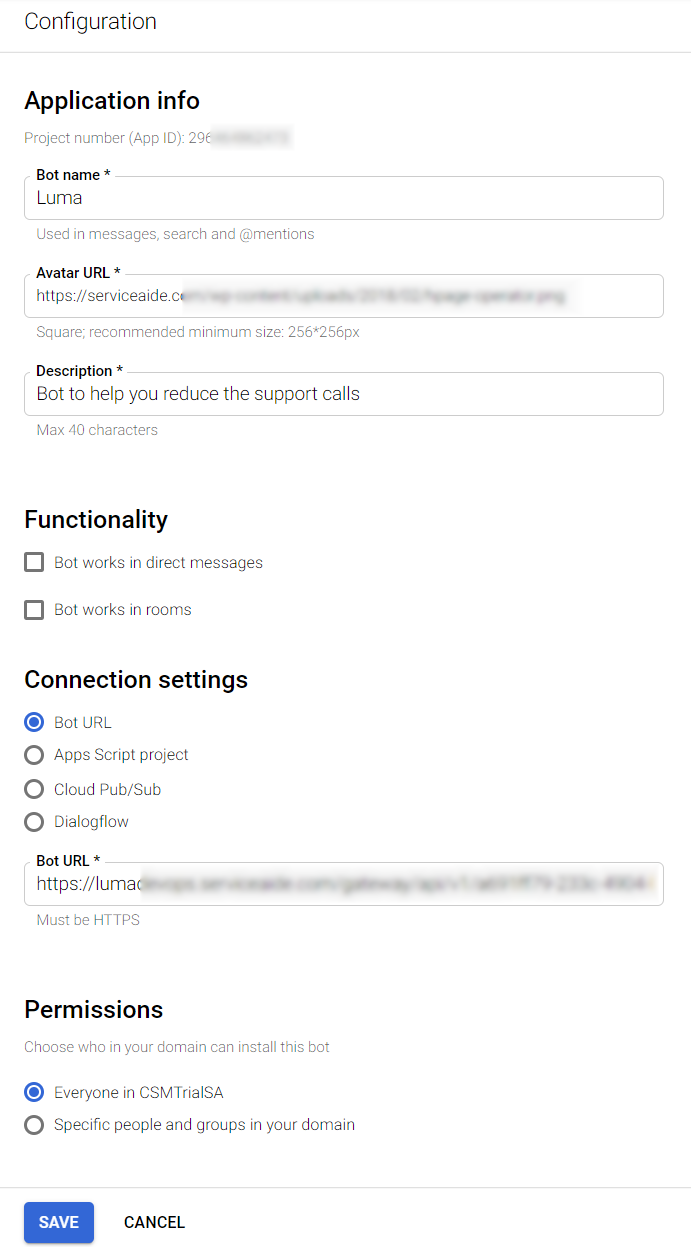
In the Connection Settings section, select Bot URL and then specify the Message URL that is copied from the Skills Builder.
Note
To know about the Message URL, refer Step 5 of Enable Google Hangouts Channel in Skills Builder section.
Enable Google Hangouts Channel in Skills Builder
To enable Google Hangouts in Skills Builder, do the following:
- On the Bots dashboard, from more options
 click Bot Configuration as shown below.
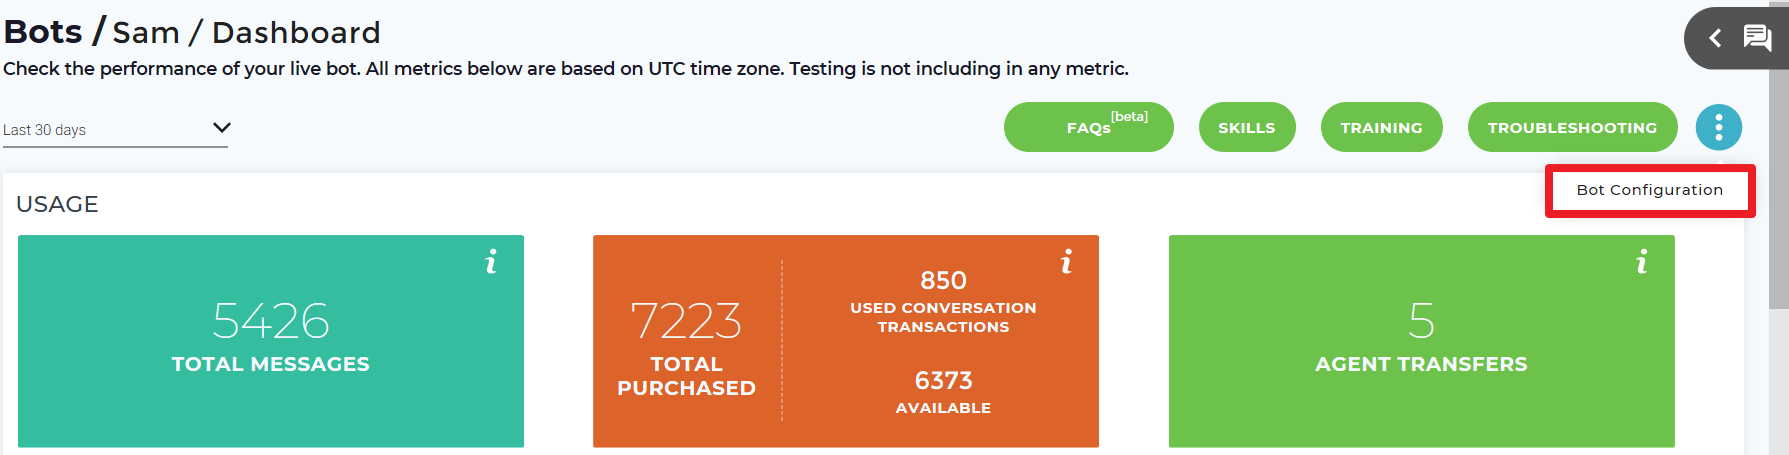
- On the Bot Configuration page, click the Channels tab.
The Channels page appears as shown below.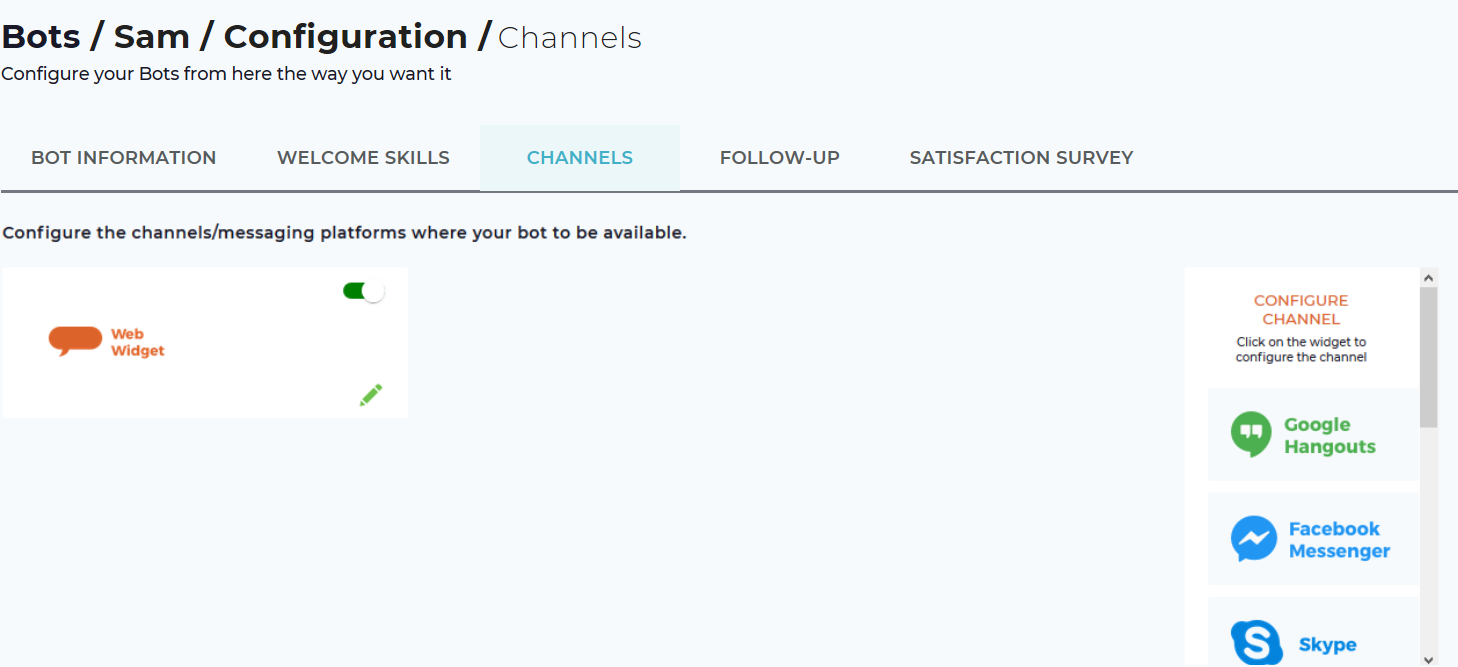
- Select Google Hangouts from the Configure Channel list.
The Configure Google Hangouts dialog box appears as shown below.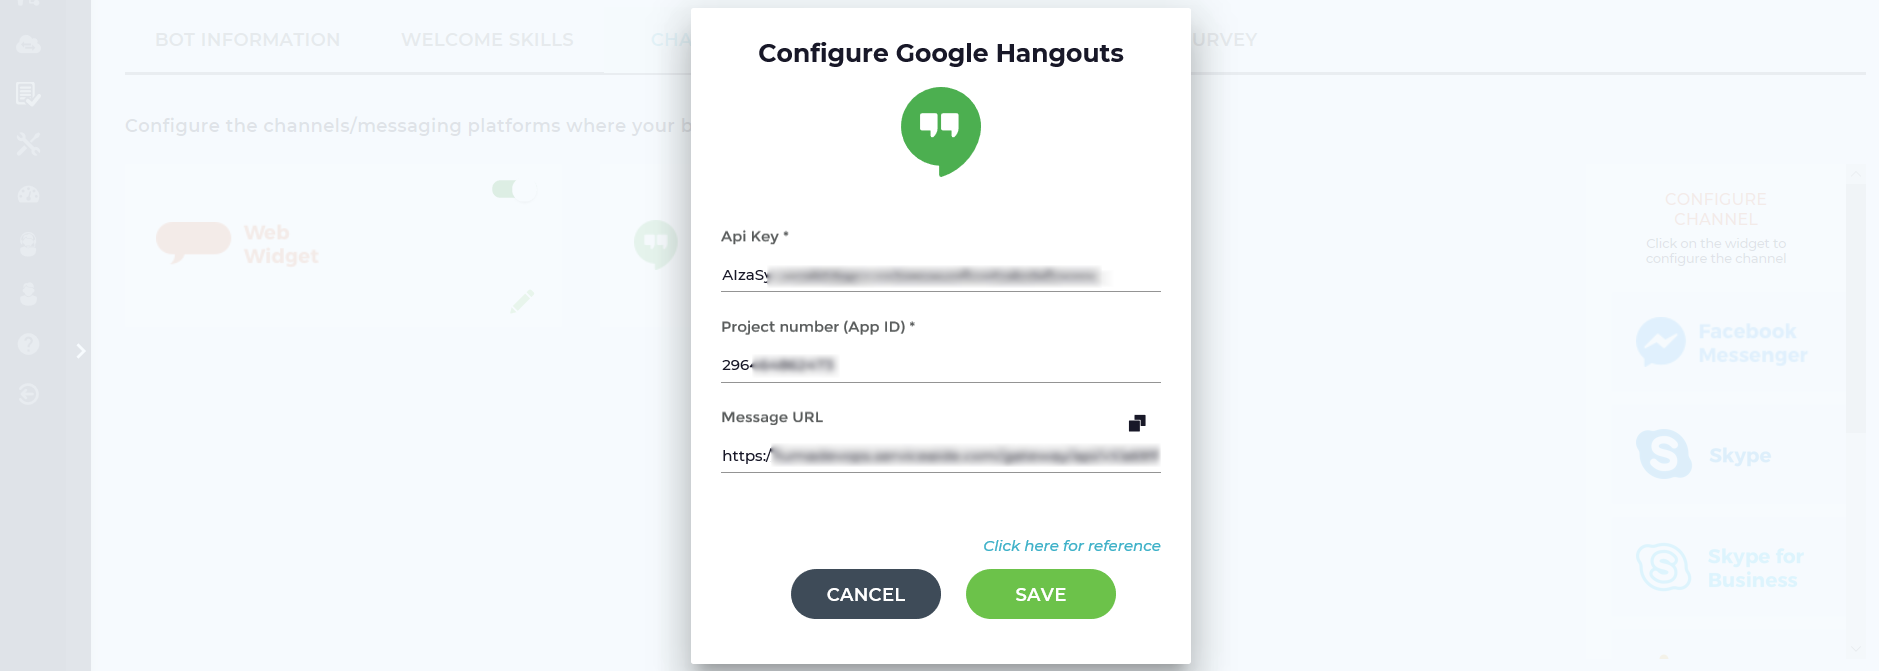
- Paste the Business Hangouts API Key and Project number (App ID) copied in Step 11 and Step 12 a (respectively) of Create Google Hangouts Project section.
Copy the Message URL and retain it in an easily accessible location such as notepad or a text editor tool. This is used while configuring the Google Hangouts Project (Step 13 of Create Google Hangouts Project section). You can use the copy icon
 to simplify the operation.
 - Click Save to enable the Google Hangouts channel. By default, the Google Hangout channel is enabled on clicking Save.
- The configured Google Hangouts is shown on the Channels page.
- If required, use the toggle button (
 ) to make the channel inactive. You can inactivate the Google Hangouts if you do not want to use it.
 - If required, use the edit button (
 ) to edit the Google Hangouts details.
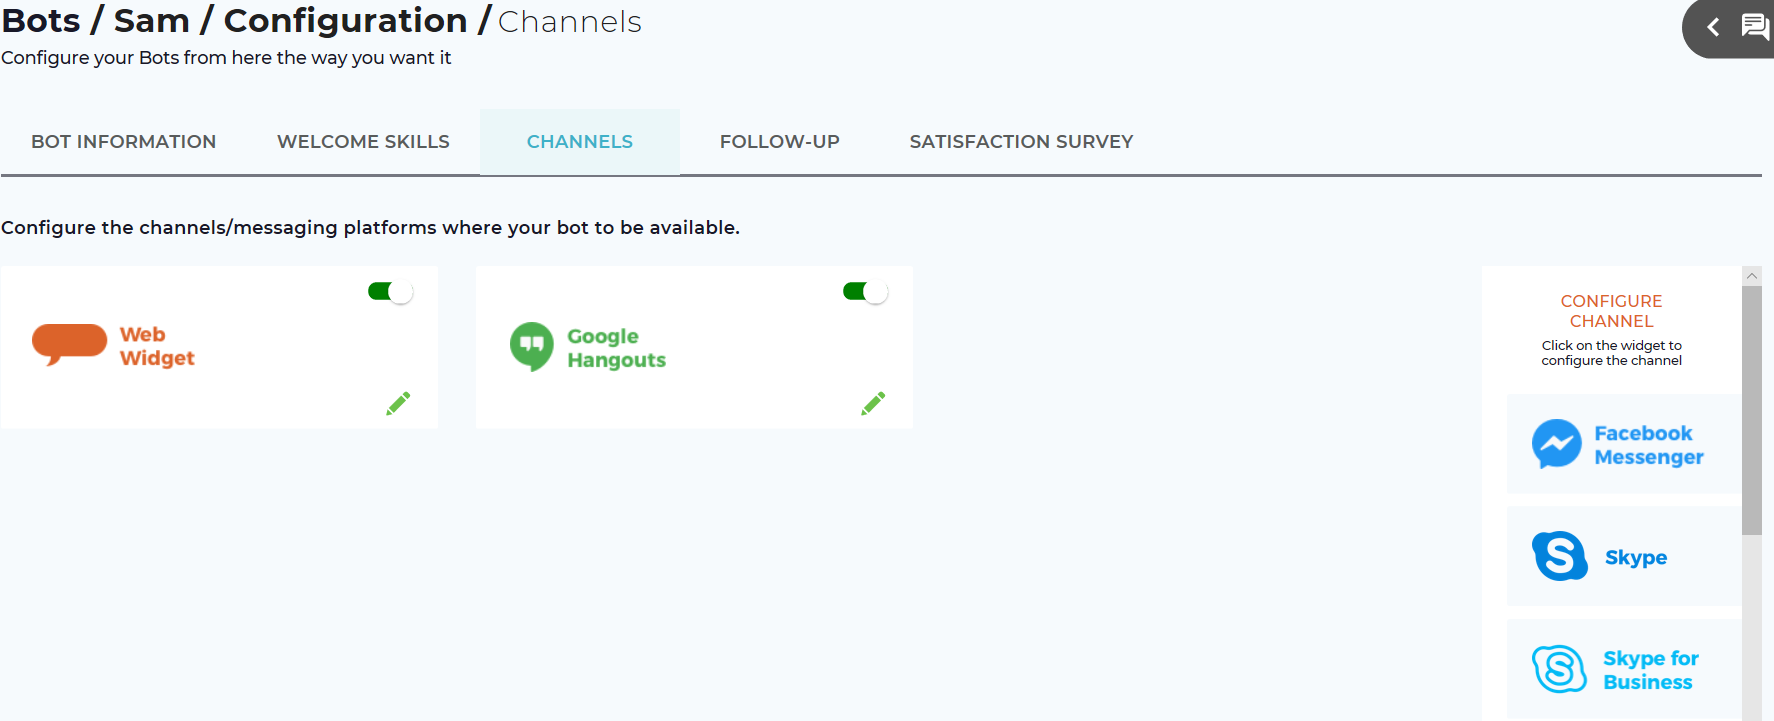
- If required, use the toggle button (
Chat with Luma
Once the service is running you can send messages to your Bot user and receive responses from your Luma Virtual Agent. To chat with the Bot user, navigate to https://chat.google.com/ and login to your Google Cloud Platform. If there are multiple bots, select the required Bot to start chatting as shown below.
Note
Note that the Bot may not be visible by default. You may need to search for the bot during the first chat instance. Once the conversation starts with the bot, the bot will be visible in the Bots list.
If case of any issues with the configuration, please contact the Serviceaide Support team.
Related content
© 2019 Serviceaide 1-650-206-8988 http://www.serviceaide.com info@serviceaide.com