Post a message to a Slack Channel for New Priority 1 Tickets
Note
While this article was written for version 1.0.0, all instructions will work with 1.0.1
This Zap (workflow) is triggered by a new ticket in Serviceaide and will post a message to a specific Slack channel if the ticket has a priority of Critical (P1). The goal would be to alert a team that leverages Slack for a new Priority 1 ticket. This is a three step Zap and all Zaps above two steps require a premium version of Zapier before they are turned on. You can create the Zap and leave it turned off for testing purposes without a premium account.
Step 1 – Setting up a Trigger for new tickets in Serviceaide
To set up a trigger, follow these steps:
- Login to your Zapier account using https://zapier.com.
Note: Creating an account with Zapier includes a 14 day free premium trial and after that you are redirected to a free basic plan.
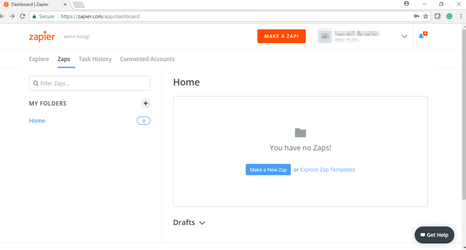
2. Click Make a Zap on your Dashboard.
3. Select the Serviceaide App as the trigger

You selected the Serviceaide app for the Trigger, now you need to select the exact event that will start this workflow or Zap.
4. Choose the trigger and the event from the respective menus on the left panel. The Serviceaide app supports 4 triggers
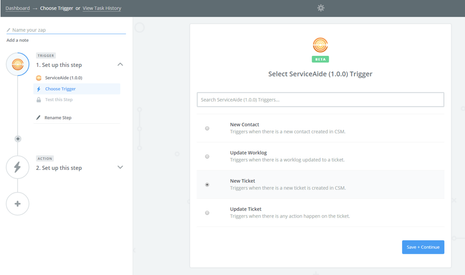
5. Click New Ticket as the trigger, only if you have selected the Serviceaide app.
6. Click Save + Continue.
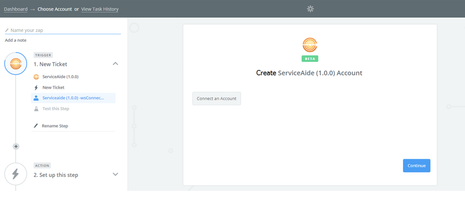
Now you need to connect to your Serviceaide environment from your Zapier account.
7. Connect to your account by clicking the Connect an Account button. If you have previously setup your account select it and Continue.
The following window appears after you connect your account.
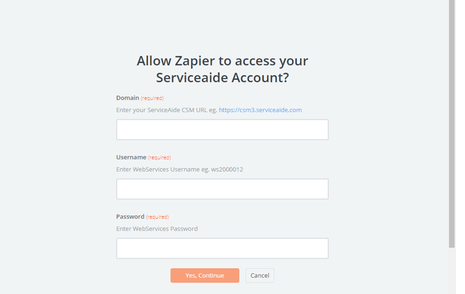
8. Specify your Serviceaide domain. This is the URL which you use to login to the application. For example, https://csm3.serviceaide.com or https://csm2.serviceaide.com. You can also use your staging URL for testing.
9. Specify your Username followed by the password.
Note: These fields require the Username and password of a Webservices user from Serviceaide. If you don’t have these details, log into your Serviceaide environment as an Administrator and navigate to MANAGE> Tools> Users and create a Webservices User . The new user must have a license type of Web Services.
10. After specifying all your credentials, click Yes, Continue. The following window appears.
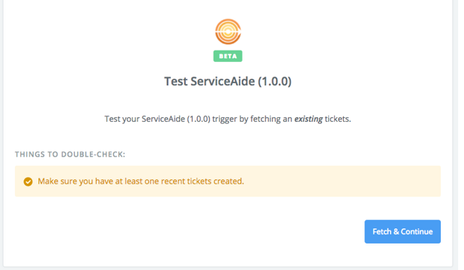
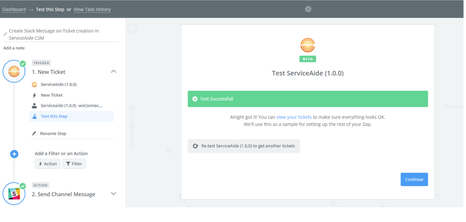
11. Click Fetch & Continue to validate the connection.
Note: You must have recently created tickets in your system for this test to return a "Test Successful" message.
12. Click Continue to move to the next step.
Note:
- If the credentials are correct and you have recently created tickets in your account, you can see the message as "Test Successful".
- If you see a message such as “We could not find the tickets”, create a few new tickets and click “Try Again”. Else, you can click Skip Test & Continue.
Step 2 – Configuring a Filter to look only for Critical Priority (P1) tickets
When a new ticket is created in Serviceaide, this Zap is triggered. For this Zap we don't want every new ticket to post a message to Slack, we only want to post Priority 1 tickets. To handle this scenario a filter needs to be added. A Filter is a type of Zapier Action. You can filter on any data that you have from the previous step.
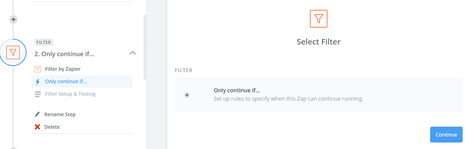
- Click the
 icon on the left panel to add a filter.
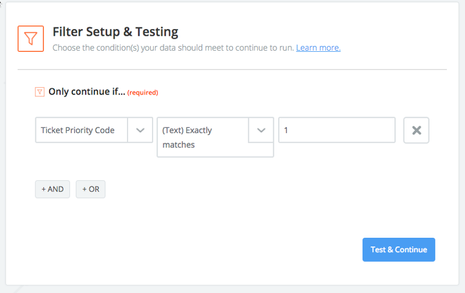
2. On the Filter screen select Only continue if and click Save + Continue. This implies that the Zap will continue only if the criteria defined in this filter is met. For example, Priority 1 (Critical) ticket.
3. To set up the filter on Priority:
a. Select Ticket Priority Code from the first field,
b. Select (Text) Exactly Matches in the next field and 1 in the last field. This implies that the filter will look only for tickets with a priority value of 1 (critical).
While this filter focuses on priority, you can also add filters for other fields such as categorization, assigned group, or requester’s organization.
c. Click +AND or +OR if you want to add another filter or another filter condition for Priority.
4. Click Test & Continue. The following window appears.
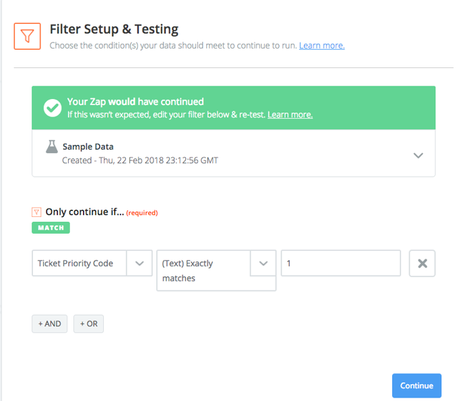
5. If your test is successful, this message 'Your Zap would have continued' is displayed.
6. Click Continue to go to the next step.
Step 3 – Creating an Action to post a message in Slack
To set up an action, follow these steps:
- Click the
 icon on the left panel to add an action.
 - Select the App from the Choose an Action App window. For example, Slack.
Note: While this example focuses on Slack you can use any other App and follow the flow of this document to create a new integration. For a quick testing, you can select a Zapier built-in app such as SMS or Email.
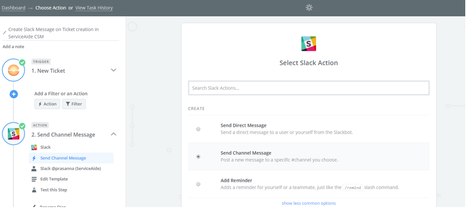
3. Select the action from the Select Slack Action window. In this example, we have selected the action 'Send Channel Message'. This action posts a message to a specific Slack Channel.
4. Click Save + Continue.
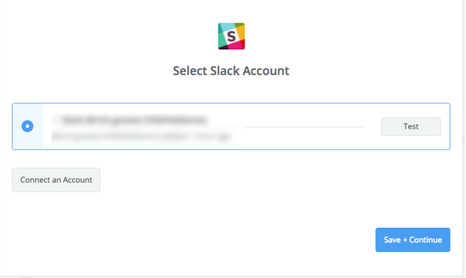
5. To link your Slack account to your Zapier account click Connect an Account. The following window appears.
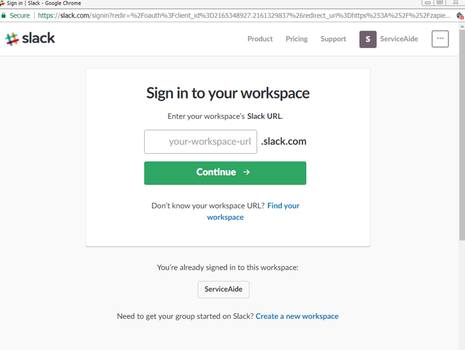
6. Specify your Slack workspace URL and click Continue.
7. After specifying all your credentials, test the connection and click Save & Continue.
The following window appears. Now, you need to select the channel and define the message you want to post.
8. Select the channel from the drop-down list.
9. Define the Message to post in Slack. In the Message Text section you can use variables from Serviceaide to create a contextual message based on the event.
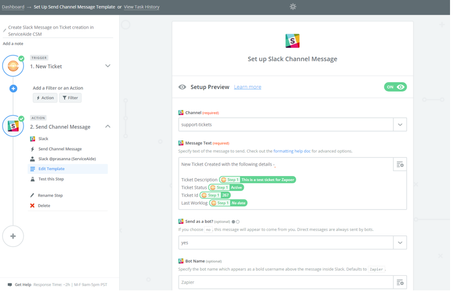
10. The rest of the Template details specifies about how the message should be posted in Slack. Most of this information is optional. After specifying the details, click Continue on the bottom right of the screen.
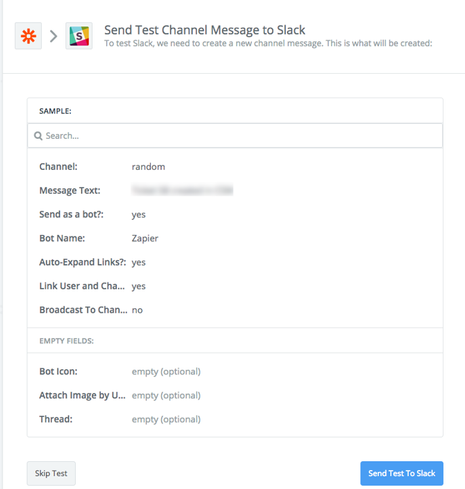
11. You can now test the message that you have created.
12. Click Send Test to Slack. If your test is successful, you can see the message in Zapier.
13. Click Finish.

You have successfully created your Serviceaide to Slack Zap.
By default, your Zap is Off. When it is set to On, it runs automatically every 15 minutes (paid Zapier plans run more frequently). If new tickets meet the criteria of your workflow, a message is posted to the Slack Channel based on the Zap you have created.
© 2019 Serviceaide 1-650-206-8988 http://www.serviceaide.com info@serviceaide.com