Configure Web Widget
- Reena Wadekar (Deactivated)
- sneha.tripathi
- Vemuri Mohana Raghuram (Unlicensed)
- Richard Graves (Deactivated)
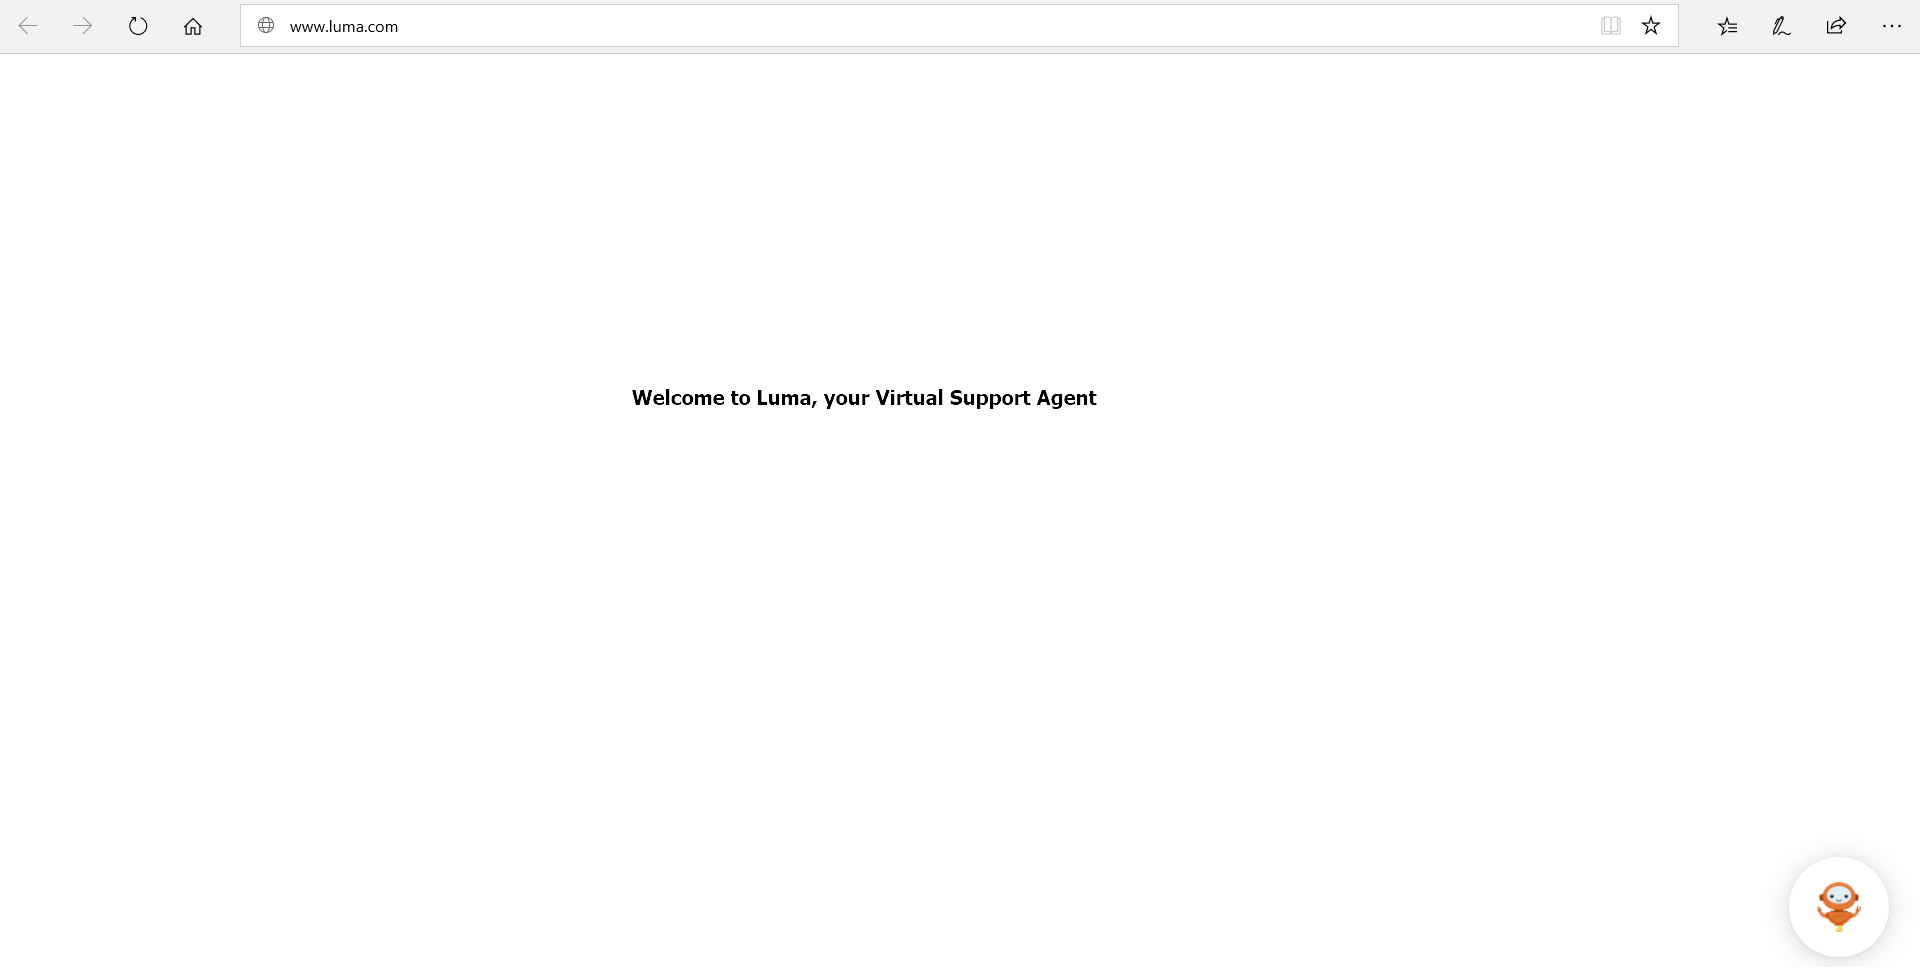
Luma Virtual Agent supports many different chat channels but for some organizations, it's critical to provide access through a company intranet or internet site. The Web Widget is a small piece of code that can easily be embedded into a website to allow launching a chat session with a bot.
To configure the Web Widget on a website, an Administrator needs to complete the following three high-level steps:
- Download the Widget Code (luma-web-widget.zip).
- Configure the Web Widget on your Web Portal using the secret key, head and body code from the Channels tab of Configuration within the Bot Builder interface.
- Enable the web widget channel inside Bot Builder.
Enable the Web Widget Channel
To enable Web Widget in the Bot Builder interface, do the following:
- Click Bots menu on the left navigation pane and then click Configuration.
The Configuration page appears. - On the Configuration page, click the Channels tab as shown below.
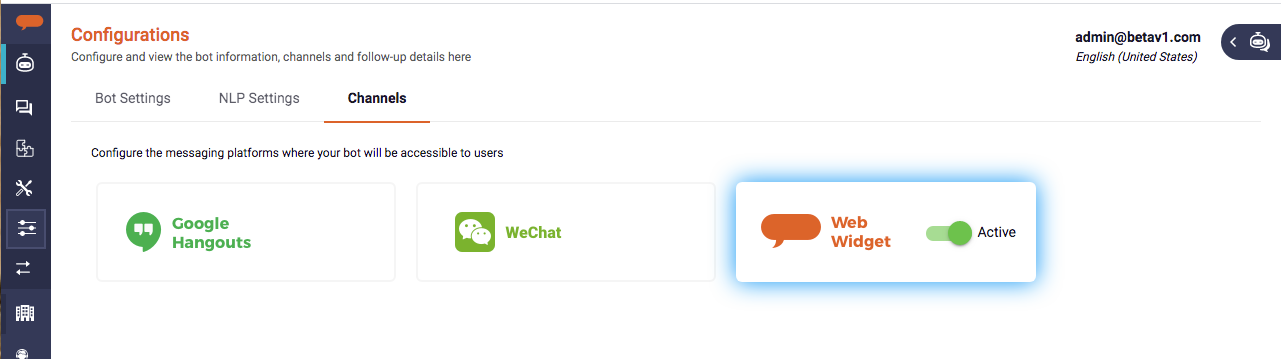
- Click the Web Widget tile from the list of channels.
The Web Widget configuration page appears as shown below. You can set the web widget Status to Active.
Toggle Trigger Welcome Skill when chat window is minimized & re-opened to ON to display the welcome skill each time the chat window is minimized or reopened.
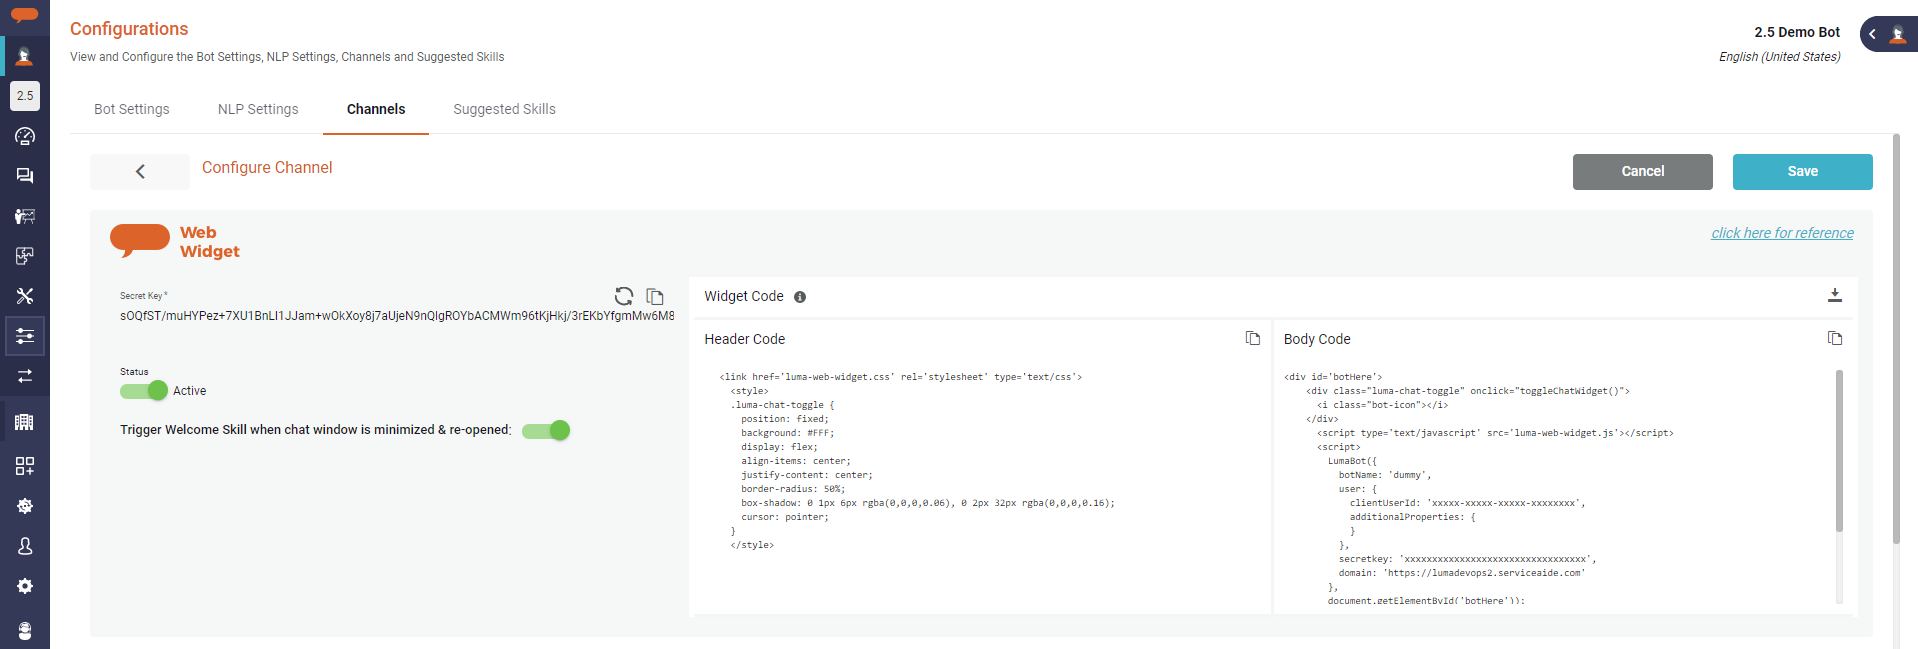
Copy the Secret Key, the Header Code and finally the Body Code and retain them in an easily accessible location such as notepad or a text editor tool. These details will be used later when adjusting the web widget code on your website. You can use the copy icon to the right of each section to simplify the operation.
- In the Widget Code section, click the download icon to download the luma-web-widget.zip folder, which includes the index.html file, luma-web-widget.js file, and the web-widget.css file with images.
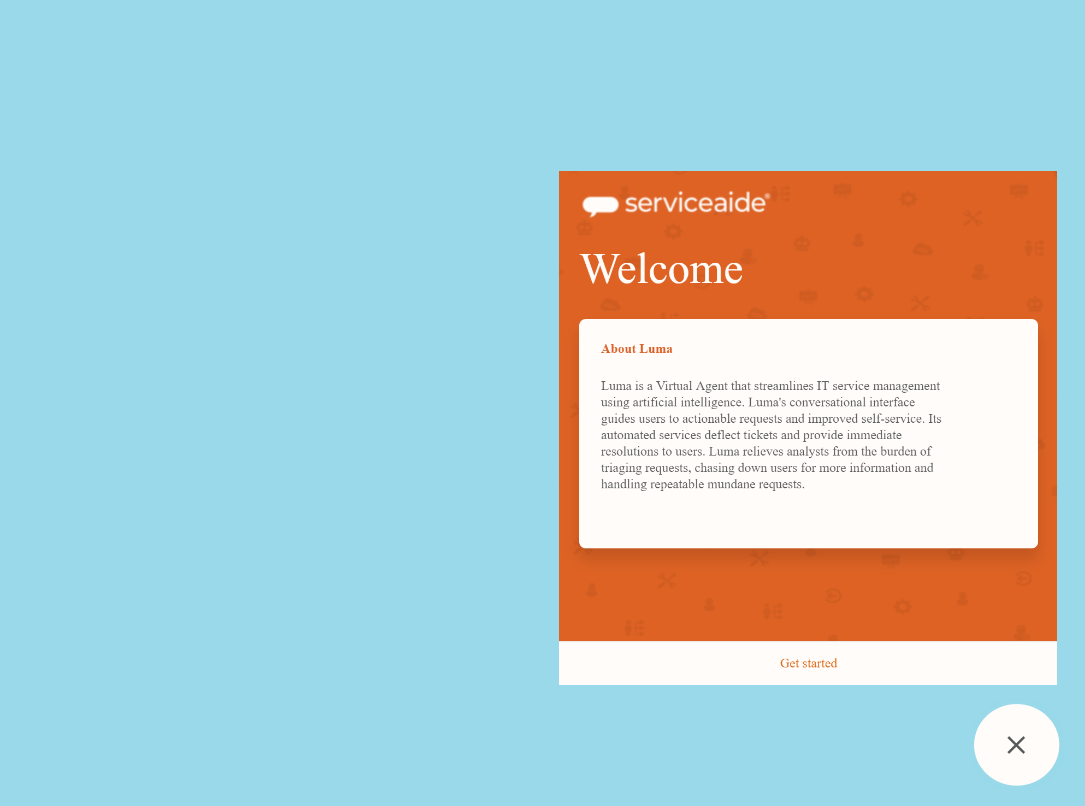
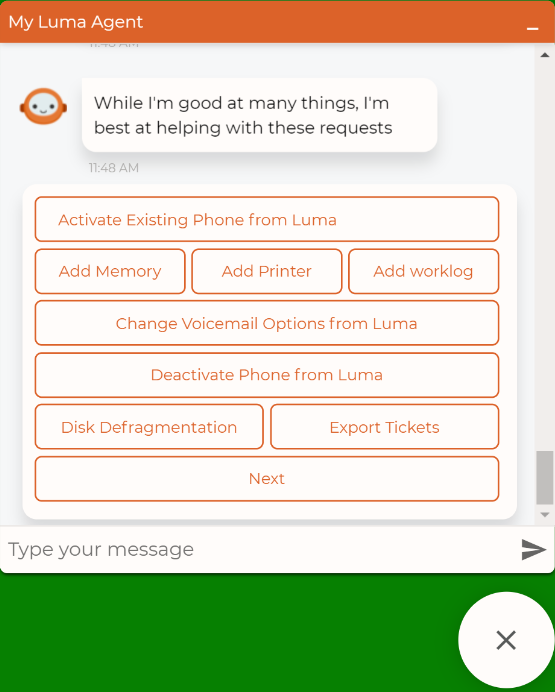
- The Customize Welcome Screen section provides a getting started message to first time users and Guest users. A common challenge for users interacting with a chatbot is understanding what the bot can and cannot do. This is a way to educate them on what your bot can do. Customize your Welcome Screen consists of:
- Welcome Title: A greeting message to the users when they open the bot chat window. The maximum number of characters is 45.
Welcome Description: The Welcome Description allows for communicating a brief overview, purpose, and capabilities of the bot. Specify a custom message to welcome the user when they open the web widget for the first time. The maximum number of characters is 580.
The Welcome Title and Description are part of the welcome screen. The Welcome message appears for a registered user only during their first interaction with the bot. However, for a guest user (an unregistered user), the welcome message appears every time they come and launch the web widget.
- In the Customize Widget Color section, you can customize the color palette by entering or selecting the required primary color. You can also select the color from the list of common colors.
- Toggle the Show welcome screen button to ON. This ensures that the welcome screen is displayed when a new user opens the widget for the first time.
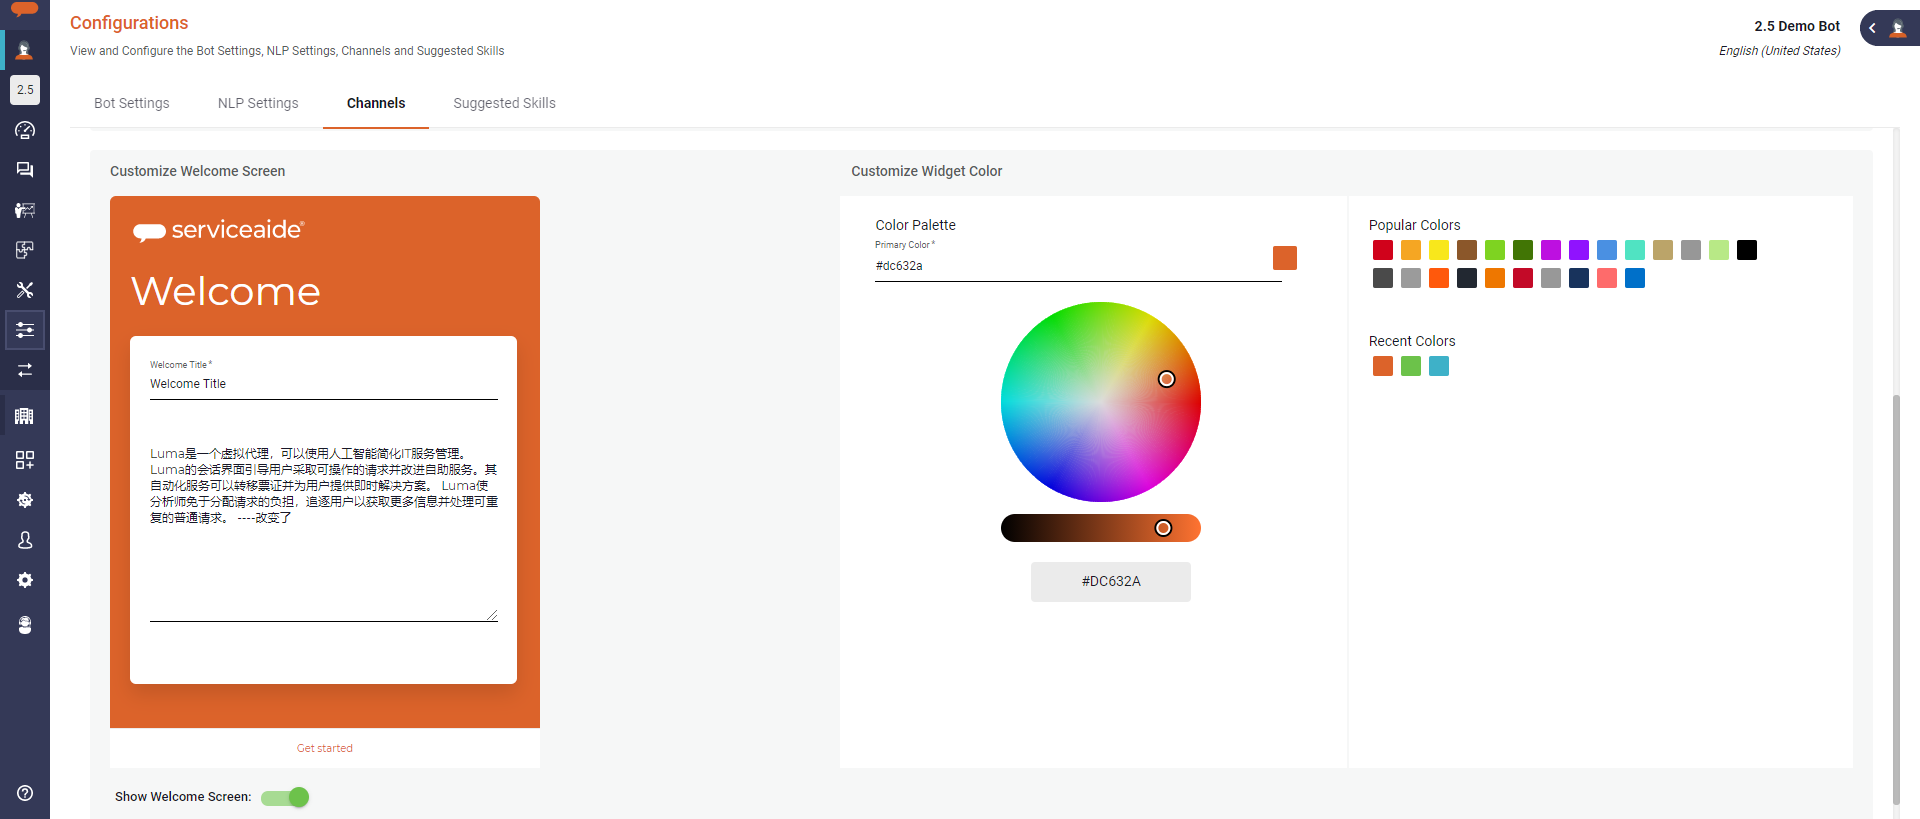
- Click Save to enable the Web Widget channel. You can inactivate the web widget if you do not want this channel available to users.
Install the Web Widget on your Site
Excluding testing, configuring the web widget on your website may take 10 to 30 minutes based on your familiarity with the website and embedding the HTML.
To configure the web widget on your web portal, do the following:
- Open the luma-web-widget folder (downloaded in step 5 in Enable the Web Widget Channel section above).

Open the index.html page of your web portal in a text editor. Paste the following details in your index.html page:
- Paste the contents of the luma-web-widget folder's index page into your index.html page.
Paste the Header Code from the Web Widget configuration page (copied in step 4 in Enable the Web Widget Channel section above) into your index.html. The Header code includes the CSS stylesheet associated with the web widget. To learn how to customize the stylesheet to change the appearance of the web widget, see the Customize Web Widget Styles article. See the example below of a sample index.html page.
Head Code Sample<link href='https://fonts.googleapis.com/icon?family=Material+Icons' rel='stylesheet'> <link href='luma-web-widget.css' rel='stylesheet' type='text/css'> <link href="https://fonts.googleapis.com/css?family=Montserrat" rel="stylesheet"> <style> .luma-chat-toggle { position: fixed; background: #FFF; display: flex; align-items: center; justify-content: center; border-radius: 50%; box-shadow: 0 1px 6px rgba(0,0,0,0.06), 0 2px 32px rgba(0,0,0,0.16); cursor: pointer; } </style>Paste the Body Code from the Web Widget configuration page (copied in step 4 in Enable the Web Widget Channel section above) in the index.html. The Body Code (which includes the secret key) contains the following javascript, which is used to embed the web chat control on your website.
Body Code Sample<div id='botHere'> <div class="luma-chat-toggle" onclick="toggleChatWidget()"> <i class="bot-icon"></i> </div> <script type='text/javascript' src='luma-web-widget.js'></script> <script> LumaBot({ botName: 'LumaChatBot', user: { clientUserId: 'xxxxx-xxxxx-xxxxx-xxxxxxxx', additionalProperties: { } }, secretkey: 'xxxxxxxxxxxxxxxxxxxxxxxxxxxxxxxxx', domain: 'https://luma3.serviceaide.com' }, document.getElementById('botHere')); // Function to call init for LumaBot function toggleChatWidget() { LumaBot.toggleChatWidget(); } </script> </div>The Body code consists of the following:
- Div container: The "div" element is passed as a parameter to the Luma Bot which uses it to start the Bot.
Script: This consists of the following parameters:
Bot Name: The name of the Bot you are chatting with. You can edit the botname as required on your index.html page. This bot name appears on the web widget chat window as shown below. It does not need to match with the bot name inside the Bot Builder interface.
Note
In the sample index.html page, the bot name is 'LumaChatBot'.

- User Object: It consists of two parameters - Client User ID and User Display Name.
Client User ID: Is an ID assigned to each unique user of your website. If the user logs into the web portal using their credentials, then those credentials (email ID or username) are passed to the web widget to auto-authenticate the users. If the client user ID is not passed to the web widget, then the user continues as a guest, and is prompted for registration.
- Secret Key: The unique code generated in Bot Builder which is used to authenticate the API calls made to the bot.
Domain: The domain URL is the URL used to communicate with the Luma Virtual Agent platform. This URL is pre-populated in the Body code. Ensure that the correct domain URL is provided in the body, failing which it will not connect to the Luma Virtual Agent instance.
Save your index.html page with the changes and refresh the web portal and cache to load the web widget automatically on the screen for users as shown in the following sample page.
Note
Since the Web Widget is automatically populated on the screen, users do not need to configure anything to view the web widget.
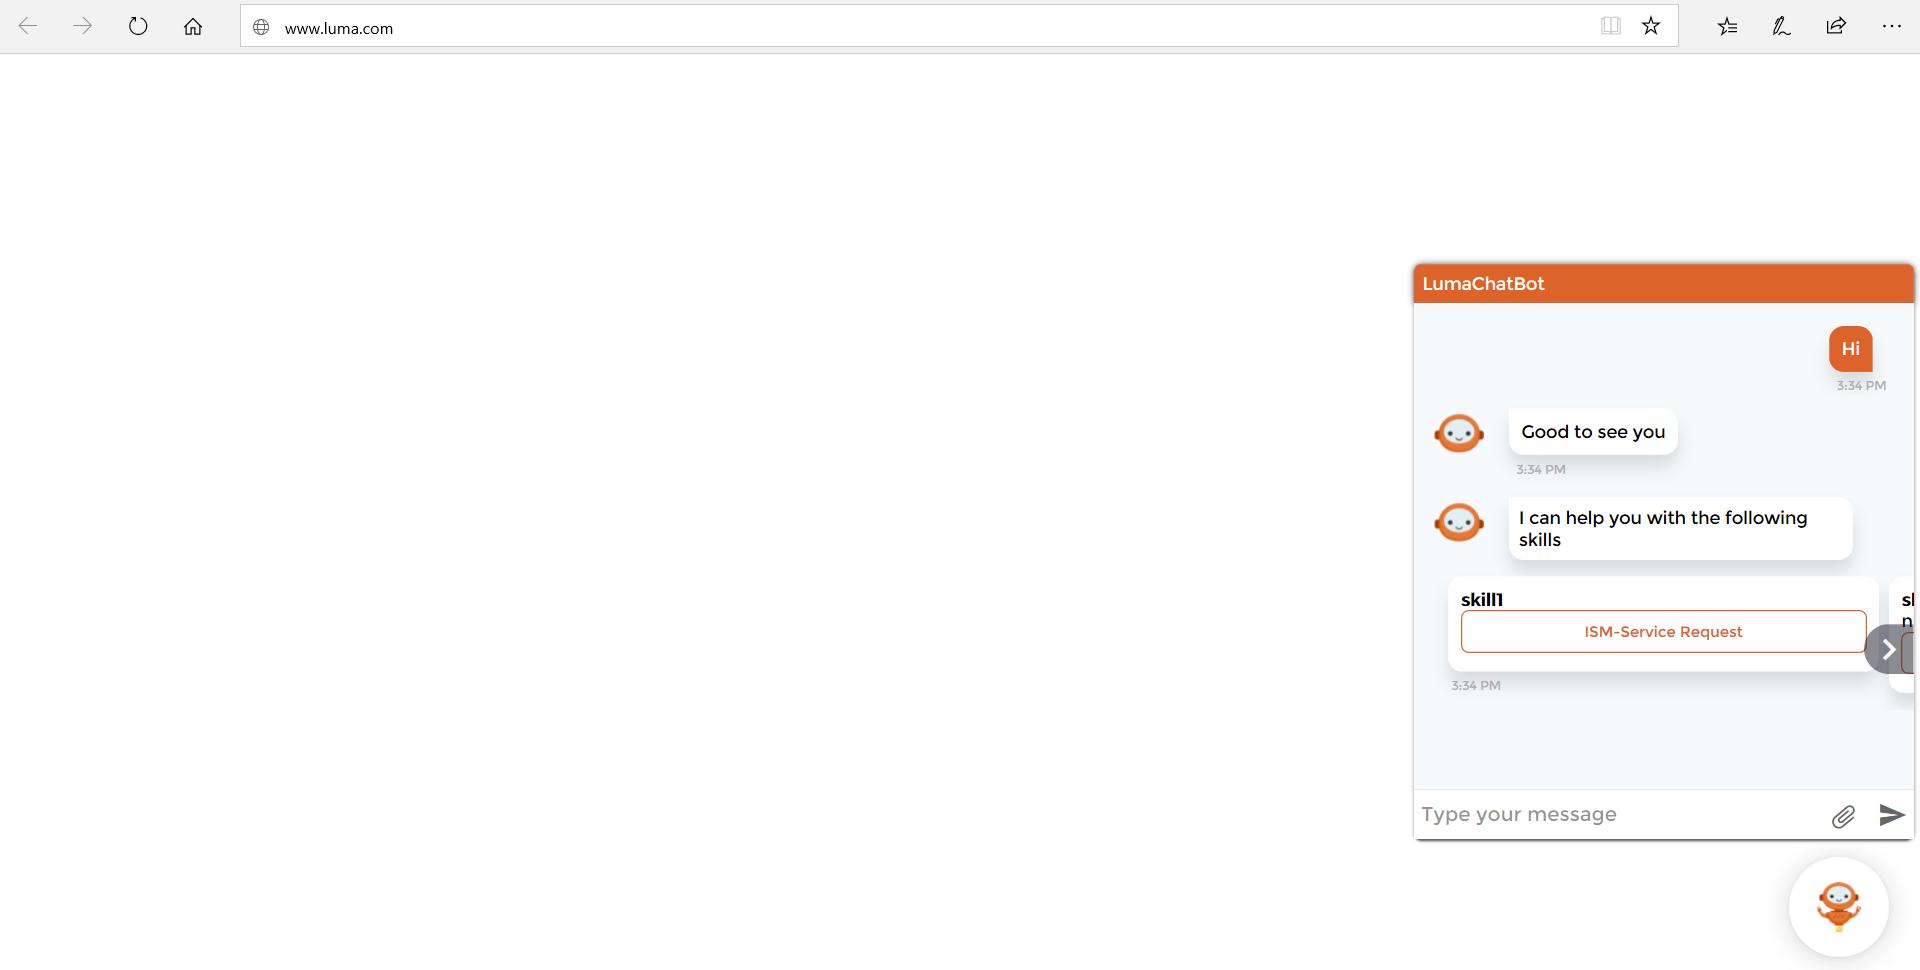
- Click the chat icon to open the web widget, which on first interaction shows the welcome skill as shown in the following sample page.
On subsequent chat sessions, the web widget will show the previous conversation history for authenticated users. For guest users, the welcome message is displayed every time the user chat on the web widget.
Style Individual HTML Elements
You can style individual HTML elements dynamically by specifying the following object in the Body code of the index.html page.
LumaBot({
    botName: "LumaChatBot",
    user: {
        clientUserId: '<USER ID>',
        additionalProperties: {
        }
    },
    secretkey: '<YOUR SECRET KEY>',
    domain: "<YOUR DOMAIN>",
    styleOptions: {
        lumaChatContainer: {
            height: '400px',
            right: '0px',
            bottom: '0px',
            width: '25%'
        }
    },
},document.getElementById("botHere"));
The following list of properties can be edited by using the above object:
- lumaChatContainer
- lumaChatHeaderContainer
- lumaTextBot
- lumaTextUser
- lumaTextAgent
- messageInfoBot
- messageInfoUser
- botFaceIcon
- agentIcon
- welcomeContainer
- welcomeImage
- brokenBot
- downloadLink
- chatInput
- attachFile
- connectionStart
- cardText
- cardTitle
- cardSubTitle
- cardButton
- quickReplyTitle
- quickReplySubTitle
- quickReplyButton
Enable Call-back on Web Widget
You can allow call-back on the Web Widget embedded on your Website. This enables the bot to perform an action on your webpage such as browsing to a new tab, navigating to a section in the page, redirecting to a new webpage or assigning value to an attribute without displaying the information to the end-user.
Following is the sample code to enable call-back on the Web Widget. The end-users are redirected to the Contacts page on the Website when the skill Customer Support Queries (Skill identifier: customer_support_queries) is requested. You may customize the code and add it to the Body code on the index.html file to change the behavior as required.
<script>
    LumaBot({
      botName: "LumaChatBot",
      user: {
        clientUserId: '<USER ID>',
        additionalProperties: {
        }
      },
      secretkey: '<YOUR SECRET KEY>',
      domain: "<YOUR DOMAIN>",
      styleOptions: {
        lumaChatContainer: {
          width: '400px'
        }
      }
    },
      document.getElementById("botHere"));
    function toggleChatWidget() {
      LumaBot.toggleChatWidget();
    }
    LumaBot.getIncomingMessages(callback);
    function callback(data) {
      console.log(data);
      if (data) {
        if (data && data.conversationContext && data.conversationContext.conversationAttributes.skillIdentifier === 'customer_support_queries') {
          console.log("moving to another page");
          window.location.href = "./contact/index.html";
        }
        if (data && data.conversationContext && data.conversationContext.conversationAttributes.skillIdentifier === 'corporate_office_location') {
          console.log("moving to another page");
          window.location.href = "./customer-support/index.html";
        }
      }
    }
  </script>
Chat with the Bot
Once the service is running you can send and receive messages from your bot.
In case of any issues with the configuration, please contact the Serviceaide Support team.
Additional Information
Following is the list of additional information while using the web widget:
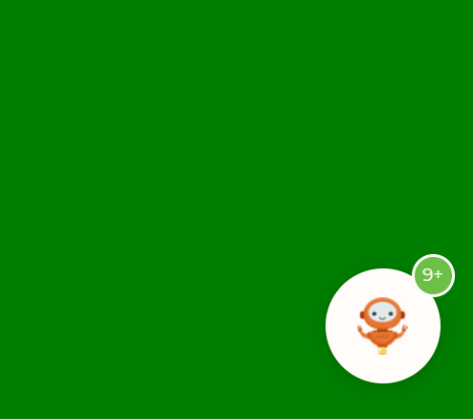
- The bot displays a count of unread messages as shown in the following sample. To view the messages, click the bot icon.
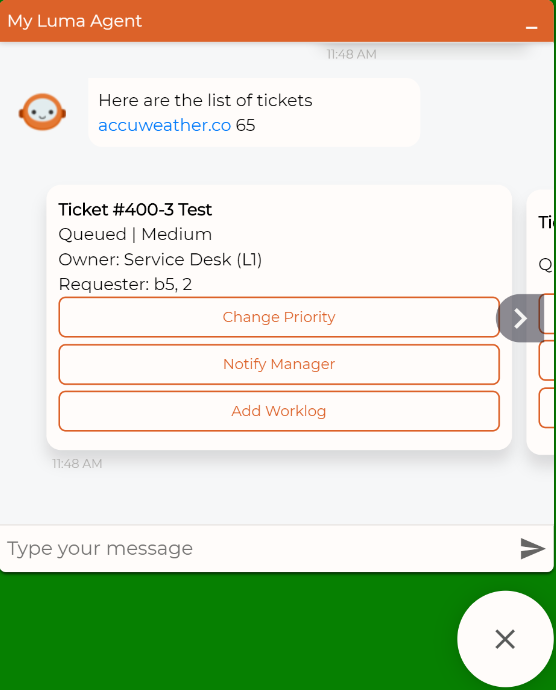
- In case of multiple options, card responses are shown to the user as shown in the following sample.
- During the chat conversation, quick reply view is supported as shown in the following sample.
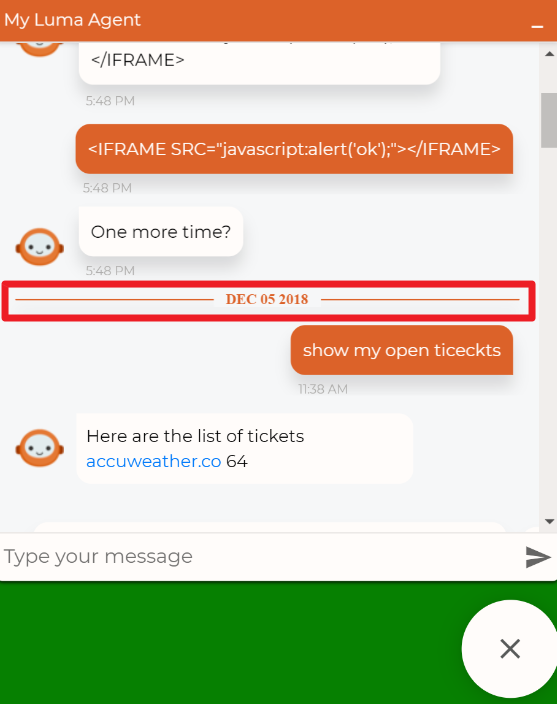
- During the chat conversation, the bot displays the date timeline of the chat with the message time for easy reference as shown in the following sample.
Troubleshooting Tips
During the chat conversation with the bot, you may encounter issues. To learn more troubleshooting the web widget refer to Troubleshooting the Web Widget.
Related content
© 2019 Serviceaide 1-650-206-8988 http://www.serviceaide.com info@serviceaide.com